
You’ve plugged your guitar in, you’re ready to rock and… nothing? If this has happened to you, I’ve created this easy to follow troubleshooting guide for guitar pickups that’ll have you back up and rocking in no time!
Knowing how to troubleshoot problems with guitar pickups is an essential part of regular guitar maintenance, and can save you a bit of money too!
Whether it’s just that your pickups sound weak, or you’re not getting any sound at all: I’ve covered everything you need to know – use the links to jump to the section you need.
- Troubleshooting a guitar pickup that sounds weak
- Troubleshooting guitar pickups that aren’t making a sound
- Related questions
Affiliate disclaimer: This page contains affiliate links for products that I’ve tried and tested. As an Amazon Associate I earn from qualifying purchases at no additional cost to you. Learn more here.
Troubleshooting guitar pickups that sounds weak
If your guitar pickups sound weak but they’re making a sound, then it could be caused by a few things – the trick is identifying the cause of the problem.
These steps are going to take you through how to identify the cause of the problem and teach you how to fix it (where appropriate!).
Equipment needed
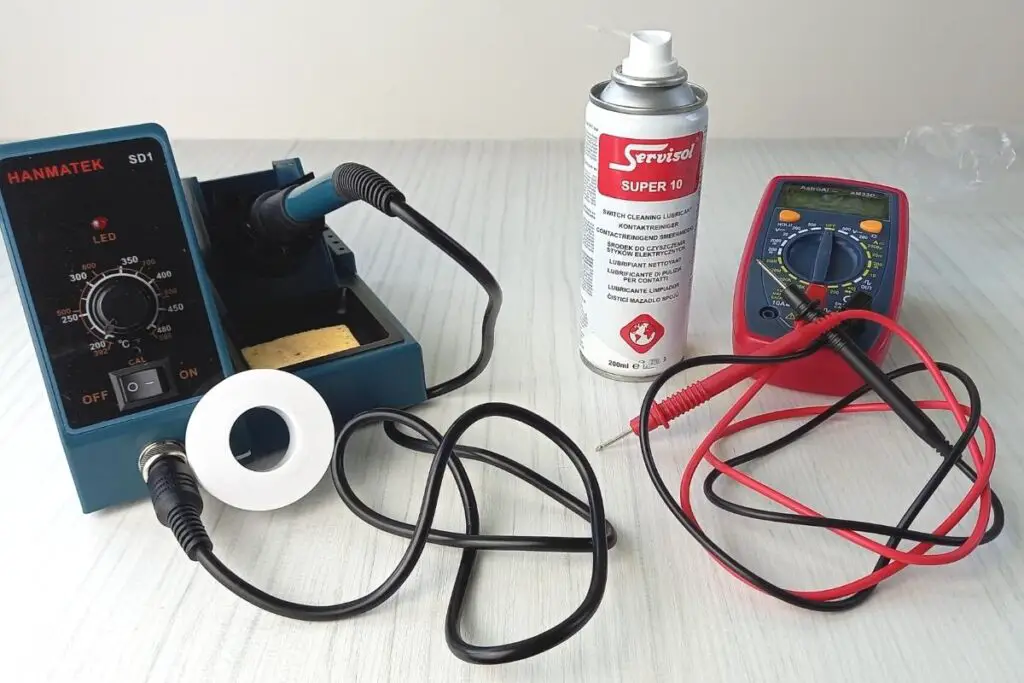
Here’s a list of all the equipment I used, as well as a link to the products on Amazon:
- AstroAI Digital Multimeter (on Amazon)
- WD-40 Specialist Contact Cleaner (on Amazon)
- Hanmatek SD1 Soldering Iron (on Amazon)
- TOWOT Tin Lead Rosin Core Solder Wire (60/40) (on Amazon)

Step 1: Turn up on the volume knob on the guitar
It may seem obvious, but first check that the volume knob on the guitar is all the way up. Next, check that the amp (or device that your guitar is plugged into) is at a normal level. Don’t turn your amp all the way up.
This is important as you’ll be overcompensating the volume for the quiet pickups. Not only this, but when you next plug in your guitar, your amp will suddenly become very loud which can damage your hearing if you’re in a close proximity.
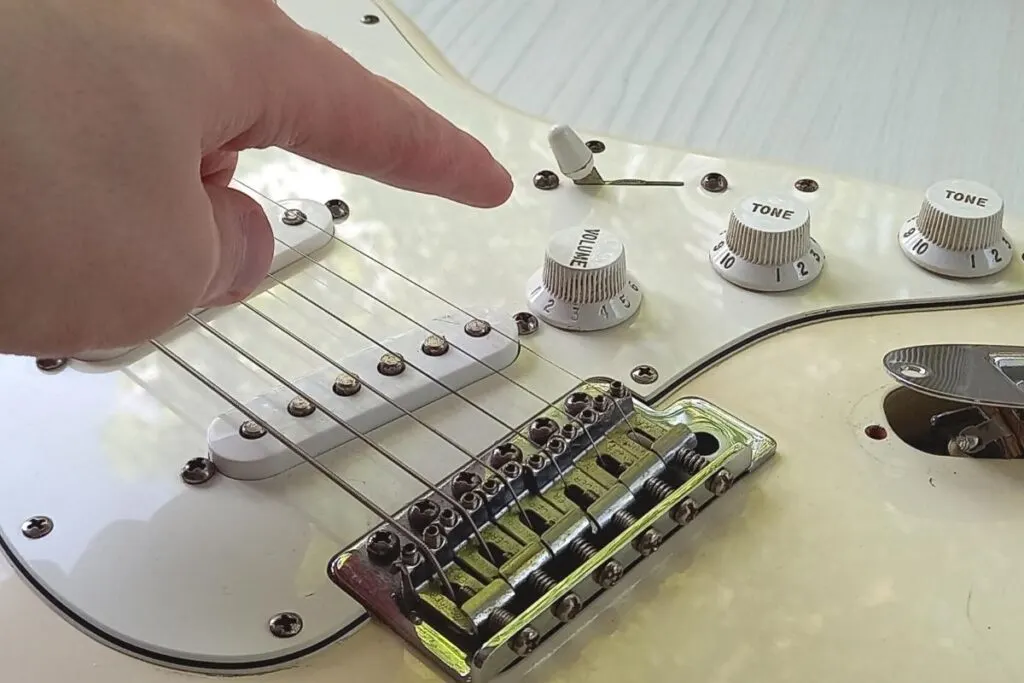
Step 2: Move the pickup close to the strings
Next, you’re going to want to adjust the height of the problem pickup and raise it closer to the strings.
To raise your pickup, turn the pickup mounting screw clockwise.
The ideal pickup distance between the top of your magnet and bottom of your string should be ⅛”, when pressing the string at the final fret. From here, feel free to adjust the pickup height to what sounds good for you.
Raising the pickup height increases the magnetic effect of the pickup on the string, which creates a stronger output signal.
More often than not, I find that this is the solution to my pickup problems – usually with the bridge pickup being quieter than the neck.
Step 3: Check that the cable is fully functional
If this hasn’t worked, it’s worth double-checking that your cable is working properly. The easiest way to do this is by swapping out the cable with a spare one!
If you don’t have a spare cable, then you can test your guitar cable using a multimeter. This is a great tool to test cables with.
You can pick up the multimeter that I use from the link in my “equipment used” section.
To test your cable: set the multimeter to “continuity mode” and then put each probe on the tip of the cable. You should get a buzzing sound from your multimeter.
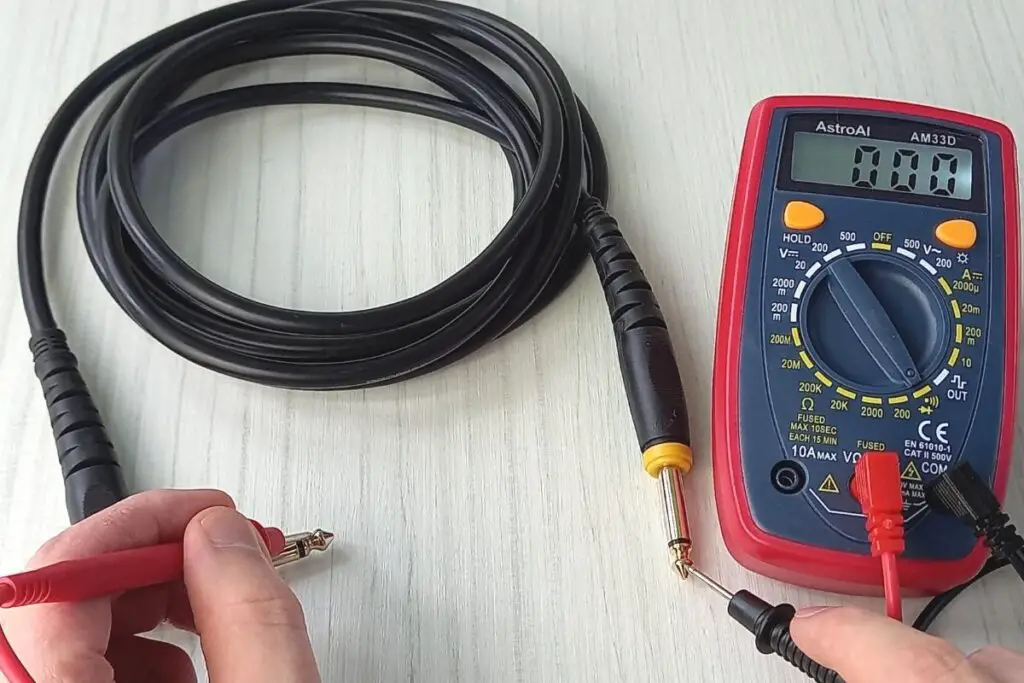

If you don’t, then it’s likely that the cable is damaged – I’d recommend picking up a new one!
Here’s a great resource that covers more detail on how to check whether you have a faulty cable.
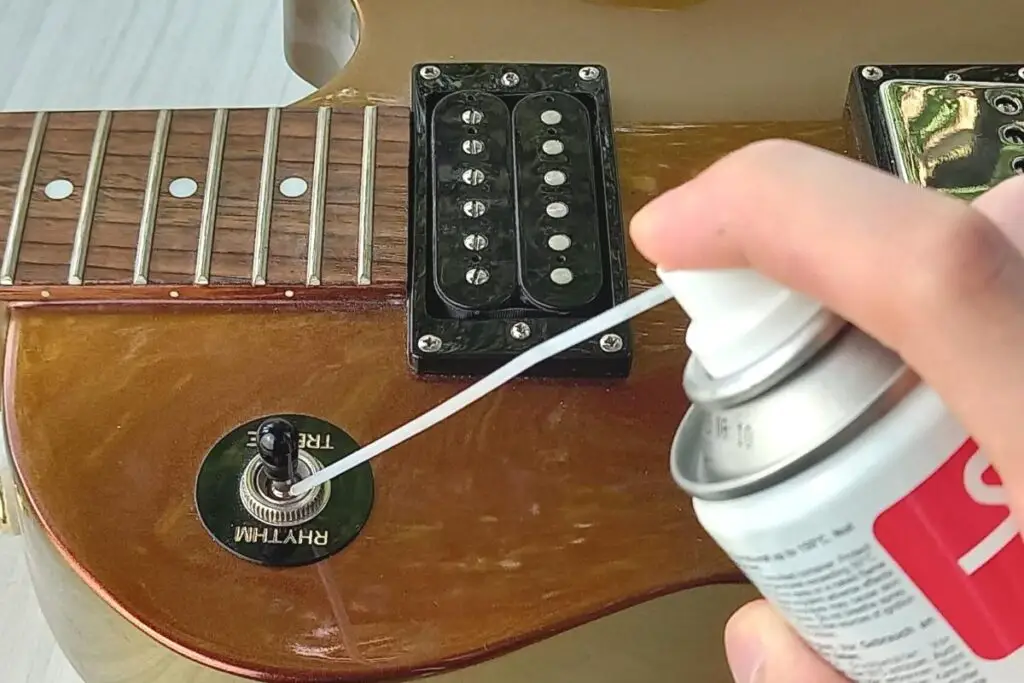
Step 4: Use switch cleaner on your pickup switch and pots
Dirty switch connections and potentiometers (“pots”) can negatively affect your guitar signal. I find that a quick clean solves a lot of issues I’ve had over the years.
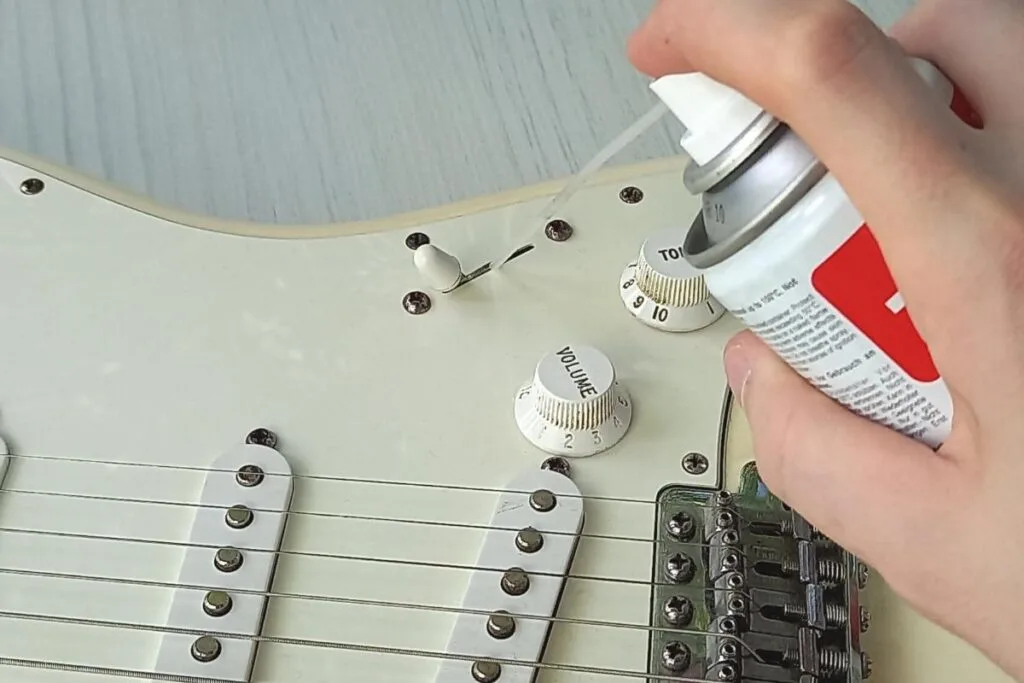
Any branded switch or contact cleaner will do the job. I’d recommend picking up a can of WD-40 Specialist Contact Cleaner.
To clean your switches and pots, simply spray the cleaner directly onto the electronics and work it into the mechanism by turning the pots up and down and moving the pickup switch back and forth between positions. You might need to remove the “volume” and “tone” knob caps to do this.

Important: In these next few steps, we’re going to start looking at the wiring and soldering of the pickups which can damage your pickups, if you’re not careful.
If you’re not comfortable with this, I strongly recommend taking your guitar to a professional for inspection and repair.
Step 5: Inspect the pickup for damage
Next, we’re going to take a closer look at the pickups themselves to look for problems. The first thing to look for is any damage to the pickup wires.
To do this, you’ll need to remove the pickup from the body of the guitar by loosening the mounting screws.
Again, be very careful during this step. The components of the pickup are very delicate, so any rough force could damage them.
Look at the pickup: the inner coil of most pickups should be protected by material (usually electrical tape) and should have no loose parts or wires. The beginning and end of the coil should be soldered to one output wire each, with a clean soldered connection (i.e. no cracking or movement).
If there’s no obvious damage, the next step is to use the multimeter to test if the guitar pickups are working properly.
A low resistance rating means a lower output. So, if the resistance reading is lower than expected for your pickups – it’s likely that there’s a wiring fault within the pickup.
If you notice any problems with the coil or wires at this stage, I suggest taking your pickup to a professional to fix, as these are the most delicate part of the pickup and are easy to damage.
Step 6: Check the magnet orientation
If you have a pickup that uses bar magnets to magnetize the pole pieces, then it could be that your magnets aren’t properly aligned.
Misaligned magnets will mean that the pole pieces aren’t being properly magnetized, which will result in a weaker output. The magnetic orientation will also affect how the pickup works with other pickups on the guitar, and could make the pickup out of phase if incorrect.
Here’s a great resource that gives a detailed guide on how to check magnetic polarity, as well as what you need to consider to keep your guitar pickups in-phase.
Step 7: Check the guitar pickup switch
Now, let’s take a look at the pickup wires connected to your guitar’s pickup switch. To do this, you’ll need to either remove the pickguard (for Stratocaster style models) or a backplate to access the switch.

Check that the soldered connections are solid, they don’t move, and the connected wire tip is fully covered.
If you find a problem with these, I suggest resoldering the joint. Soldering may seem daunting at first, but it’s a great skill to know if you want to maintain or modify your guitar.
To do this, you’ll need a soldering iron. I use the Hanmatek SD1, and I’ve found it to be a really reliable soldering station for beginners that’s great for jobs like these.
As well as a soldering iron, you’ll also need some 60/40 solder with a diameter of 0.32” (0.8mm). This is the right thickness of solder to use on your guitar.
Important: Using a soldering iron can be dangerous. Please ensure that you follow all the safety precautions for working with a soldering iron.
First, you need to desolder the existing joint to remove excess solder. Next, use your tinned soldering iron to heat the wire and switch terminal. Once heated, apply the solder to connect the two components together.
Here’s a great resource for any beginner looking to learn good soldering technique on a guitar.
Step 8: Check for any wiring issues
If you’re still having problems, it may be caused by the wiring itself. This is more likely to be the case if your guitar is second hand, or has had the pickups changed.
It’s important to ensure that your pickups have been wired correctly. Here’s a few links to diagrams of the most popular pickup wiring configurations.
If your pickup configuration isn’t on the list – check your guitar manufacturers website.
Step 9: Check the output jack
Finally, a faulty output jack connection could be affecting your guitar’s output.
Unscrew the output jack from the guitar body and check that the wires are soldered correctly (i.e. with a clean solder joint, no cracking, and no movement).

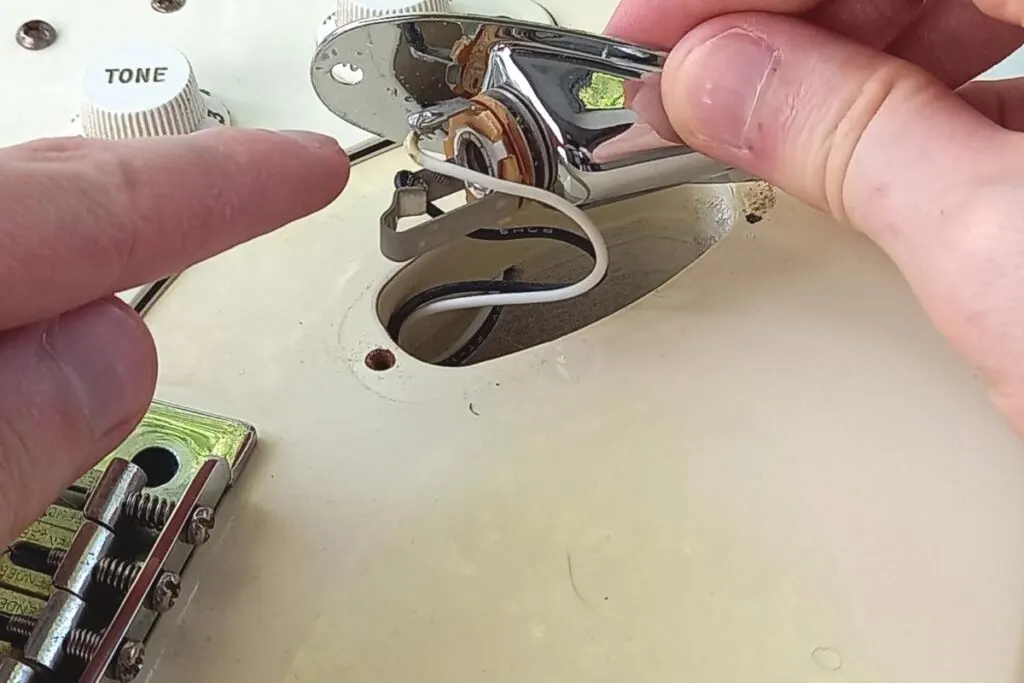
If there’s damage to the solder – or damage to the jack itself, desolder the joint, and re-solder the connection (or a new jack) using your soldering iron and the 60/40 solder wire.
If you’re still having problems after this step, then I recommend taking your guitar into a professional for further inspection.
Troubleshooting guitar pickups that aren’t making a sound
If your bridge or neck pickups aren’t making any noise, then something is wrong with the wiring between that pickup and the output jack.
In my experience, it’s usually to do with the pickup switch – so let’s start there and work our way across the signal path.
Equipment needed
Here’s a list of all the equipment I used in these steps, as well as a link to the product on Amazon:
- AstroAI Digital Multimeter (on Amazon)
- WD-40 Specialist Contact Cleaner (on Amazon)
- Hanmatek SD1 Soldering Iron (on Amazon)
- TOWOT Tin Lead Rosin Core Solder Wire (60/40) (on Amazon)
Step 1: Turn up the volume knob on your guitar
It may seem silly, but it’s best to double check that your volume knob is turned all the way up to start with. Next, check that your guitar amp is at a normal level.
Be sure not to turn the amp higher than normal as when you plug your working guitar back into the amp, it could damage the amp and possibly your hearing.
Step 2: Check you cable
Another reason your pickups may not be working is a broken cable. The easiest way to check this is by swapping it out with another cable, or swapping your guitar out with a working guitar.
If you don’t have a spare cable (or guitar) you can check your cable using a multimeter. This device will show whether there’s any breakages in the circuit, which will be causing the problem.
To do this, put your multimeter in “continuity mode” and place each probe of the multimeter at either tip of the cable. You should hear a buzzing noise. If you don’t, then the cable is broken and will need replacing.
Step 3: Clean your pickup switch and pots using switch cleaner
As I said, most of the times that I have an issue with my pickups not making any noise, is because dirt and dust has got into the pickup switch which affects the connection.
To clean the switch, and your pots, simply spray them with a switch cleaner. Make sure that the cleaner goes into the mechanisms, so be sure to remove the “volume” and “tone” knobs from your pots.

Once the cleaner is on them, simply move the switch and pots back-and-forth to really work the cleaner in.
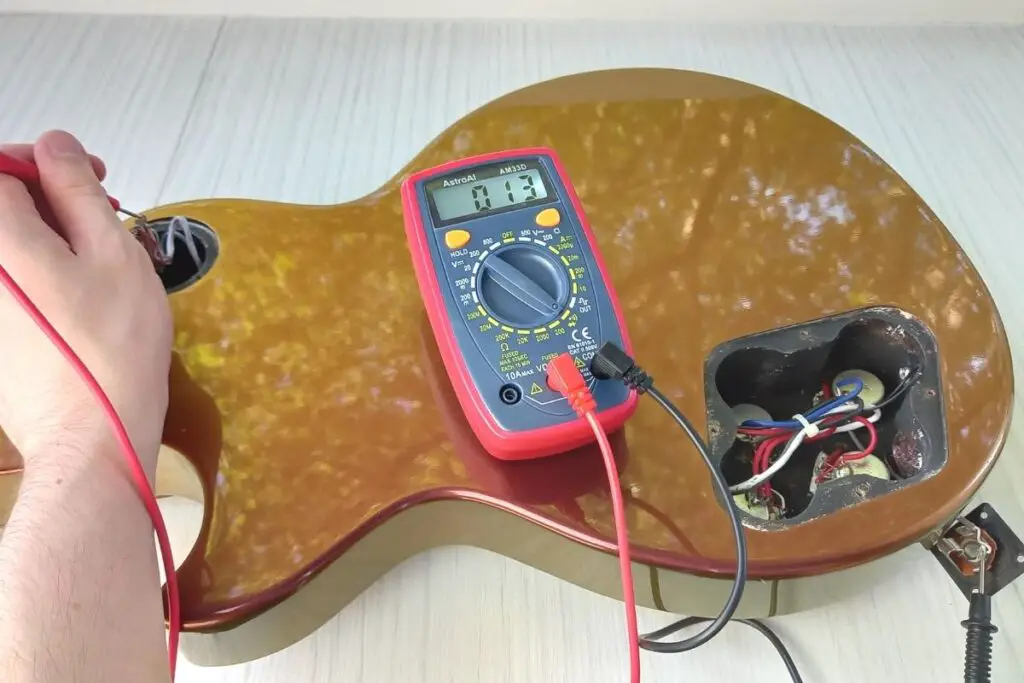
Step 4: Use a multimeter to test your pickups
The next step is to figure out if it’s the pickups themselves that are broken. To do this, dismount the pickups from the guitar by removing the mounting screws.
Next take the multimeter and place the black probe on the ground wire (usually black) and the red probe on the “hot” wire (usually a coloured wire).
You should get a buzzing sound from the multimeter to indicate that the connection isn’t broken.
If you don’t get the buzzing sound, you may have a problem with your pickups or the wiring of your guitar. Let’s first check the guitar wiring.
Step 5: Use a multimeter to find the broken connection
If that hasn’t worked for you, then it’s time to use a multimeter to find where the connection is breaking.
To do this, you’re going to need to keep your pickups dismounted from your guitar so that you have access to the soldered connections. You’re also going to need clear access to your pickup switch, volume and tone pots, and output jack.
To find where the break is in your guitar’s wiring, set your multimeter to “continuity mode”. Next, place one of the probes on the “tip” node of your output jack.
Now, follow the wire back to the previous solder joint and touch the other probe to it. You should get a buzzing noise.

Keep repeating this step until you no longer get a buzzing sound. When you no longer get a buzzing sound: you’ve found the break in your circuit!
Step 6: Inspect the solder connection
Now you’ve found the break in the circuit, inspect the solder joint to see whether there’s any cracking, movement, or if the wire is partially exposed.
If you see any of these, then desolder the wire joint using your soldering iron and apply new solder.
Important: Using a soldering iron can be dangerous. Please ensure that you follow all the safety precautions for working with a soldering iron.
If you see that the wire is in any way damaged, then it can be replaced by desoldering it from where it’s connected to, replacing it with a new wire, and soldering it into place.
Here’s a great video that shows the process of soldering wires on a guitar.
Step 6: Check the output jack
Finally, a faulty output jack connection could be affecting your guitar’s output.
To check this, unscrew the mounting screws on the output jack. Now, check that the wires are soldered correctly (i.e. with a clean solder joint, no cracking, and no movement) and make sure that there’s no obvious damage to the jack itself.
If the jack is damaged, then you can replace it by desoldering the existing connection and soldering in a new jack using your soldering iron and 60/40 solder – it’s quite a straightforward process!
If you’re still having problems after this step, then I recommend taking your guitar into a professional for further inspection.
Related questions


Conor is a music producer, multi-instrumentalist, and all-round enthusiast from the UK with over 15 years of experience. He’s the founder and sole-content creator for the roundtable audio blog and YouTube channel.