
As a guitarist, there’s nothing I find more annoying than hearing that “buzzing” sound when I’m playing. Fret buzz can really distract from a live performance or recording, so it’s important to know what causes it and how to fix it.
Fret buzz can be caused by incorrect neck relief, uneven frets, low saddle height, nut erosion, damaged strings, or playing style. In most cases, it can be fixed with adjustments to the guitar’s neck or saddles. Severe fret wear or neck warping may need to be fixed by a professional luthier.
In this article, I’ll be covering the causes of fret buzz, how to fix it, and any related questions you might have.
You can use the below links to quickly jump to a section.
Affiliate disclaimer: This page contains affiliate links for products that I’ve tried and tested. As an Amazon Associate I earn from qualifying purchases at no additional cost to you. Learn more here.
What causes fret buzz?
Fret buzz is caused when your guitar’s string comes slightly into contact with an unintended fret (or frets) higher up the neck. The noise you’re hearing is the string loosely vibrating against the higher fret.
Here’s some audio comparing a guitar without noticeable fret buzz with obvious fret buzz:
I played both guitars with the same amount of pressure but you can hear that the second guitar has a really bad buzz.
All guitar’s will have some level fret buzz, it’s just the nature of how they’re made, but it becomes a problem when it’s noticeably loud.
It’s a very common occurrence with guitars and is (in most cases) quite easy to fix. In fact, every guitar that I’ve owned has had some kind of excessive fret buzz at one time or another, and I’ve managed to fix them all so far!
The causes of fret buzz are usually related to the set-up of a guitar such as incorrect neck relief, uneven frets, low saddle height, or nut erosion. Other causes of fret buzz include damaged or dirty strings, or playing style.
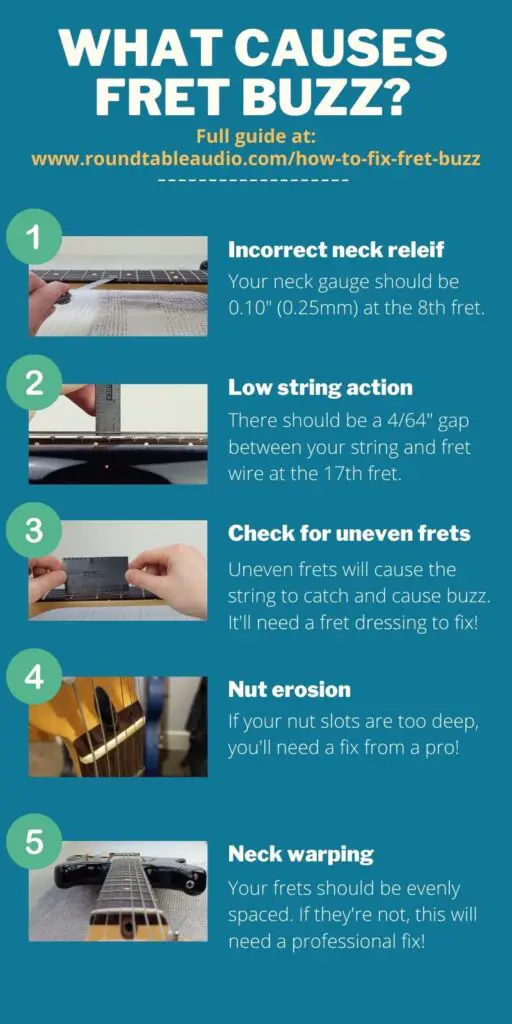

Incorrect neck relief
“Neck relief” means the amount that your guitar neck bends. The ideal neck should be close to straight, with a very slight amount of relief.

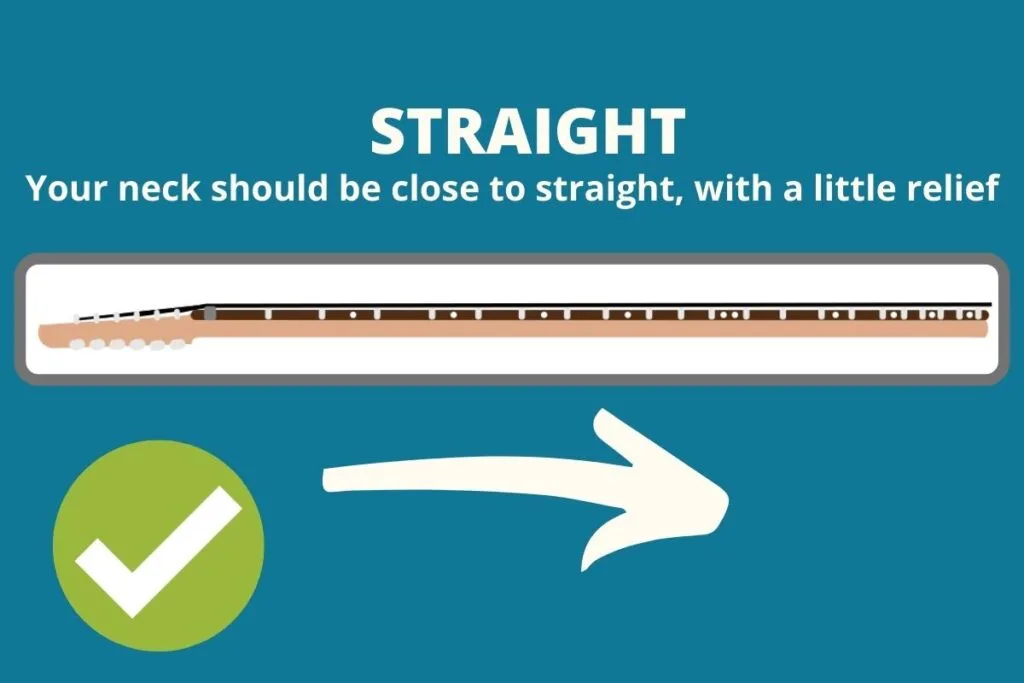
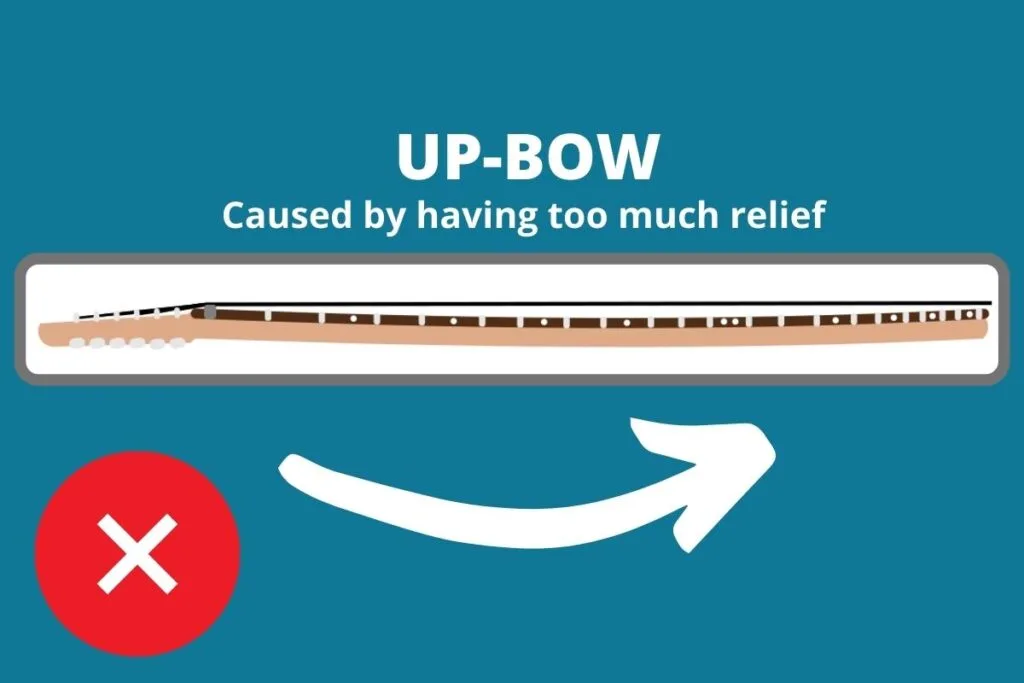
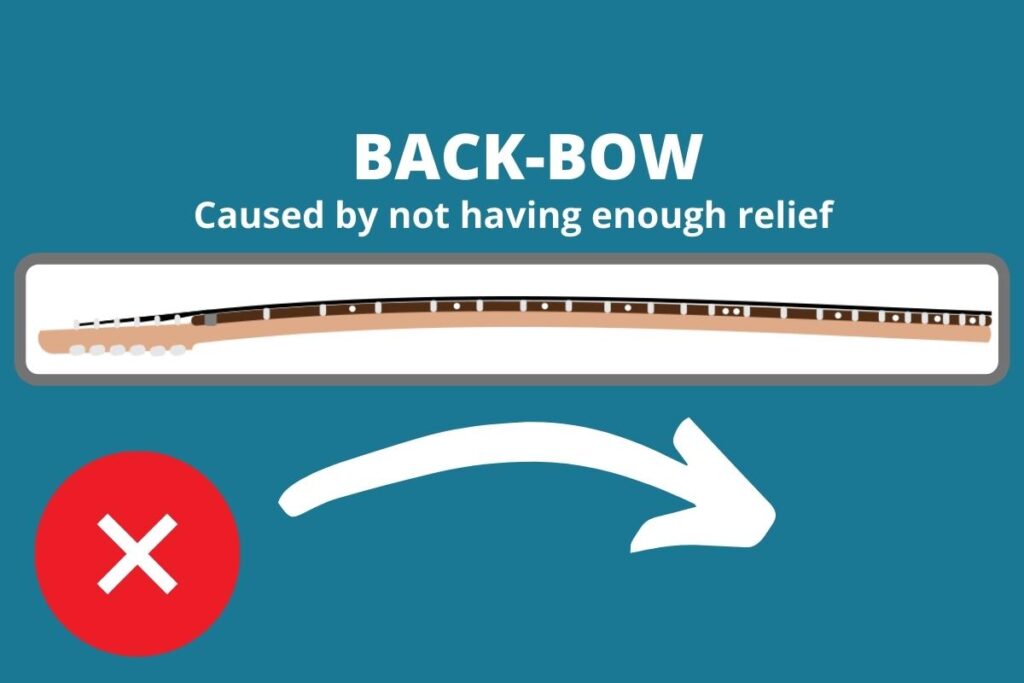
If there’s too much relief, your guitar neck will be too far away from the strings. This is called up-bow. If there’s not enough relief, your neck will be pushing into the strings, called back-bow.
Both up-bow and back-bow cause fret buzz in slightly different ways.
Up-bow is more likely to cause buzzing when you’re playing in the middle of the neck, as the strings will be catching against the frets closer to the body.

Back-bow, however, will cause fret buzz when you’re playing towards the headstock, as the strings will be catching against the raised frets in the middle of the neck.

So, if you have fret buzz on high frets, or fret buzz in the middle of the neck, there’s a good chance it will be caused by your guitar’s neck relief.
In severe instances, your guitar may have neck warping, where one side of the neck is lower than the other. This is a pretty severe problem depending on the type of guitar you have. If you think you have neck warping, you should take your guitar to a professional luthier to take a look.
Did you know: Neck relief can change over time due to natural changes in humidity, during guitar string changes, or from improper guitar storage. I check my guitar’s neck relief every 3 months.
Low saddle height
The saddles are where the guitar strings rest on your guitar’s body. It helps set the string action of your guitar, which is the distance between the bottom of a string and the top of a fret.
With a low string action, the strings are closer to the frets. With a high string action, the two are further apart.


If the string action is too low, then the strings will come into contact with unintended frets, which will cause buzz. This is doubly true if you’re strumming heavily, or drop tuning your strings (if they’re not the correct gauge! See “Playing Style” below!)
Low string action may also cause open string buzz, where the string buzzes without being fretted.
Raising the saddles on an electric guitar is a very straightforward fix.
There is a challenge, however: people (myself included!) prefer a low string action on a guitar because it’s easier to play. This is because you don’t have to push as hard on the strings to make contact with the fret, and it also makes bending much easier.
So, the challenge is to achieve a low string action without getting buzz.
Uneven frets
If the frets on your guitar are uneven, then there’s a high chance that it’s causing buzz. Each fret should be either level or lower than the one before it.
Uneven frets are mostly caused by either standard wear-and-tear or poor construction. Let’s cover wear-and-tear first.
Wear-and-tear
Over time, your frets will begin to wear away as the metal from your strings erodes the metal of the fret to create small dips, called pitting.
Also, bending strings can scrape the fret flat, which causes a similar problem. You’ll see this on strings closer to the high e string.
Once a pit is big enough, or a fret is too flat, the string will be lower down than it is supposed to be which will cause the string to catch on other frets higher up and cause buzz.
This is natural and will happen to all guitars over time. The rate of fret wear depends on a lot of factors such as the material your frets are made from (stainless steel is widely considered to be the most durable), how much you play, and the style that you play in.
Generally speaking, wear will happen quicker if you’re putting more pressure on the frets, or bending a lot. My oldest guitar is 15 year old, and has a lot of fret wear across the neck, but it’s still playable for practicing at home.
Poor construction
Another cause for uneven frets is poor construction which is usually found with cheaper guitars. As I said, if any fret is higher than the one before it: it’ll cause a buzz.
To fix fret buzz from uneven frets, you’ll need a fret dressing. This is where a new fret is sculpted by filing down the old, worn fret.
If a fret has come loose and risen then it will need to be reset. It can be caused by either cheap construction or years of string pressure on the neck forcing the fret out.
Both these jobs require a professional to look at it. Whilst you can buy the tools online, I really wouldn’t recommend trying it yourself if you’ve not done it before. If you mess up your fret levels, it can ruin your guitar and cost you more money to fix.
I received price quotes from 4 luthiers in my local area for a fret dressing. The highest was £95 (around $125). The lowest was £40 (around $55). Of course, this will depend on the amount of work needed!
Did you know: Fret wear can also affect your guitar’s intonation, which means how “in-tune” your guitar is across the whole fretboard.
Nut erosion
Between your guitar’s headstock and the fretboard is the nut. This has little slots that hold the strings in place. Like frets, the guitar’s nut can also suffer from wear-and-tear over time that can cause buzz.
As the material of the nut wears away, the sting will sit lower in its slot which can put the string in contact with the frets.
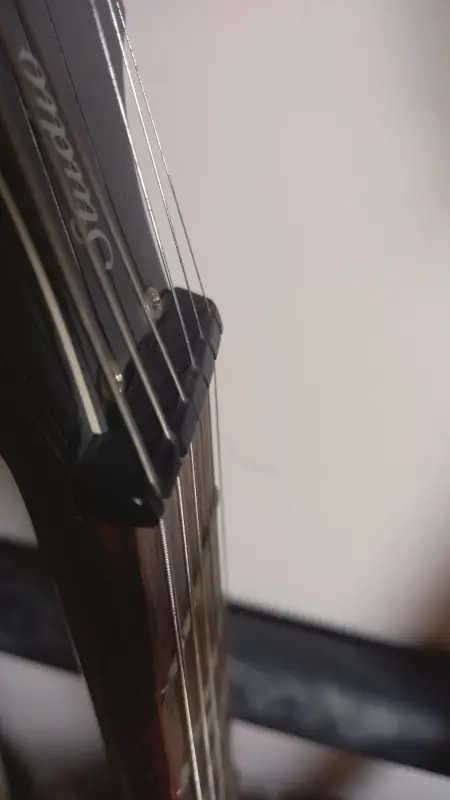
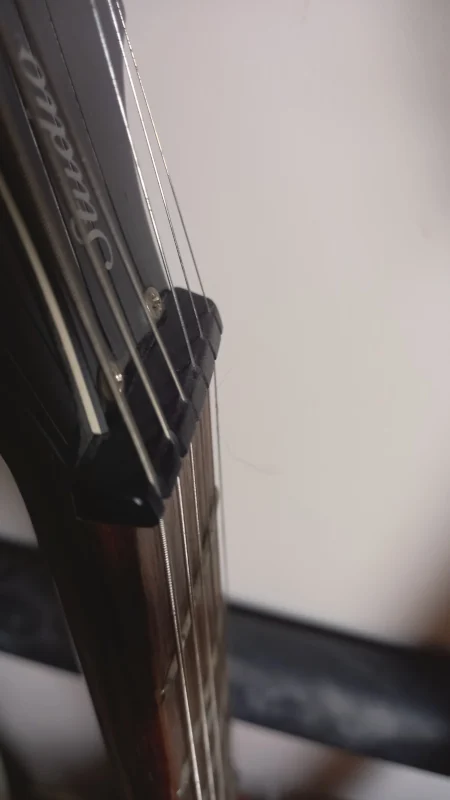
This is more likely to happen with cheaper guitars that use plastic to make the nut.
This is one of the common causes of both fret buzz on lower frets and open string buzz.
Damaged or dirty strings
When did you last change your guitar’s strings? (Thinking about it, it’s been a while since I changed mine…)
It’s easy for them to become damaged and dirty over time, which can cause unwanted noise.
Built up dirt is not only gross, but can also create fret buzz if there’s too much of it. As sweat and grease builds up, it creates a layer that reduces the distance between the frets and the string. This becomes a bigger problem the lower your string action is.
Likewise, a damaged string that is kinked or bent can cause it to press against frets, which will create buzz.
Wiping down your guitar after playing and replacing your strings every 3 months will stop your strings from buzzing!
Playing style
Did you know that your playing style could also be causing fret buzz? The harder you strum or pick guitar strings, the more they’ll vibrate, and the more likely they’ll be to rattle against frets which causes buzz.
Here’s an example I recorded of plucking a string softly and heavily. Listen to how the heavier picking causes fret buzz.
Not only this, but using the wrong gauge strings can also cause buzz. As a general rule: you should use thicker guitar strings if you’re playing in a lower tuning.
Finally, improper finger placement can also cause fret buzz. You should place your finger on the fretboard just behind the fret you’re playing for the most clear sound.
How to fix fret buzz
Now that you know the different causes, let’s look at how to fix fret buzz!
Before we get started I always recommend completing a full set up whenever fixing an issue with your guitar. This involves cleaning your frets, nut, saddles, and restringing as well as the steps I’m covering below.
For the purpose of this article, however, here’s a guide just looking at how to fix fret buzz on your electric guitar.
Step 1: Get the right tools
You’re going to need a few specialist tools to help you fix your buzzing. Luckily, these tools are relatively inexpensive and will be useful for any future guitar maintenance.
You’ll need:
- A set of feeler gauges
- A ruler that can measure 64th’s of an inch
- Hex key’s (also called an “Allen keys”) that fit your truss rod and saddles
- A screwdriver
- A capo
- A fret rocker
I use the Groovetech Stagehand Compact Tech Kit which is a handy guitar kit that includes the above tools (except the fret rocker!) Check it out here on Amazon!
For a fret rocker, I use the String Action Ruler from Baroque. You can pick one up here on Amazon.
Here’s a photo of my gear:
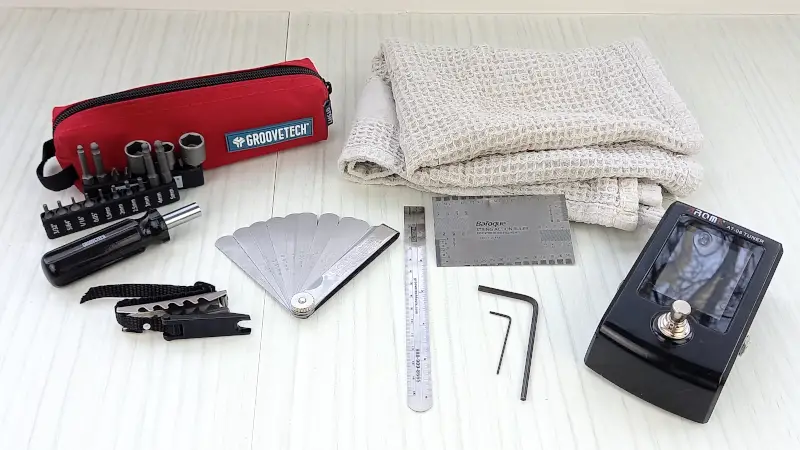

In addition to these, you’ll need:
- A guitar tuner
- A towel or blanket to rest your guitar on (if you’re going to be laying it on a work surface)
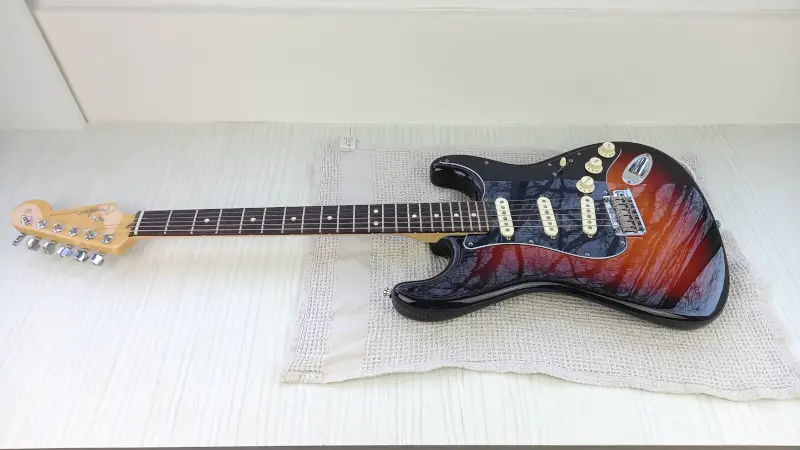
Step 2: Prepare your guitar
First, set up a blanket or towel on a flat surface to lay your guitar on as you’re working on it. You can rest it on your lap in “playing position”, but I generally find it easier to work on a guitar that’s rested flat.

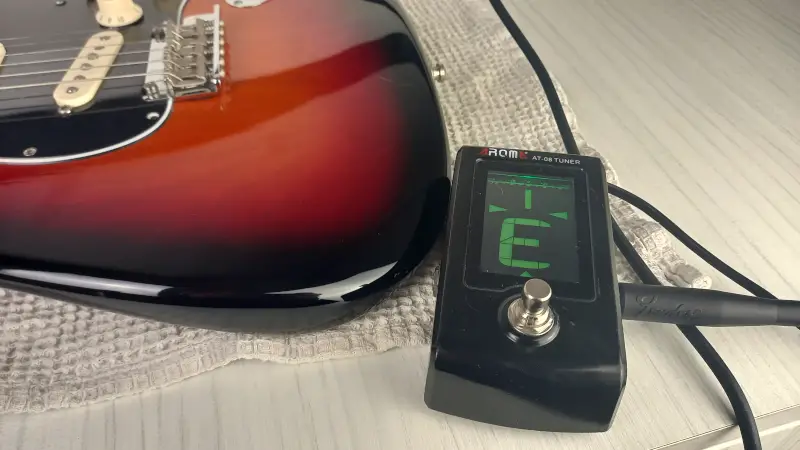
Next, tune your guitar to whichever tuning that you normally use. This will put the normal amount of pressure on the strings and neck, and makes sure that any changes you make do are accurate.

Step 3: Look for any neck warp
The first thing to check for is any signs of neck warping.
To do this, you can first “eyeball” down the neck to look for any obvious warp. To do this, look down the neck towards the body.
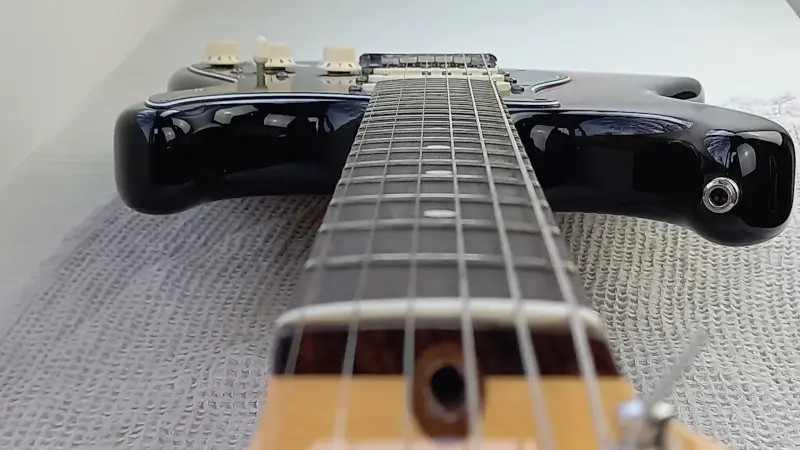
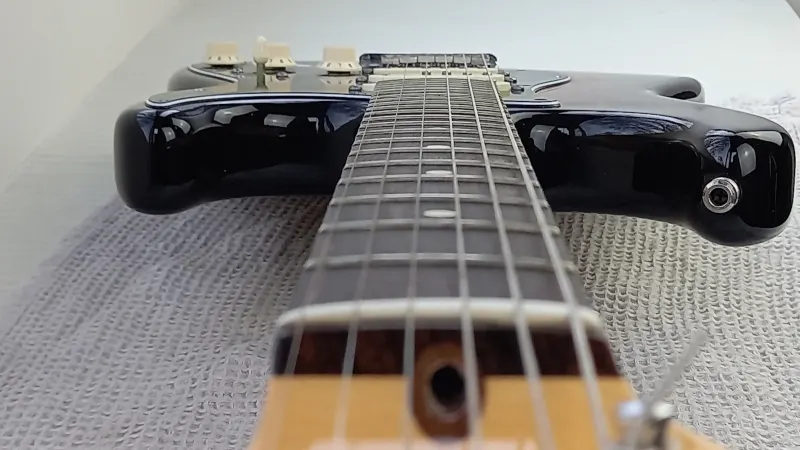
The frets should be evenly spaced down the fretboard. If one the frets appear to be getting closer together on one side, then you may have neck warping.
If you can’t see any obvious warping, the next step is to measure for any neck warp.
Step 4: Measure for any neck warp
Put your capo on the 1st fret position (i.e. between the guitar nut and the first fret wire). This pushes the string lower than the nut to give us a better picture of how much bend there is in the neck.
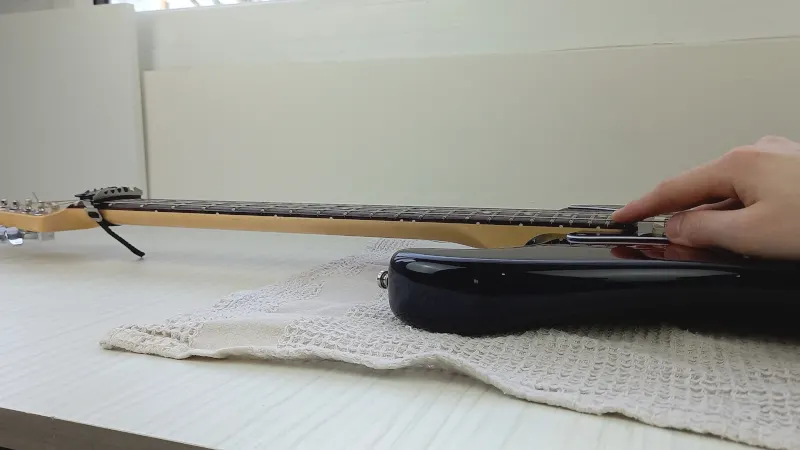
Next, push the Low E string down at the last fret. Like the capo at the 1st fret, pushing the string down gives a better indication of any bend in the neck by removing any effect of the saddle height on the string.

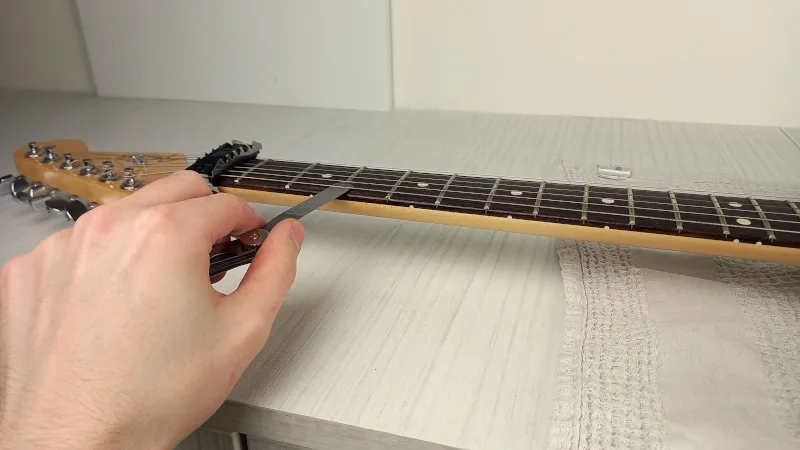
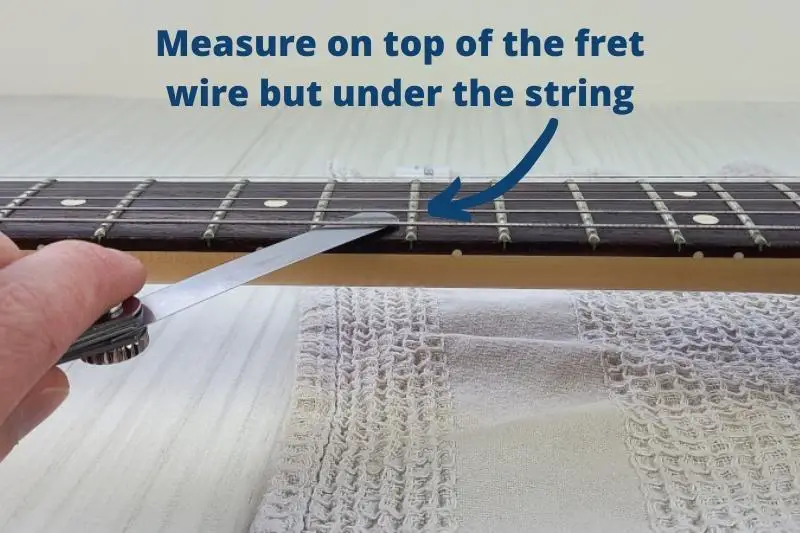
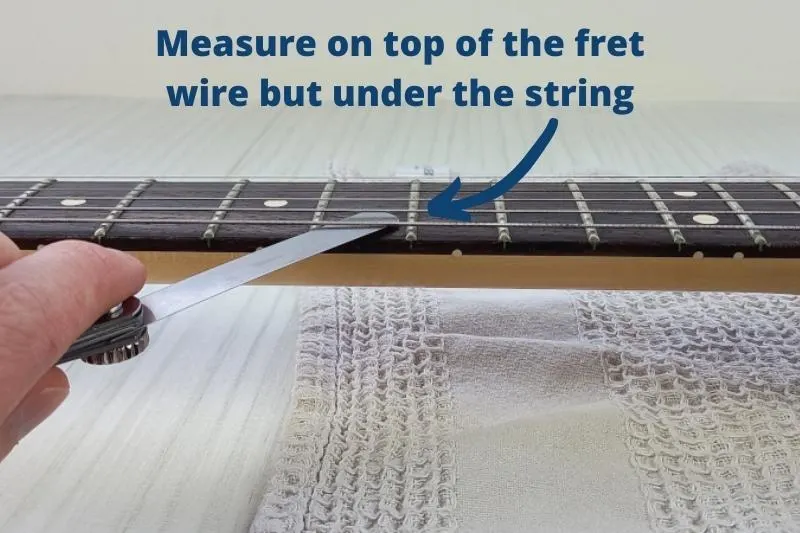
With your free hand, gently slide a feeler gauge under the string and on top of the 2nd fret wire. You’re looking to see which gauge can pass through the gap without causing any friction.

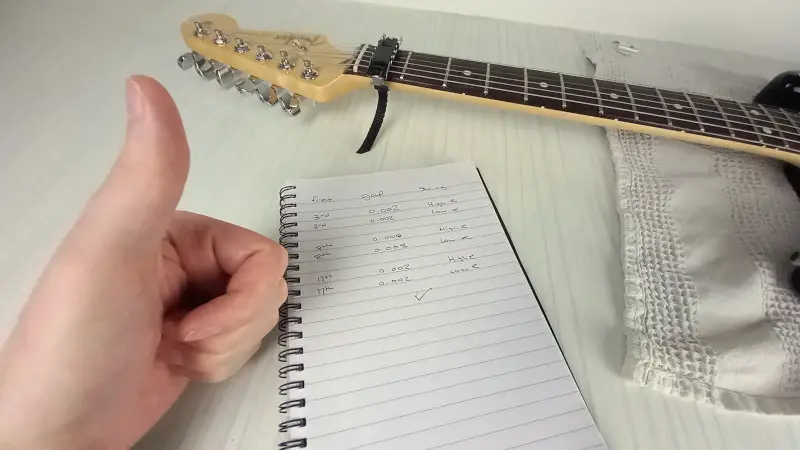
Now, make a note of the gauge you used, and the fret you used it on.
Repeat this at a couple of places on the neck. I tend to do one near the headstock, one in the middle, and one towards the body.
Now, repeat these steps using the high E string. Again, record your measurements at each point.

What we’re looking for is to make sure that the gap is the same across both sides of the neck. If there’s any noticeable consistent differences, then may have neck warp.
For a one-off odd looking result, try measuring again. If you get the same measurement, then you might have an uneven fret, which we’ll come to shortly.
Step 5: Measure the neck relief
Now we’re going to make sure your neck has the right amount of relief. Having the right neck relief really helps to fix fret buzz.
Like before, we’re going to use the low E and the high E strings to measure the relief, starting with the low E.
With the capo still on the first fret, press the low E string down at the last fret.
Using your free hand, begin sliding the feeler gauges under the string at the 8th fret wire. The 8th fret wire is used as it’s usually where the neck bend is deepest.
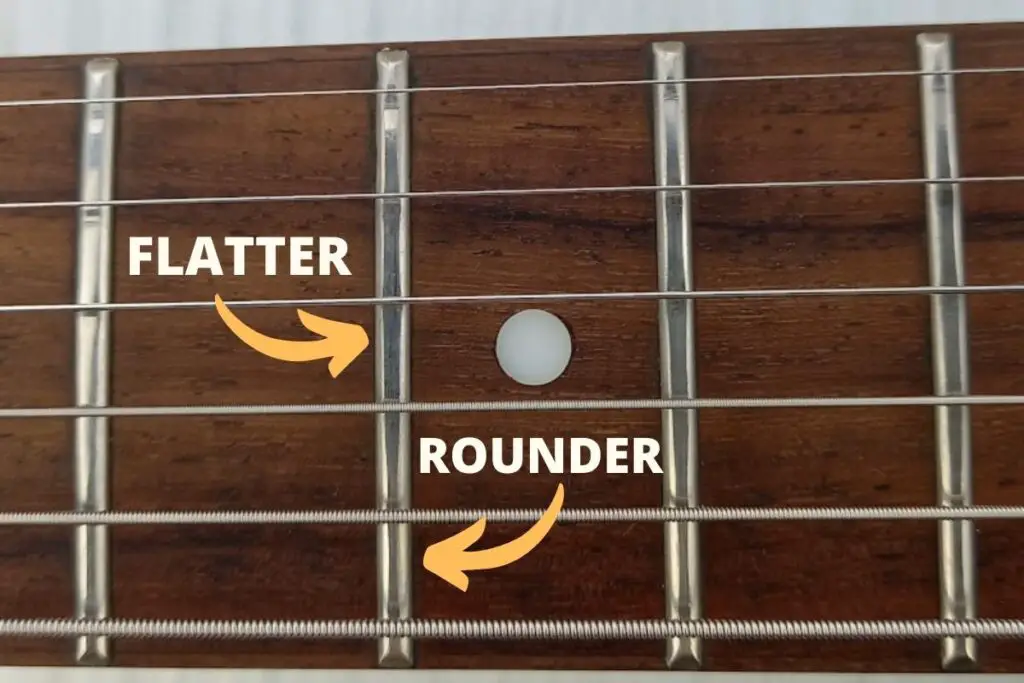
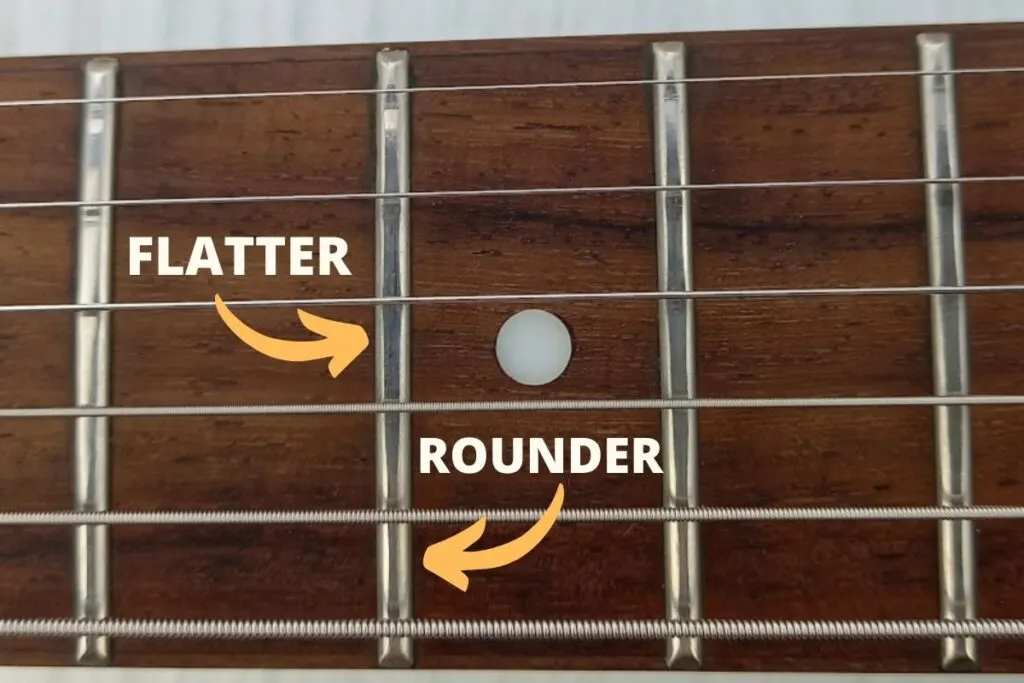
Depending on your neck radius, you’ll want to see the following measurements:
| Neck Radius (Inches) | Neck Relief at 8th Fret (Inches / Millimetres) |
| 7.25″ | 0.12″ / 0.30mm |
| 9.5″-12″ | 0.10″ / 0.25mm |
| 15″-17″ | 0.08″ / 0.20mm |
If you’ve got the above result, that’s great! You can move onto step 7.
If your measurements were higher than the figure in the table, then you’ll want to decrease the amount of relief.
If they were lower, then you’ll need to increase the amount of relief in your guitar’s neck.
To change the amount of relief in the guitar neck, you’ll need to make adjustments to your guitar’s truss rod.
Step 6: Adjust your truss rod to get the correct neck relief
Important: When making any adjustments to the truss rod: be sure to make small changes at a time. Big changes can damage your guitars neck.
I recommend only doing quarter turns of the truss rod at a time.
Your guitar’s truss rod is a metal bar that runs through the length of the neck. It supports your guitar’s neck against the pressure of the guitar strings, which are always pulling the neck from at the headstock and bridge.
The truss rod needs to be adjusted very slowly, as any large changes can damage the neck.
The nut to adjust the truss rod is located at the bottom of the headstock, just above the guitar’s nut. For Gibson, and other similar models, you may have to remove a small plastic plate to access the truss rod nut.

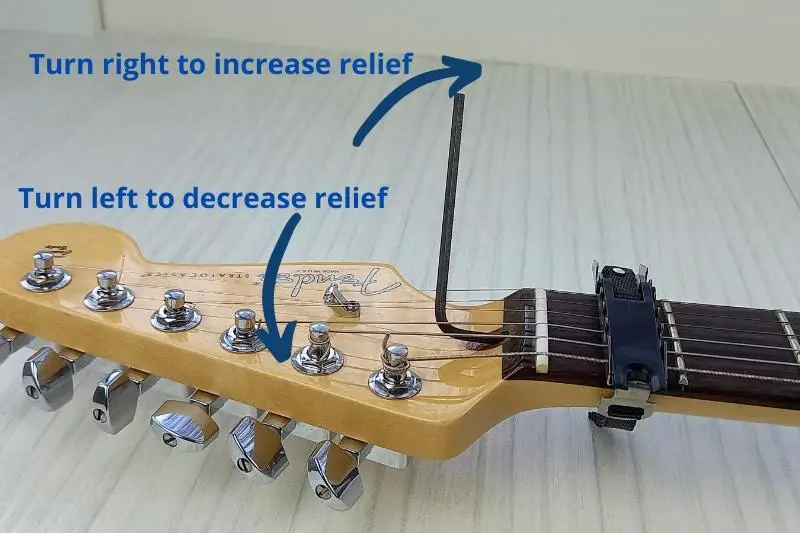
To adjust your truss rod, insert your hex key into the truss rod nut. To increase relief, move the hex key towards the high E string, and to decrease relief, move it towards the low E string.

Now, tune up your guitar and repeat step 5 (remember to take the capo off for tuning, and to put it back on for step 5). Hopefully, you’ll now have the correct measurement. If not, then repeat steps 5 and 6 until you do.
Step 7: Set your saddle height
Next, let’s take a look at the guitar’s saddles.
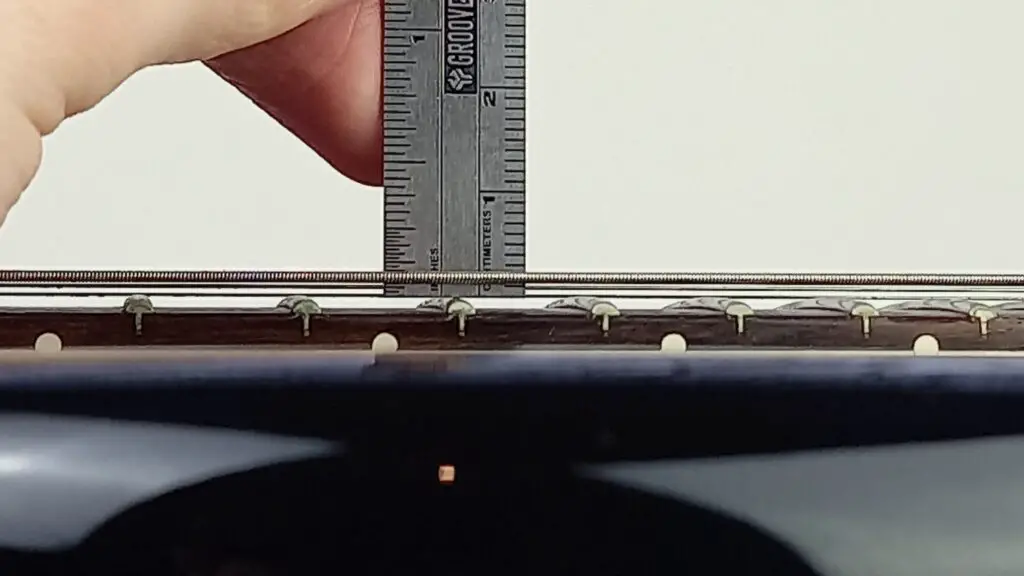
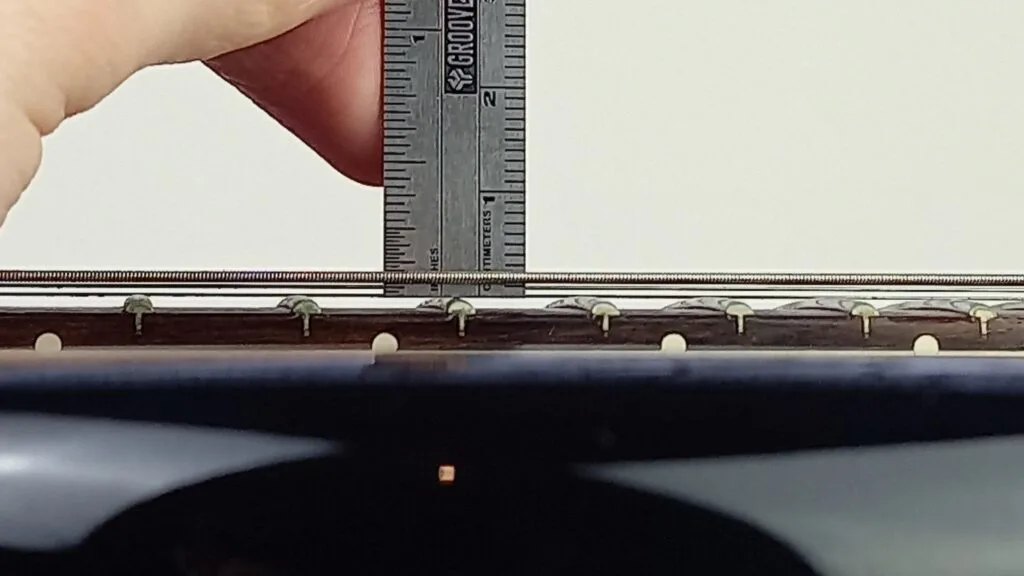
With your guitar in tune, and the capo on the first fret position, we’re going to measure the height (or action) of the guitar string at the 17th fret using a ruler.
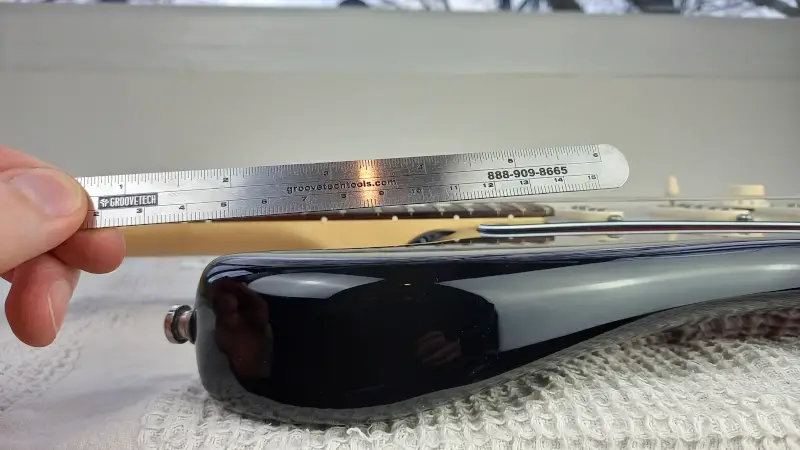

Place your ruler on the 17th fret wire and look at where the bottom of the string is on the ruler.
String action is down to preference. I prefer a low string action, so I try to get between 4/64″ and 6/64″ depending on the gauge of string I’m using.
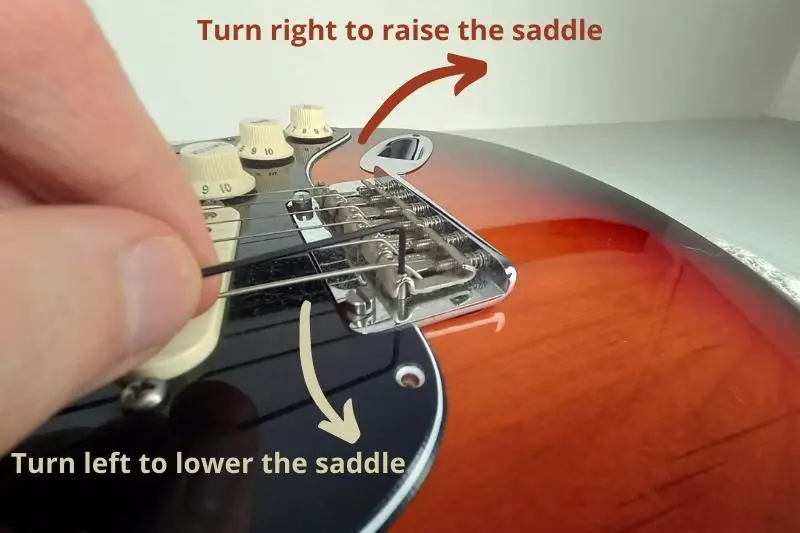
If your saddle is too low, then it’s probably causing your frets to buzz! You can adjust your saddle height using a hex key for guitars with “Stratocaster” style bridges, or a flathead screwdriver for a Les Paul style bridge.

Step 8: Measure for uneven frets
From this point on: These won’t be problems that we’re fixing ourselves. This is because fret-work and nut filing (covered in the next step) can mess your guitar up if not done properly.
Instead, we’re going to identify the problems so that you can get it fixed at a local guitar shop. This means that you know what the problem is, and just pay for the work you need doing!
We’re now going to check for any uneven fret wear! For this step, you don’t need the capo on.
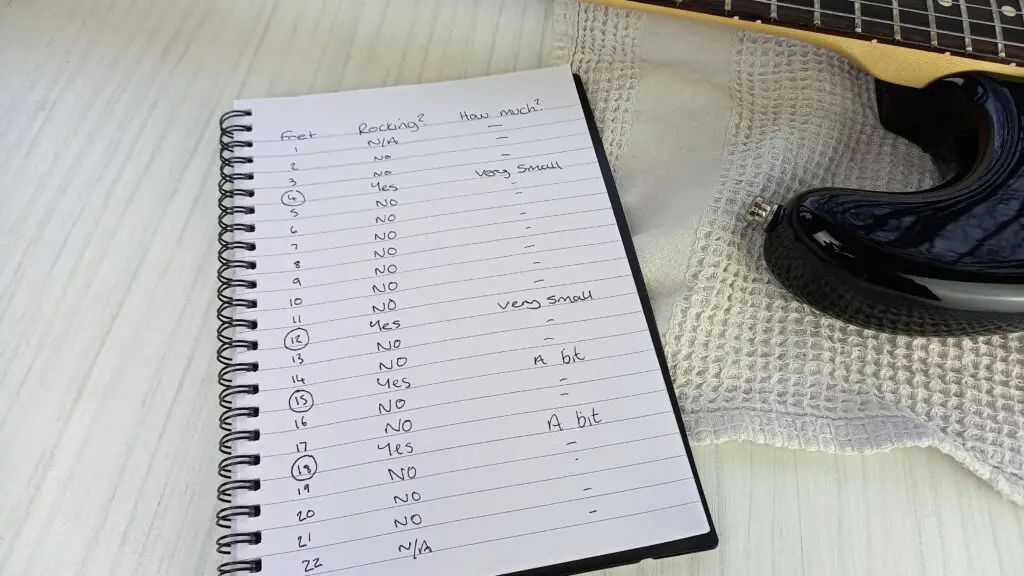
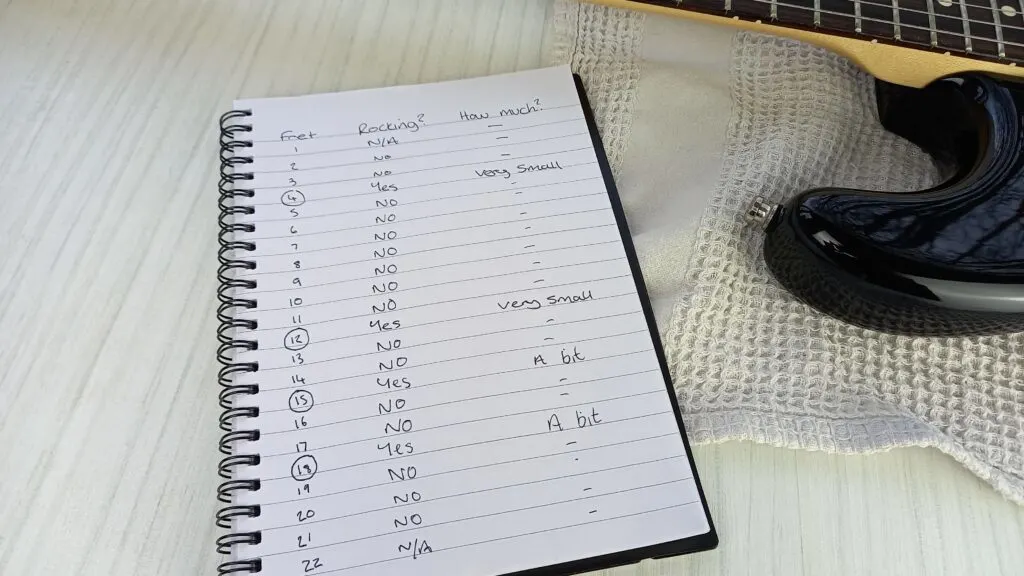
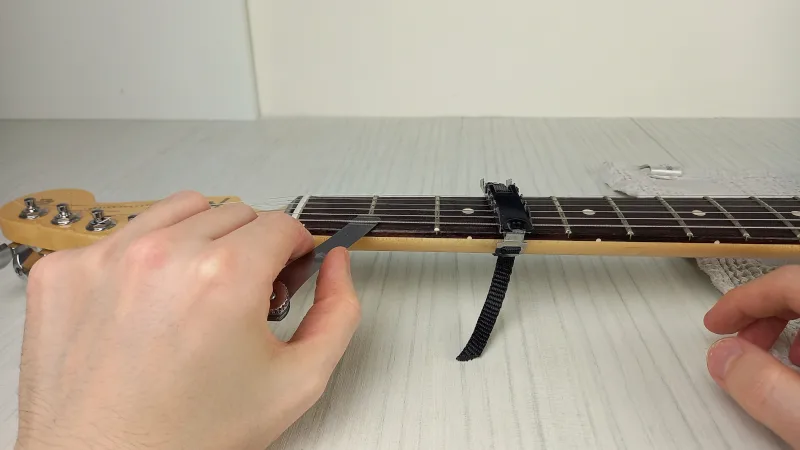
To measure for uneven frets, lay the fret rocker across first 3 frets (the fret wire, not the fingerboard) and rock it back and forth.


Ideally, there should be no movement. If there is movement, you’ll hear a “clicking” noise, which is the fret rocker hitting against the fret wire. This means that the middle one of the 3 frets is raised. If that’s the case, make a note of the raised fret.
Repeat this process all the way down the fingerboard until you reach the end, making a note of each raised fret.
Now, you’ll need to contact a guitar repair shop to fix the frets. In most cases, the frets will need a simple fret dressing, which is where they’re filed down and reshaped. In some cases, it may be that the fret needs resetting, or replacing.
Top tip: I recommend getting price quotes from at least 3 different repair shops. This could help you get a better price, as some repair shops may match a valid lower priced quote.
8. Check the nut slot depth
Our final step is to check the depth of your guitar’s nut slots. This is another one where we’ll identify the problem, but get a professional to fix.
Start by putting your capo onto the third fret wire.
Next, put the 0.002″ (0.05mm) feeler gauge under the string at the 1st fret. You should be able to slide it in without any friction.
If you can’t fit the gauge underneath, then your nut slots are too deep and will need to be fixed by a professional.

9. Still buzzing? Visit a local luthier
If you’ve got to the end of this guide and your guitar is still buzzing, try running through the steps again.
An older guitar that’s not been adjusted before will need a bit of time to settle, usually a day or so.
If you’re still getting fret buzz, then it’s time to call in a professional. Head on to Google and find a local guitar repair shop in your area and get a luthier to look at it.
Having a local luthier that can look at your guitar every so often is really helpful to maintaining your guitar in the long-run. While I set-up and maintain my guitar’s myself, I get the guitars that I record with looked over by a professional about once a year, just to make sure I’ve not missed anything.


Related questions
Fret buzz doesn’t always come through an amp. The louder your fret buzz is, the more likely you are to hear it through your guitar amp. Likewise, you’ll be more likely to hear fret buzz on a clean guitar signal.


Conor is a music producer, multi-instrumentalist, and all-round enthusiast from the UK with over 15 years of experience. He’s the founder and sole-content creator for the roundtable audio blog and YouTube channel.