
Synthesizers are an iconic instrument in music production due to their incredible range of sounds and versatility. As hardware synthesizers become more affordable for home studios, you may find yourself wondering how to connect a hardware synthesizer to a computer.
Here are 5 ways to connect and record your synth to your computer or laptop:
- Connect your synth via an Audio Interface
- Connect your synth via a Mixing Console
- Connect your synth directly to your computer or laptop using a Y-Cable
- Connect your synth via a USB cable
- Record your synth using a microphone
The method that’s right for you depends mostly on which synth you own and which equipment you have available, or can afford to buy.
Let’s take a look into each of these methods for connecting a synth to your computer or laptop and decide which one is right for you!
How to connect a synth to a computer or laptop via an Audio Interface
To connect your synth to a computer or laptop using an Audio Interface:
- Determine the cable size needed for your synth’s output socket (either ¼ inch (6.35mm) or ⅛ inch (3.5mm))
- Connect the output(s) of the synthesiser to the input(s) of the Audio Interface
- Connect the Audio Interface to your computer or laptop via a USB cable
- Open your DAW’s preferences and enable the Audio Interface
- Arm your track to enable recording
Determine the cable size needed for your synth’s output socket (either ¼ inch (6.35mm) or ⅛ inch (3.5mm))
In the vast majority of cases, your synth’s outputs will be a ¼ inch (6.35mm) socket which look like this:
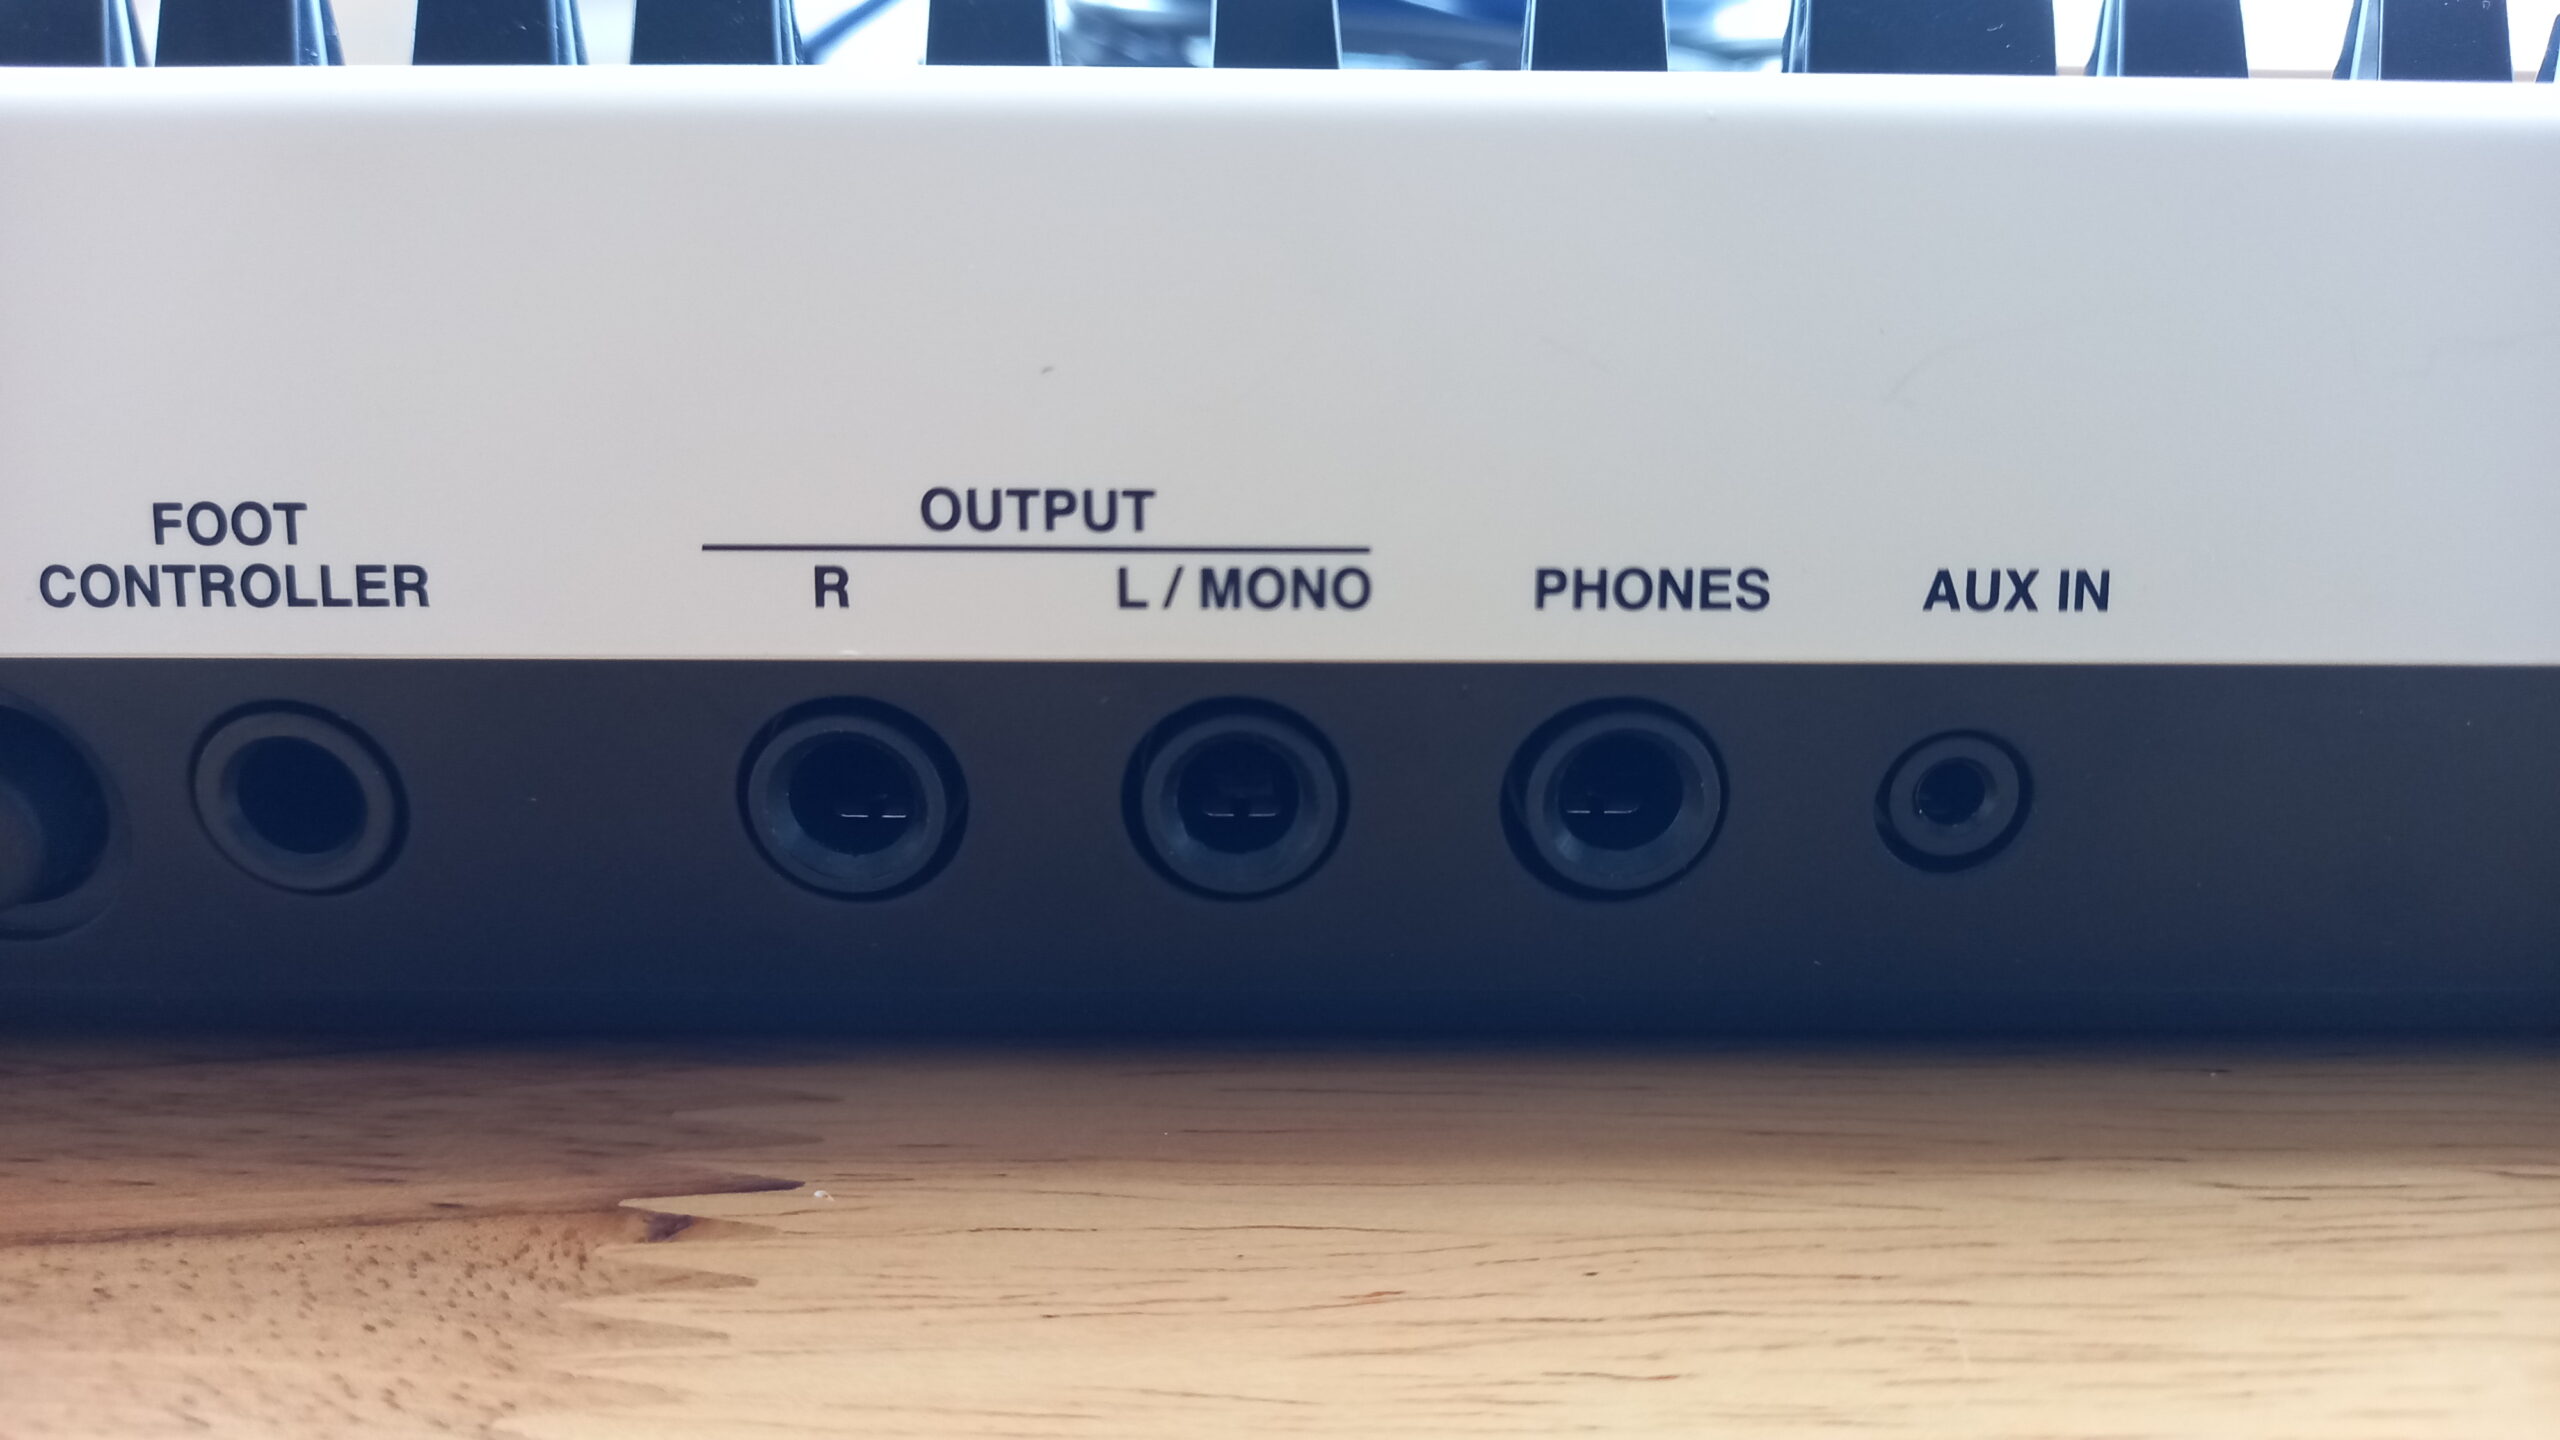
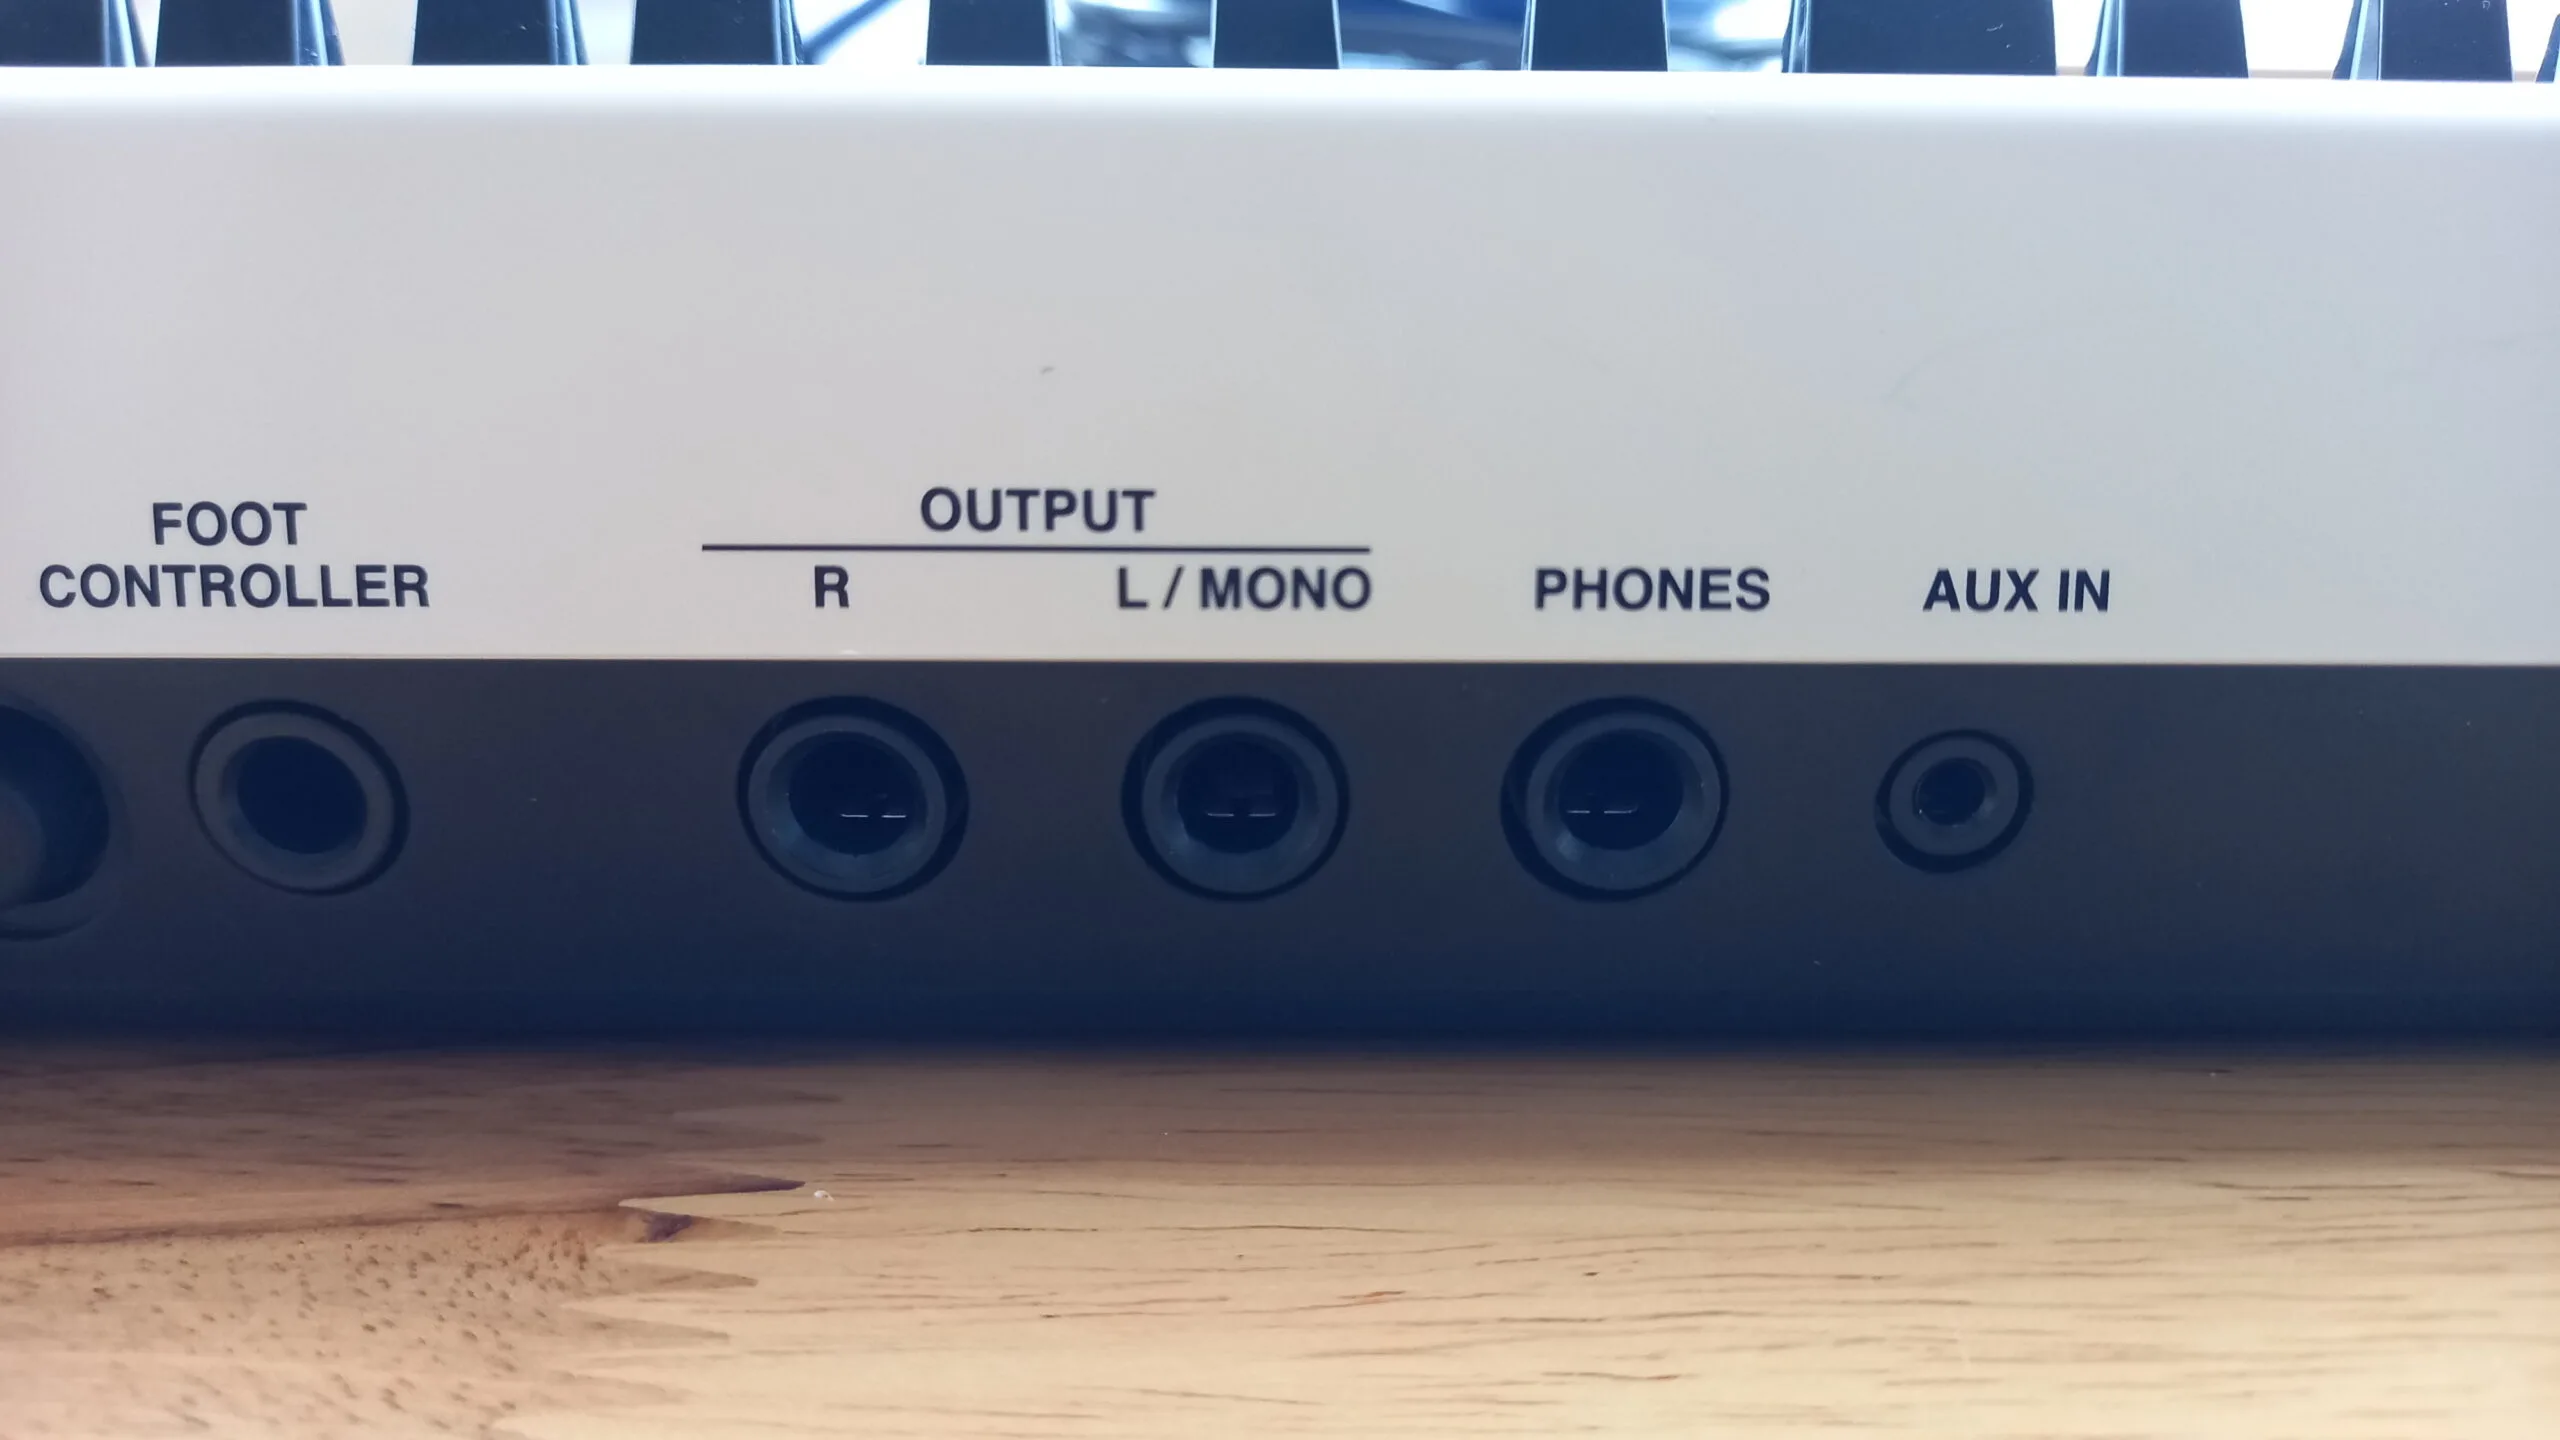
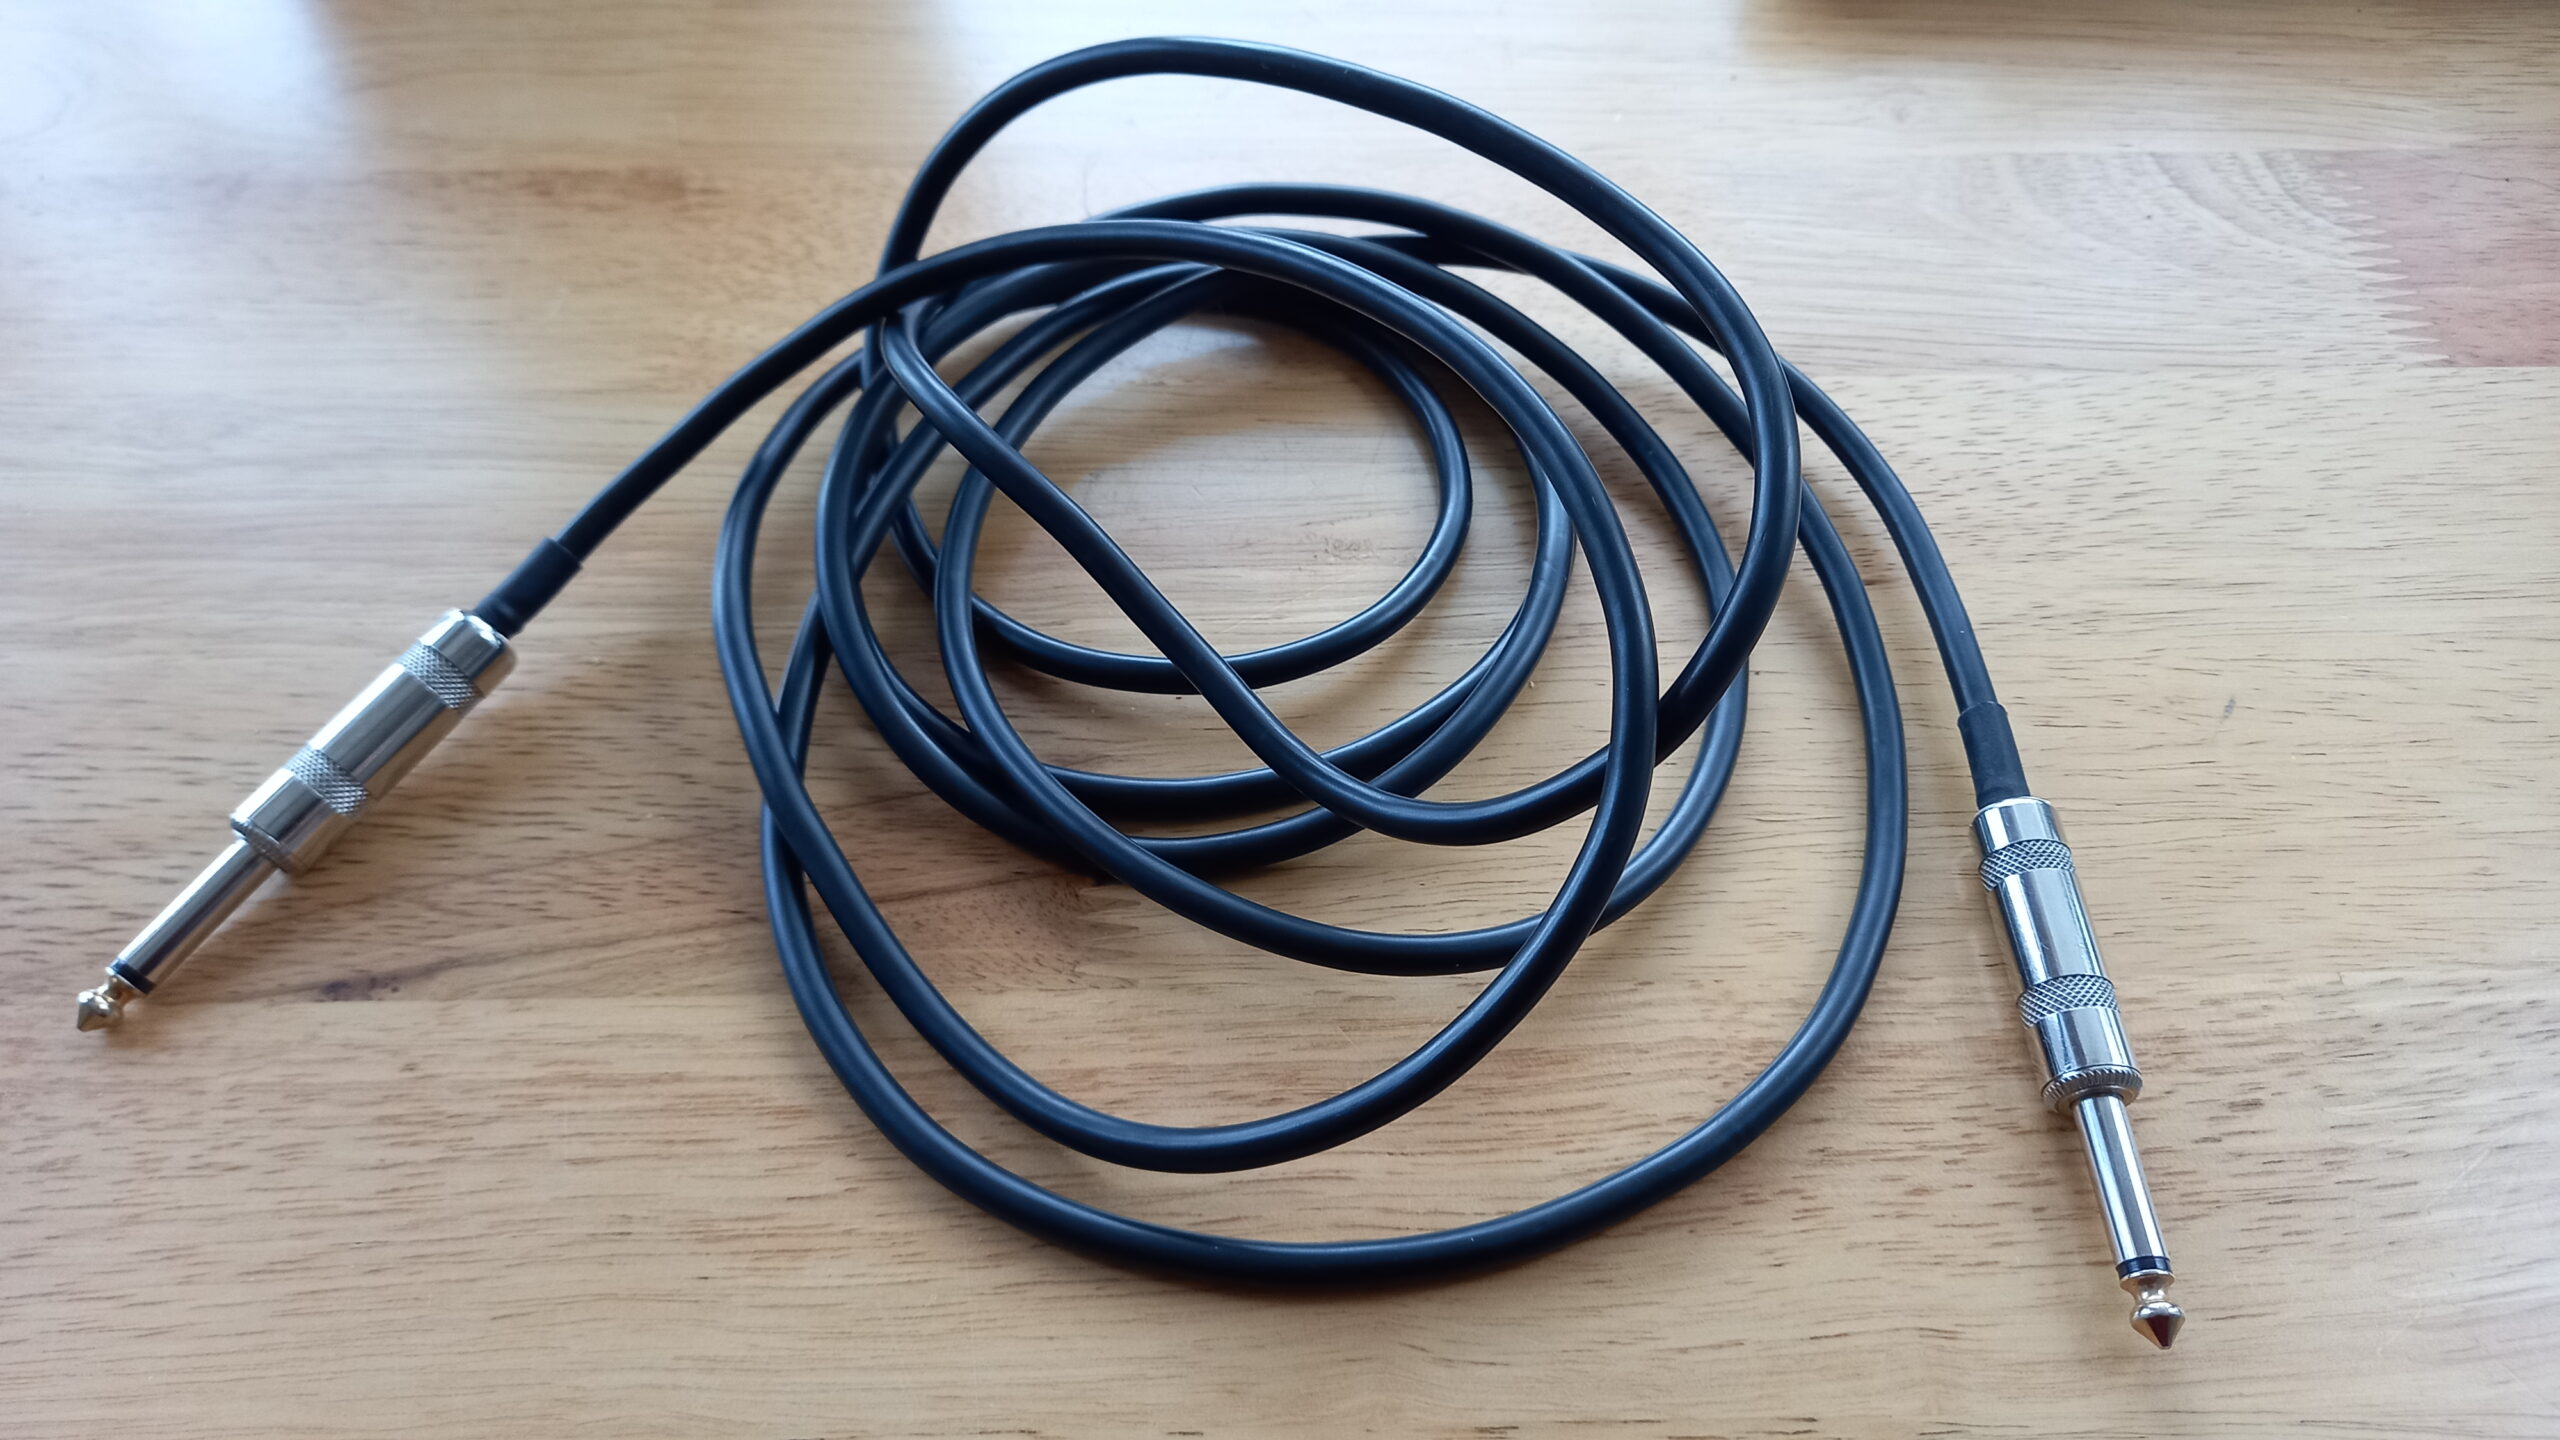
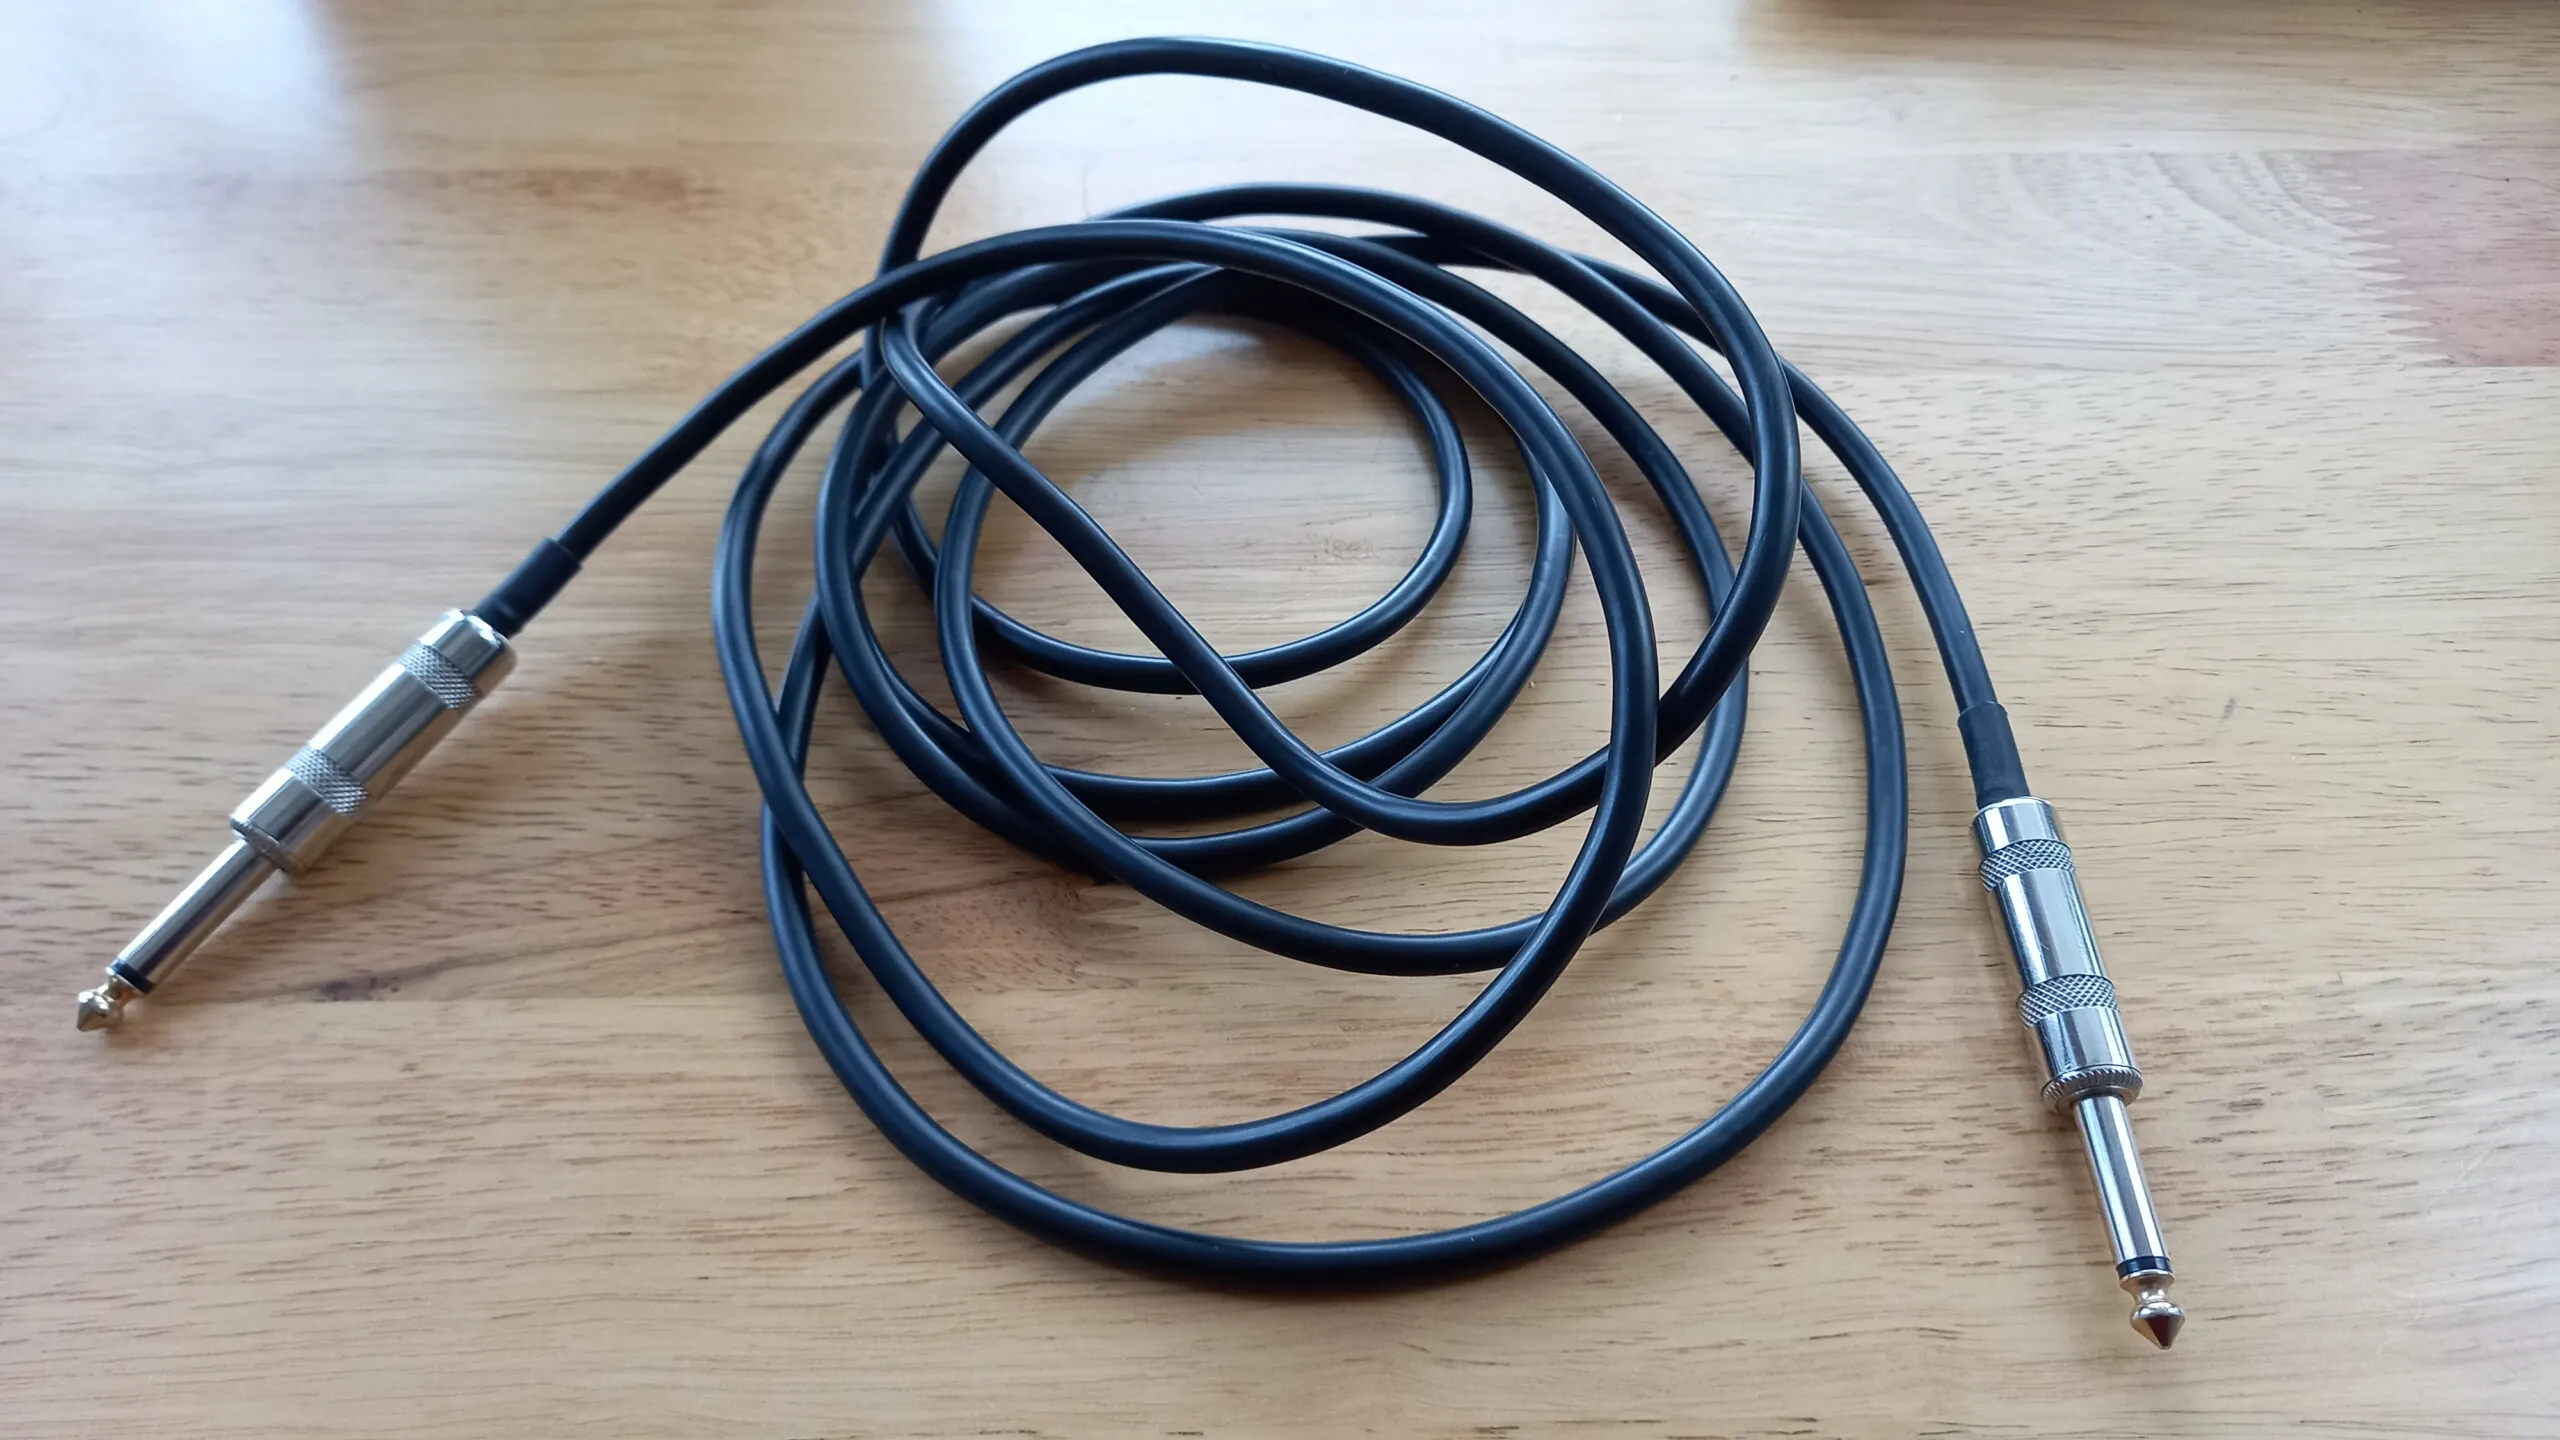
In this case, you will need a ¼ inch to ¼ inch stereo cable. If you’re connecting both outputs, then you will need 2 cables. These cables look like this:
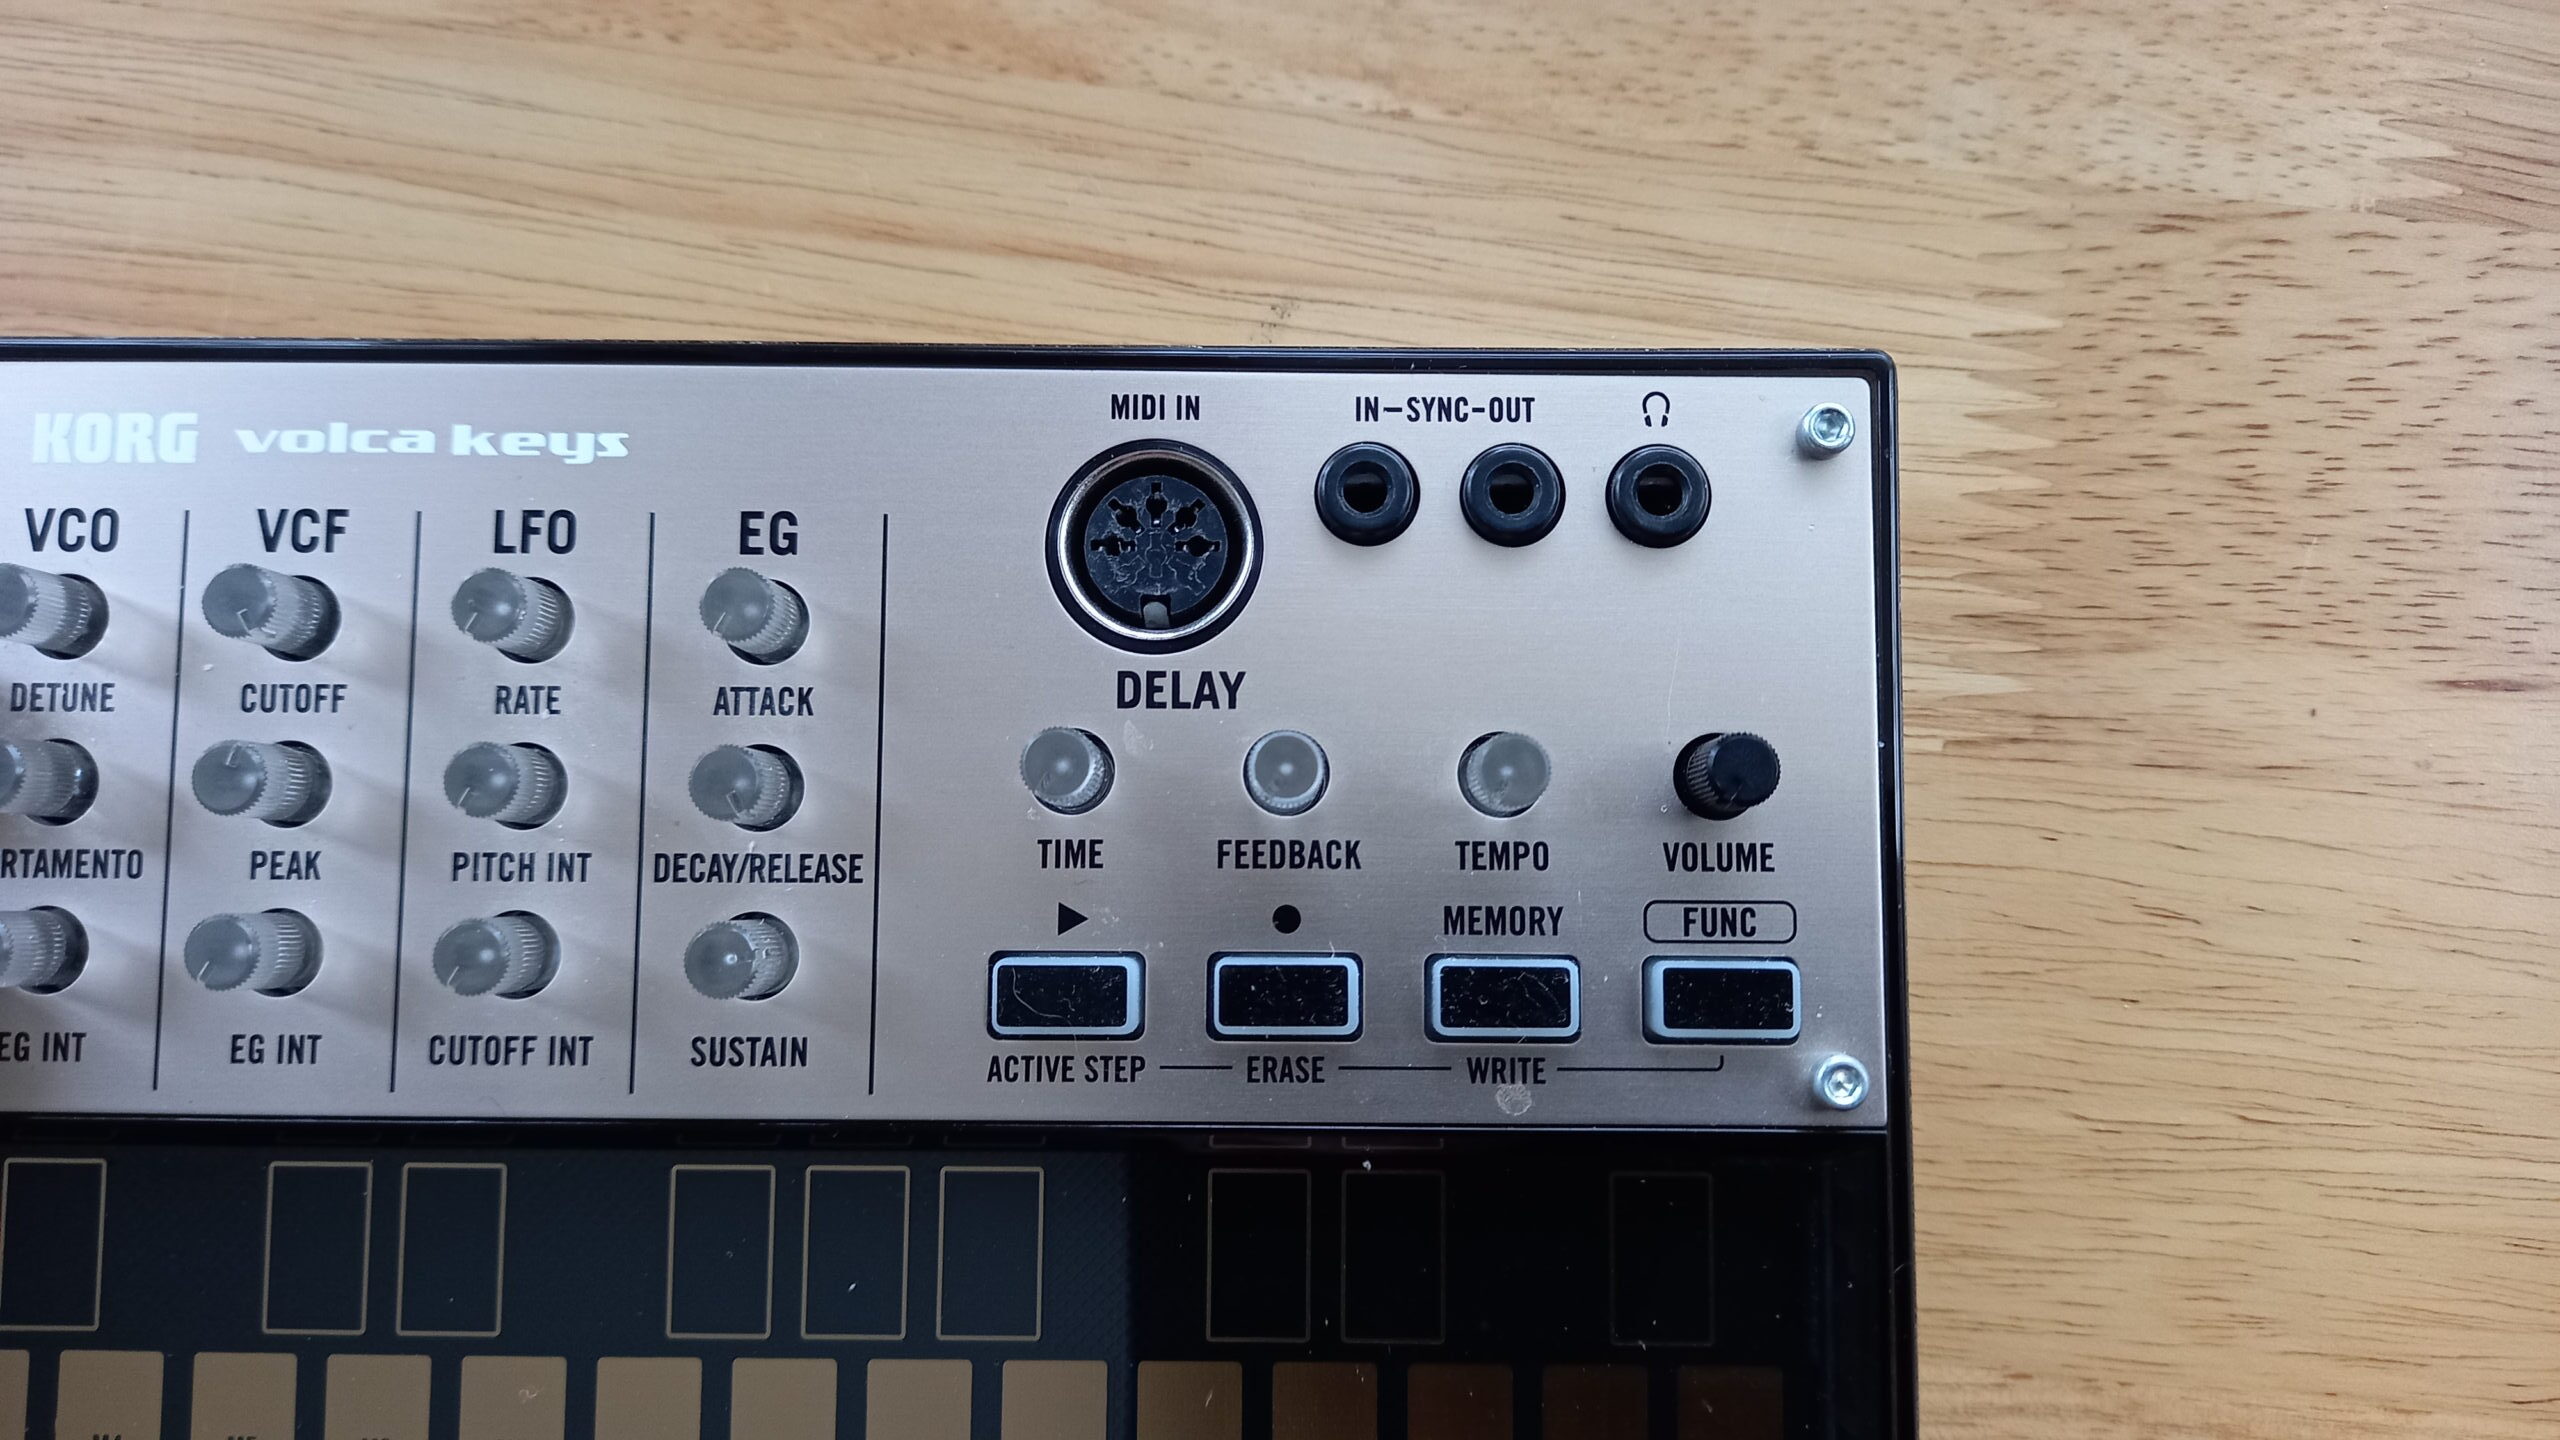
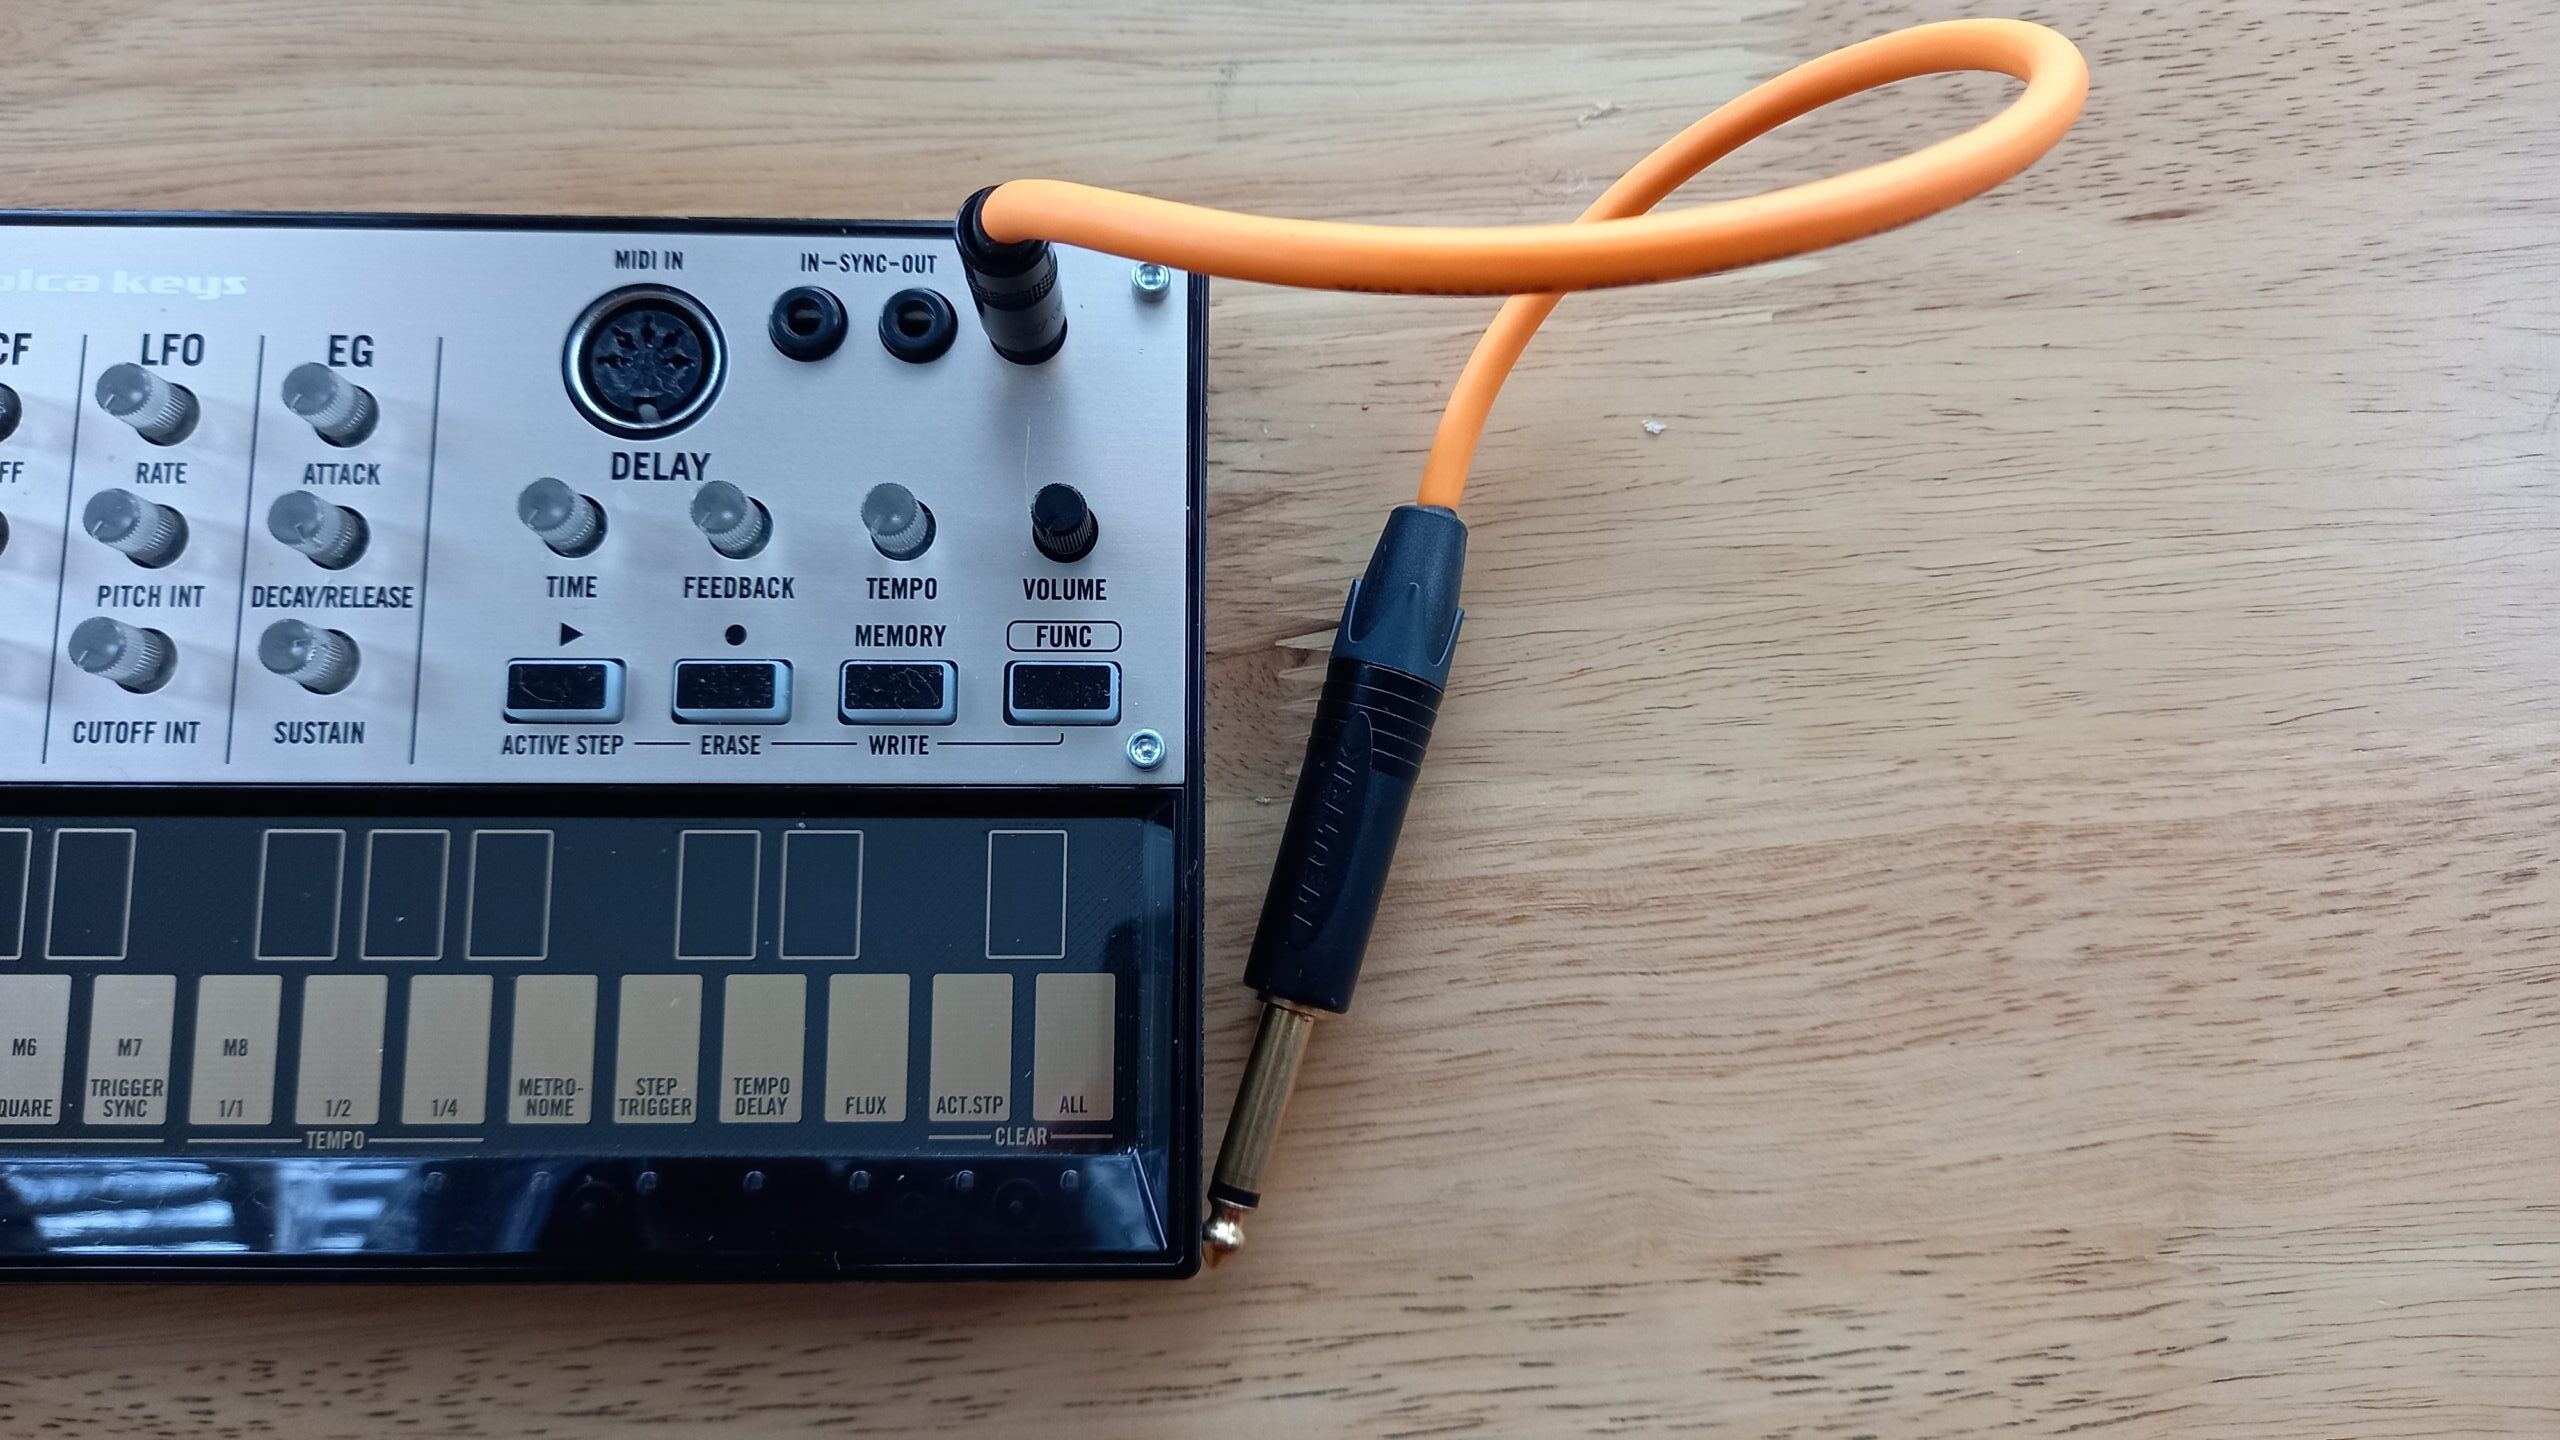
Smaller synths, such as the Korg Volca series, have an ⅛ inch (3.5mm) output socket, which looks like this:

If this is the case, you’ll need an ⅛ inch to ¼ inch stereo cable, which looks like this:

Connect the output(s) of the synthesiser to the input(s) of the Audio Interface
If your synth has 2 outputs, left and right, then you may wish to record both. This is known as recording in stereo. To do this, you will need to attach each output to its own channel.
If you intend to record the synth in mono, then you only need to connect the mono output to the audio interface.
Top tip: Most people, myself included, recommend recording a synth in mono in most instances, as it will be easier for you to mix into your track. The exception to this may be where you are using an onboard stereo effect such as chorus. Always do what sounds best to you!
Connect the Audio Interface to the computer or laptop via USB
Your audio interface will have come with a USB cable to connect it to your computer or laptop. Plugging it in via USB will provide power to most audio interfaces, older or larger models may have an additional mains adapter that needs to be plugged in.
Check the manufacturer’s manual or website for full details!
Open your DAW’s preferences to enable the Audio Interface
This step will vary depending on the DAW you are using, but in my experience most will have a clear section for selecting an audio interface. Here’s how it looks in Ableton Live 10:
If you’re unsure where to find it, check the developers “help” section, or their website!
Arm your track to enable recording
Again, this will vary depending on the DAW but most will have an option to “arm” the track ready for recording. Make sure this is active, and you’ll be ready to record!
How to connect a synth to a computer or laptop via a mixing console
To connect your synth to a computer or laptop using a mixing console/mixer:
- Determine the cable size needed for your synth’s output socket (either ¼ inch (6.35mm) or ⅛ inch (3.5mm))
- Connect the output(s) of the synthesiser to the input(s) of the mixing console
- Determine the cable size needed for your mixing consoles output socket(s) (either ¼ inch (6.35mm), RCA, or USB)
- Connect the mixing console to your computer or laptop via a Y-Cable or USB cable
- Open your DAW’s preferences and enable the mixing console
- Arm your track to enable recording
Determine the cable size needed for your synth’s output socket (either ¼ inch (6.35mm) or ⅛ inch (3.5mm))
In the vast majority of cases, your synth’s outputs will be a ¼ inch (6.35mm) socket which look like this:
In this case, you will need a ¼ inch to ¼ inch stereo cable. If you’re connecting both outputs, then you will need 2 cables. These cables look like this:
Smaller synths, such as the Korg Volca series, have an ⅛ inch (3.5mm) output socket, which looks like this:
If this is the case, you’ll need an ⅛ inch to ¼ inch stereo cable, which looks like this:
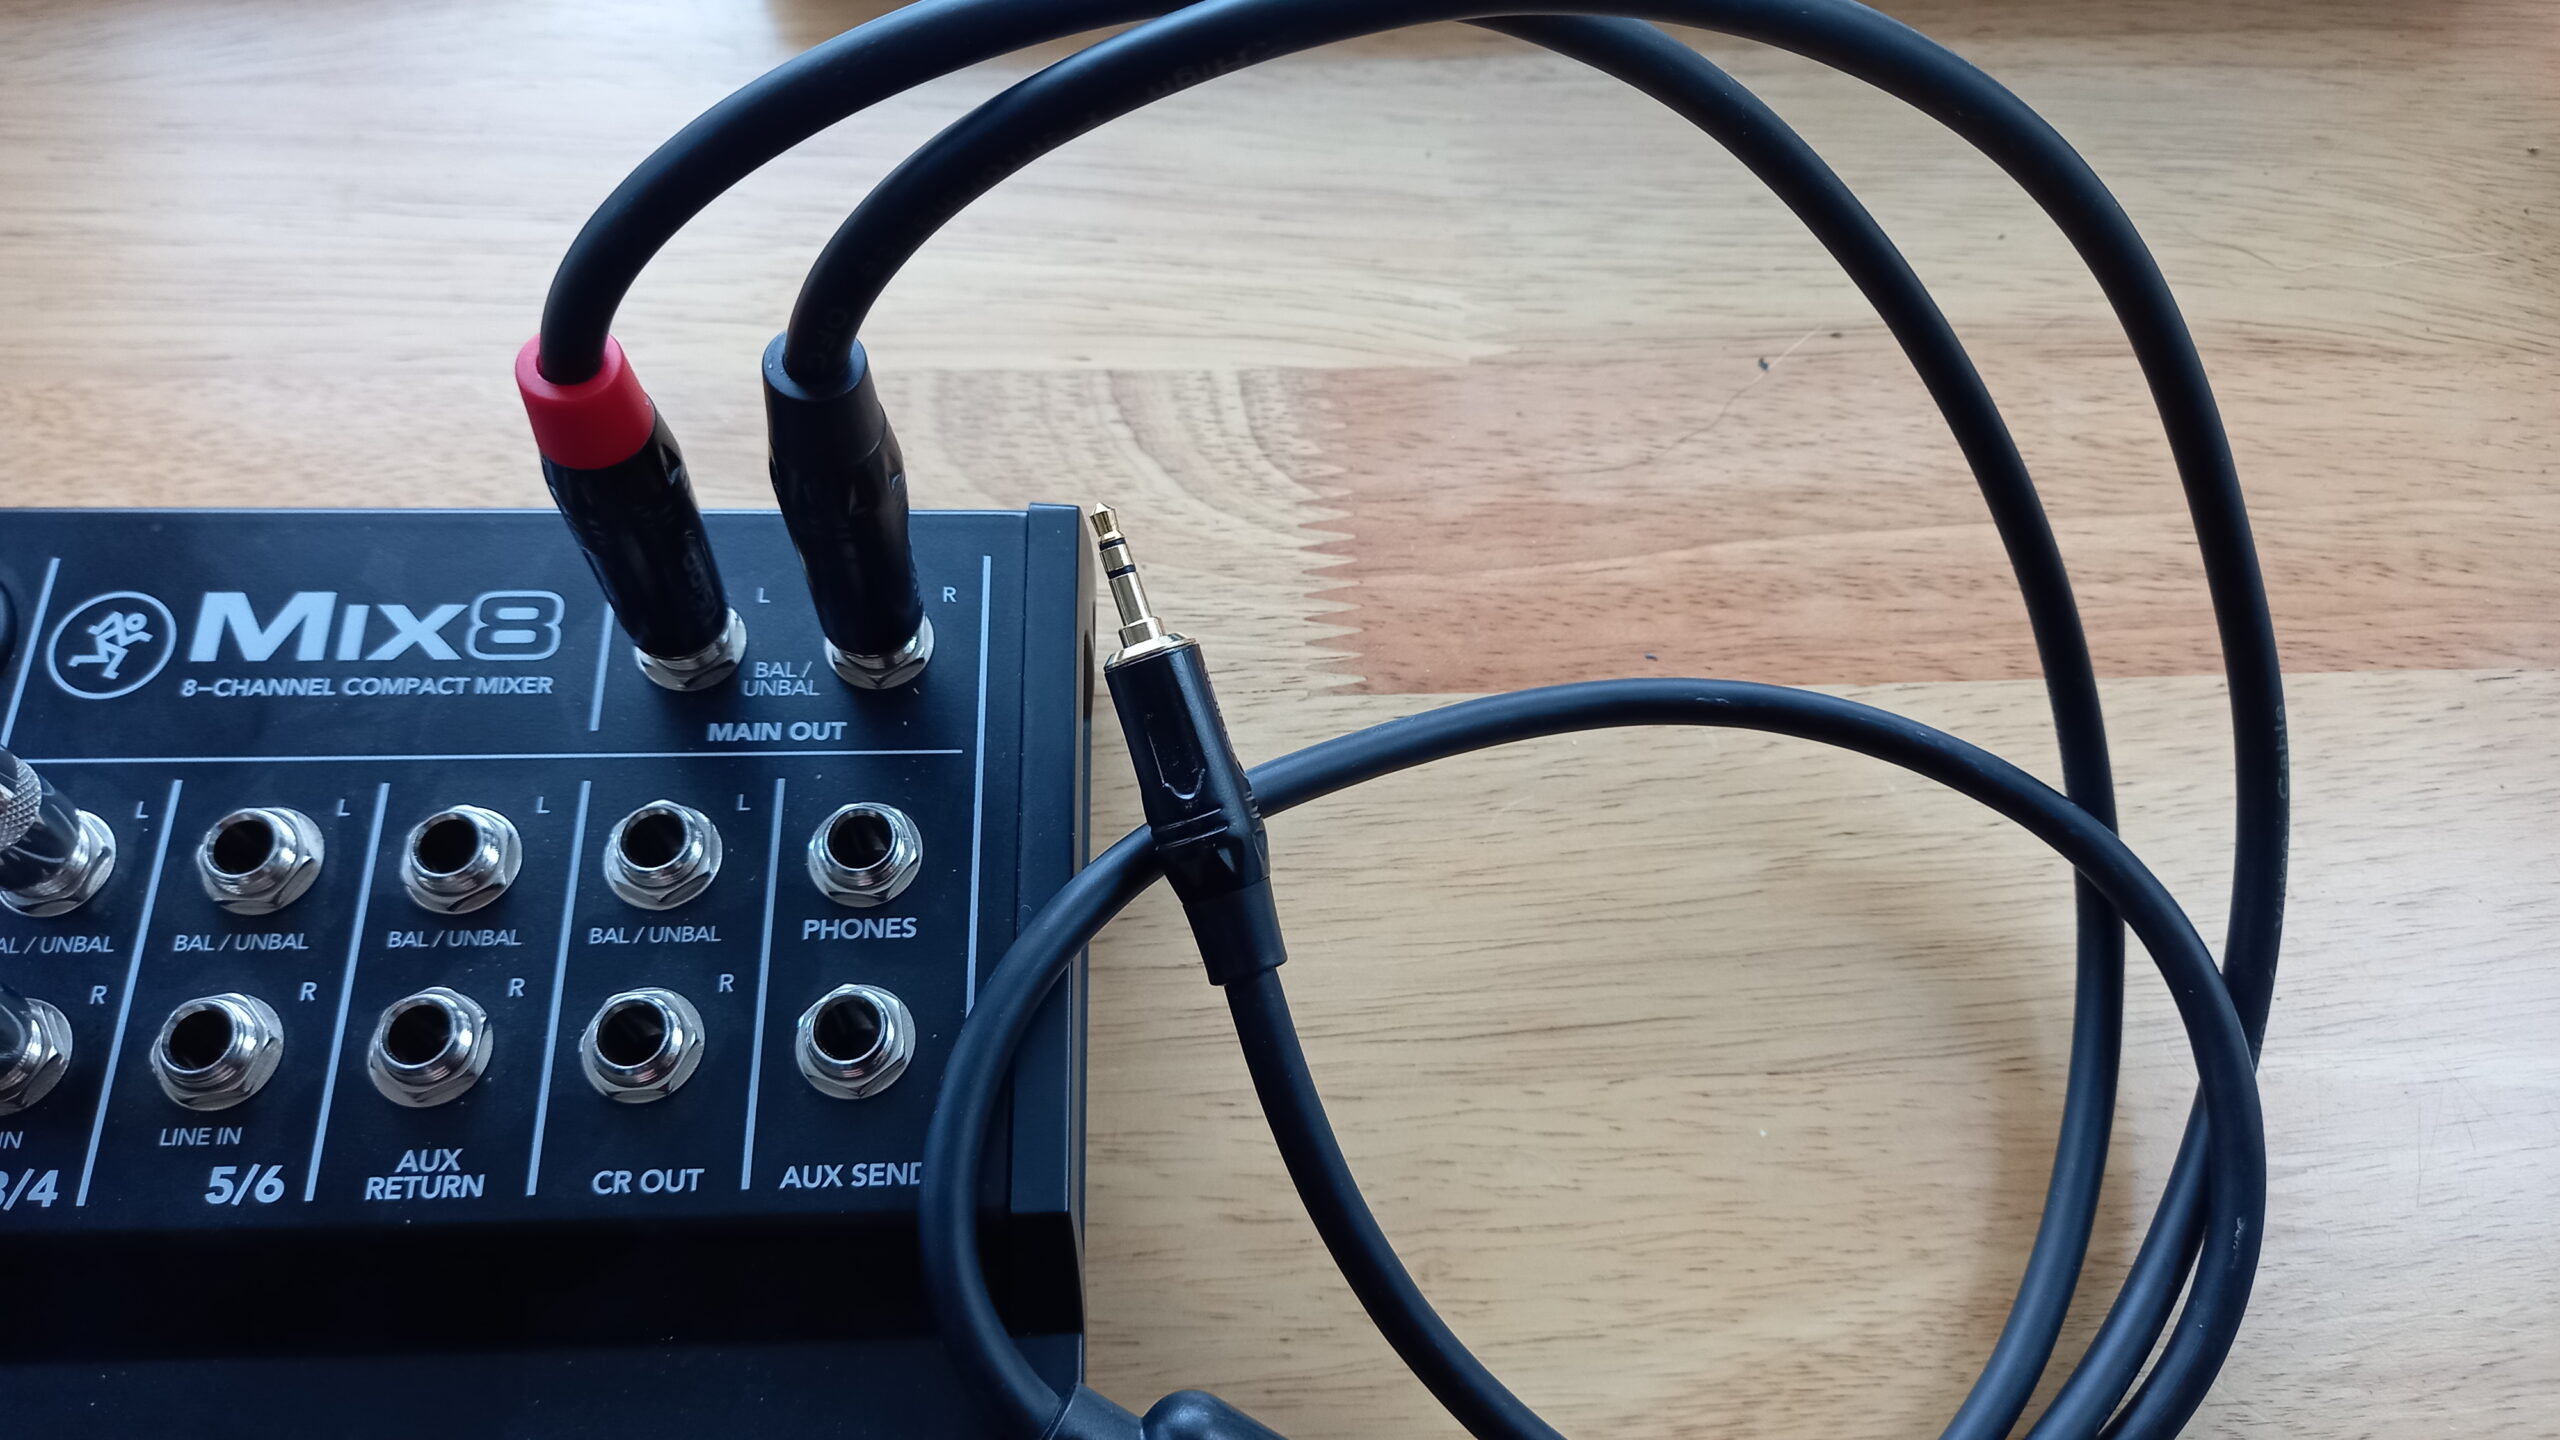
Connect the output(s) of the synthesiser to the input(s) of the mixing console
If your synth has 2 outputs, left and right, then you may wish to record both. This is known as recording in stereo. To do this, you will need to attach each output to its own channel, like this:

The below image shows 2 cables connected to the input of the mixing console.
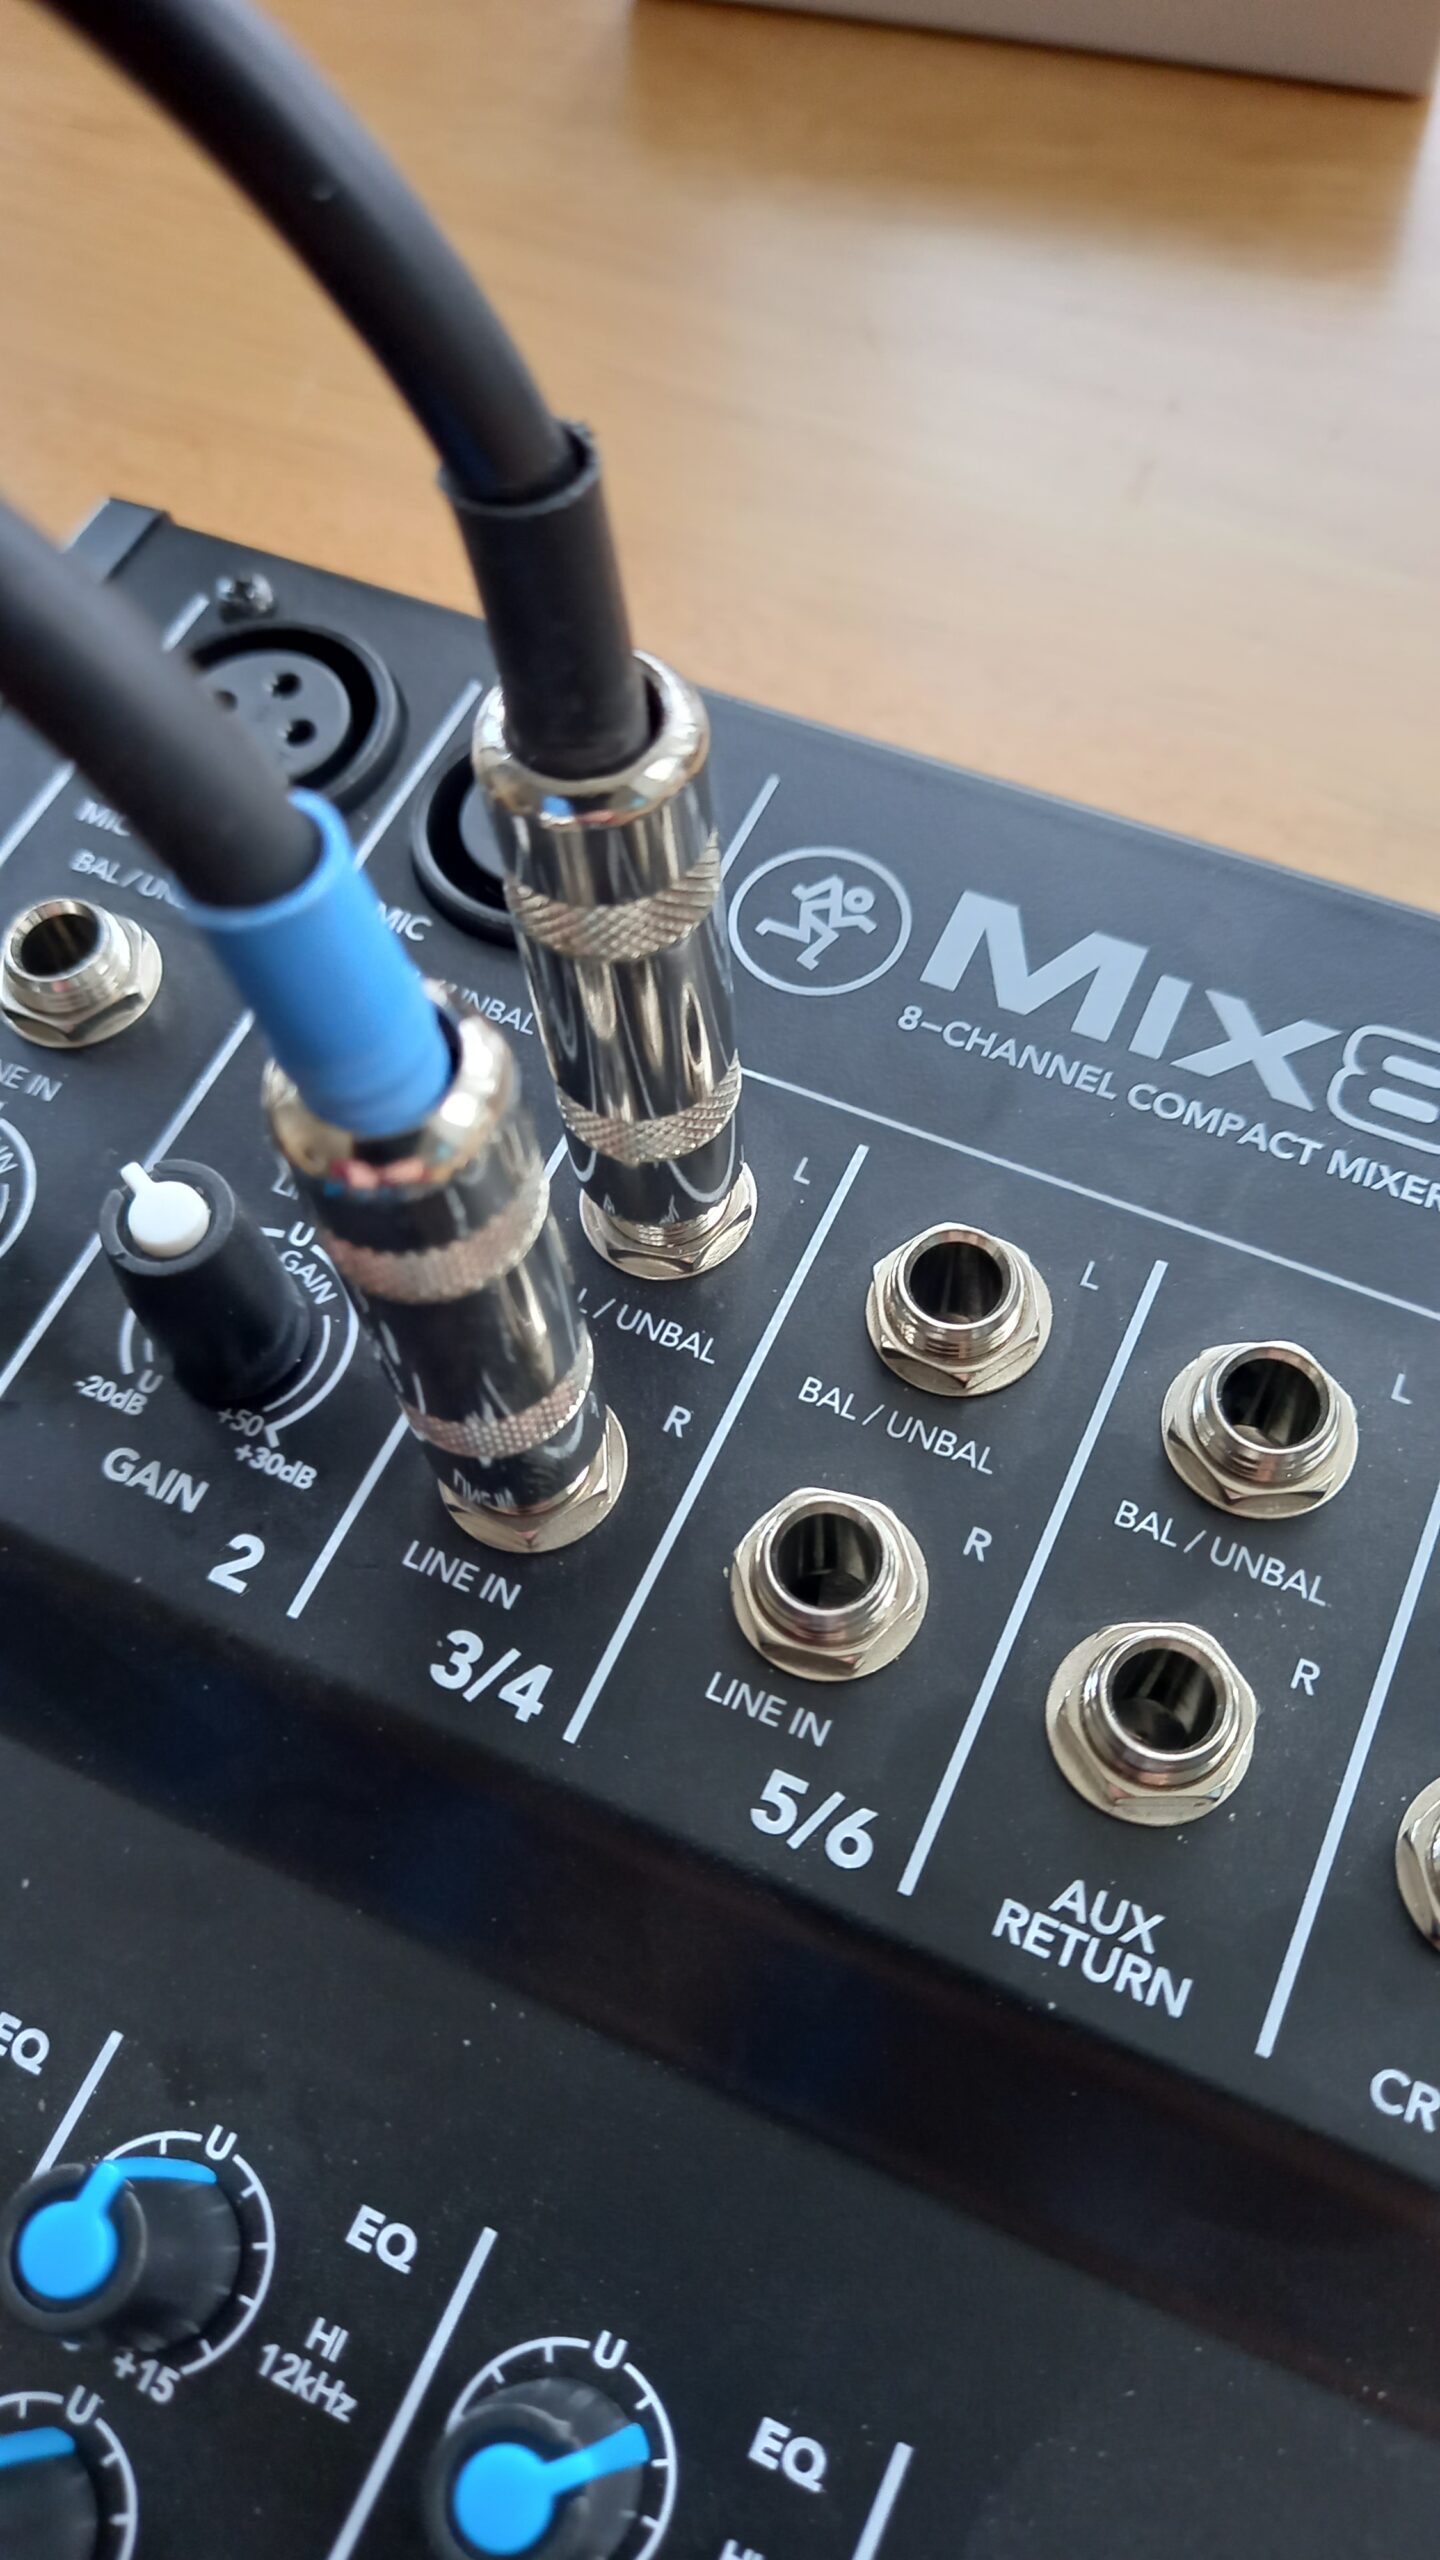

If you intend to record the synth in mono, then you only need to connect the mono output to the mixing console. Most mixers will be able to take either mono or stereo signals.
Determine the cable size needed for your mixing consoles output socket(s) (either ¼ inch (6.35mm), RCA, or USB)
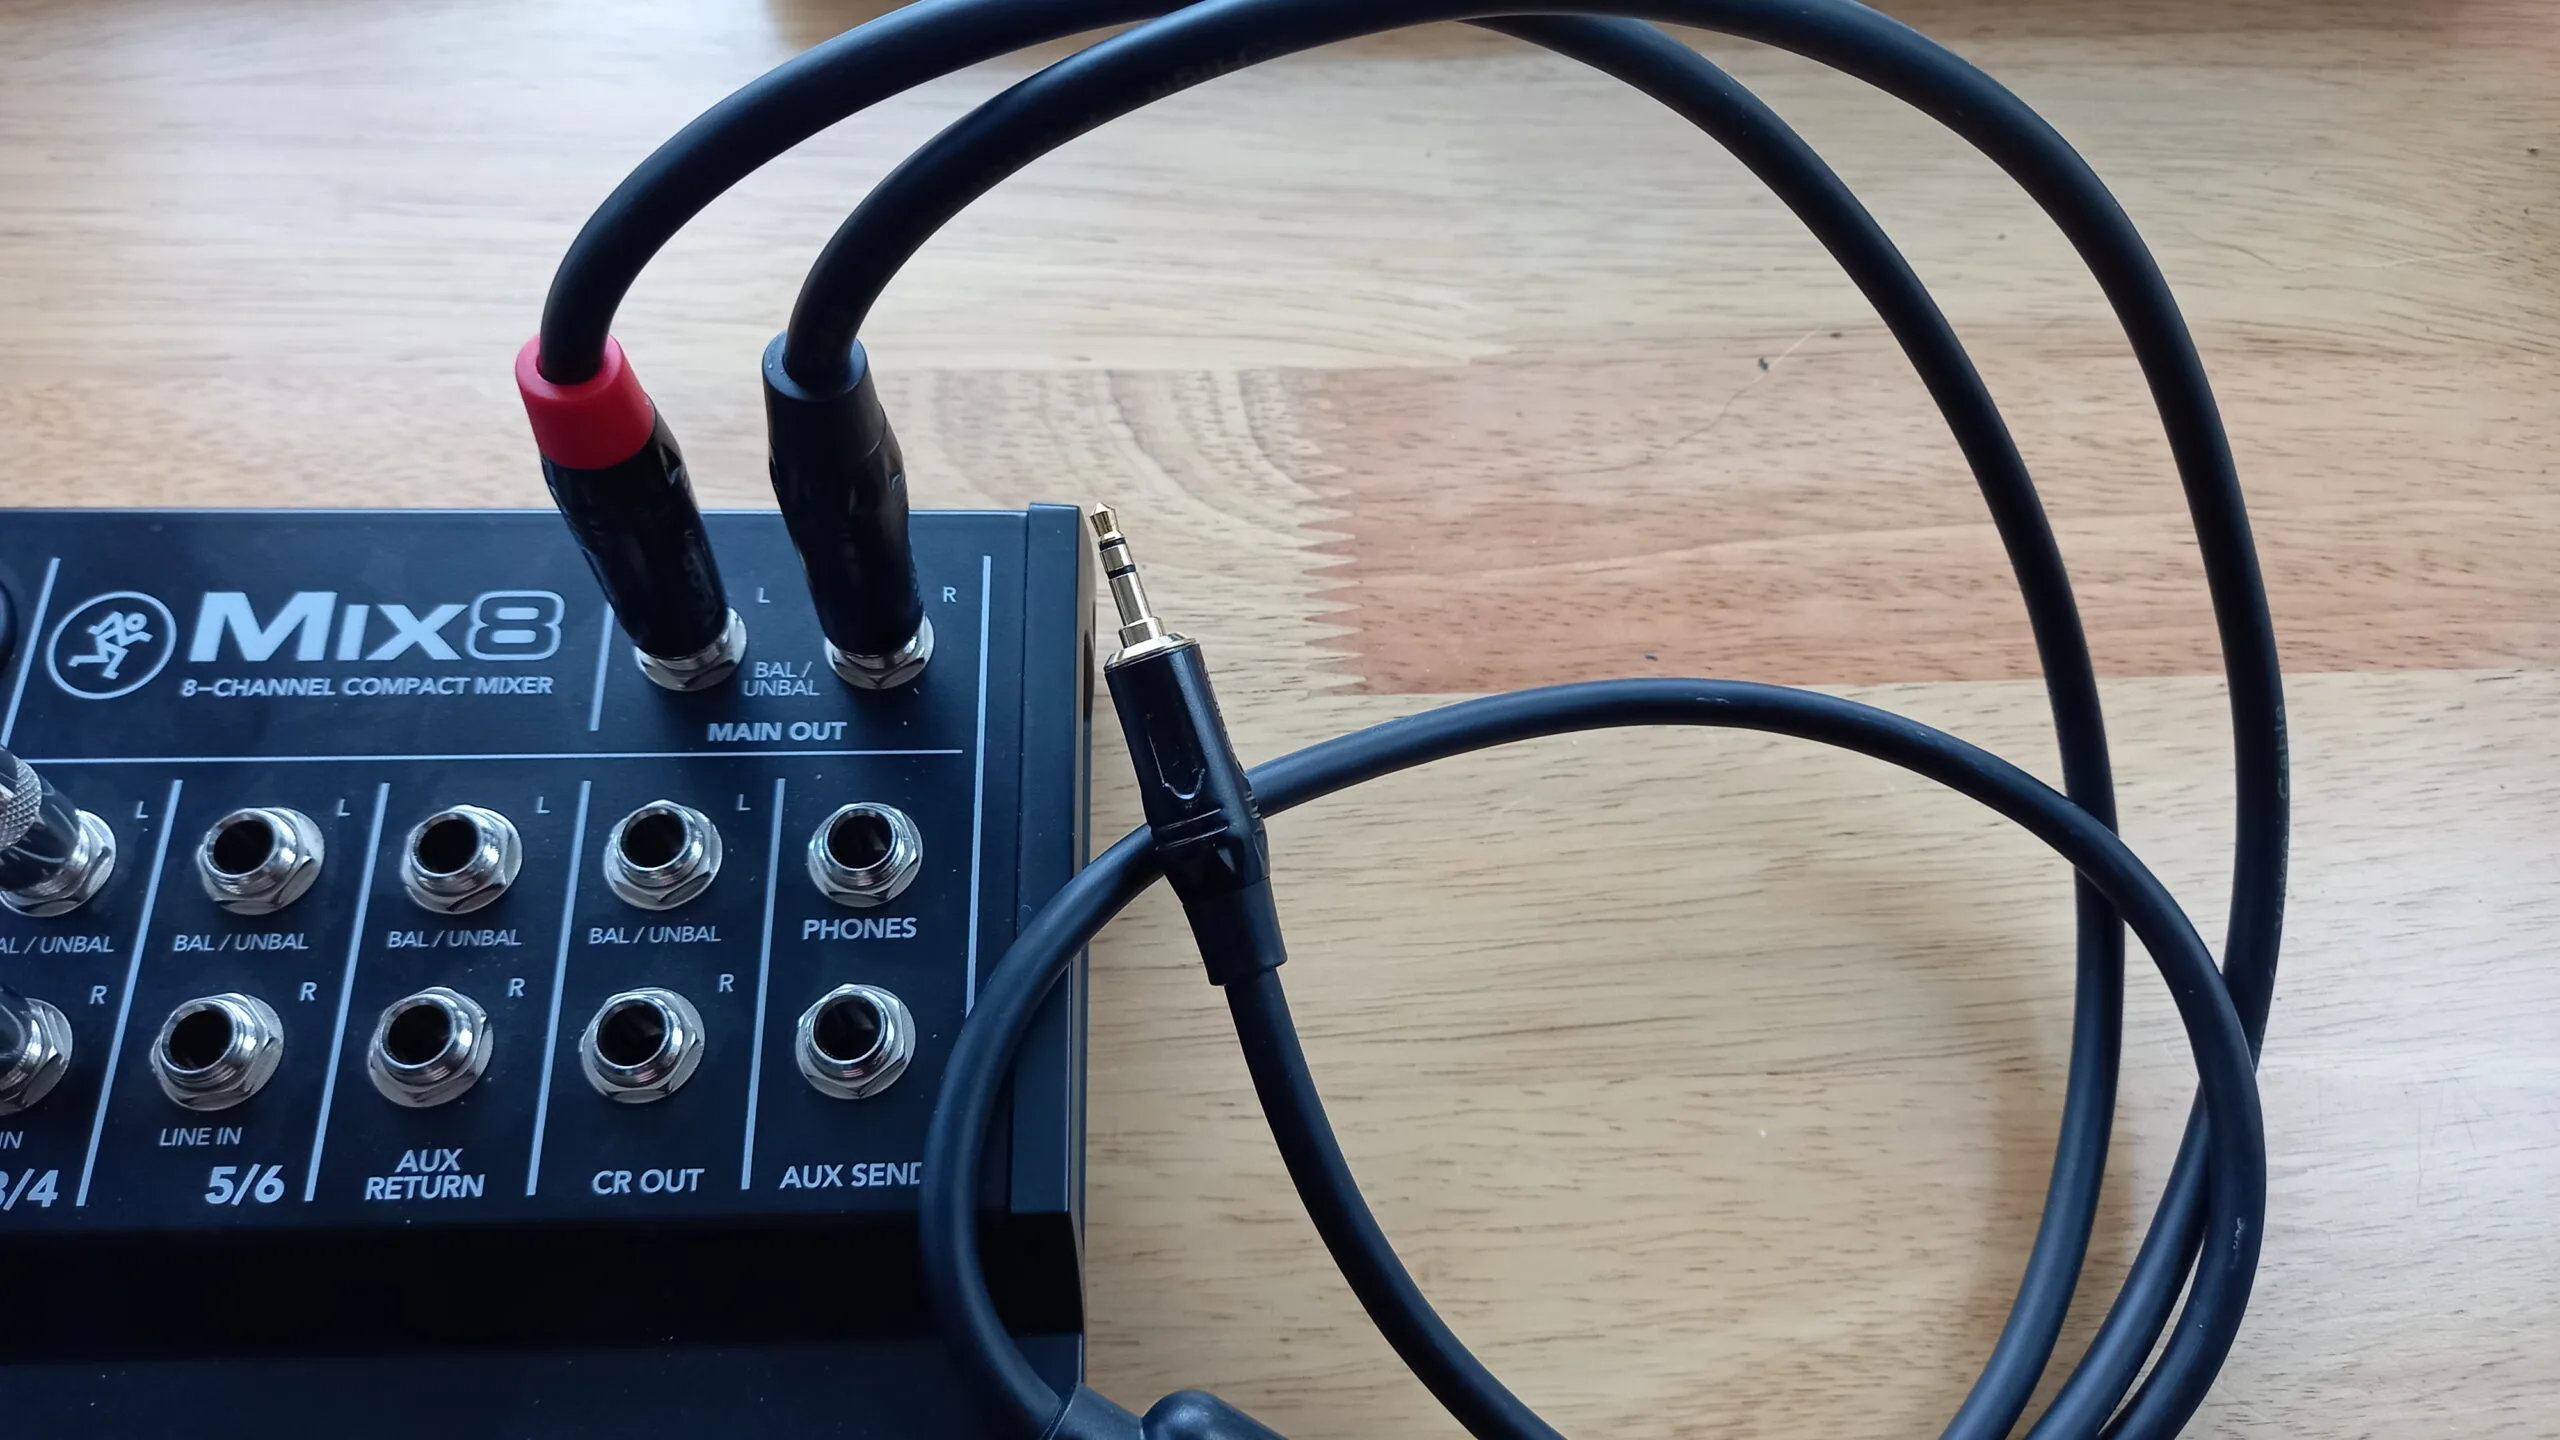
Most mixing consoles will have different output options. Most commonly, you’ll be using the “Main Out” or equivalent. This will require either:
- A double ¼ inch (6.35mm) to ⅛ (3.5mm) stereo jack Y-Cable if you’re connecting directly to your PC
- 2 ¼ inch (6.35mm) to ¼ inch (6.35mm) stereo cables if you’re plugging in via an audio interface (i.e. connecting both outputs to 2 inputs using separate cables)
Some modern mixing consoles can also connect via USB, so double check whether yours can!
Connect the mixing console to your computer or laptop via a Y-Cable or USB cable
If you’re connecting via the Y-Cable method, then connect the ⅛ inch (3.5mm) mini-jack into your computer or laptops line input (which will be stereo).

Top tip: You can always find out more information regarding outputs in your mixing consoles manual!
Open your DAW’s preferences and enable the mixing console
If you’re connecting your mixing console via stereo cables (i.e. not by USB) then you shouldn’t require any additional set up.
If you’re using a USB mixer, then you will likely have to enable it from your DAW’s preferences menu to be able to record.
Arm your track to enable recording
Now arm your track, and you should be getting some sound! If not, double check the above steps have been followed. If that still doesn’t work, check out the website of the device’s manufacturer or get in with them!
Connect your synth via USB
To connect your synth to a computer or laptop via USB:
- Ensure that your synth model is able to send audio via USB
- Connect your USB cable to your synth
- Connect the other end to your computer or laptop’s USB input
- Ensure any required drivers are downloaded and installed
- Open your DAW’s preferences and enable the synth
- Arm your track to enable recording
Ensure that your synth model is able to send audio via USB
Check to see whether your synth has a USB-B port. If it does, your synth can connect to your PC via a USB cable!
However, not all synths that can connect to a computer via USB can send audio.
As an example, I have a Yamaha CS Reface that connects to my PC via a USB cable. This, however, only allows me to send MIDI data instead of audio.
So, double check your synth’s manual to see whether you can send audio!
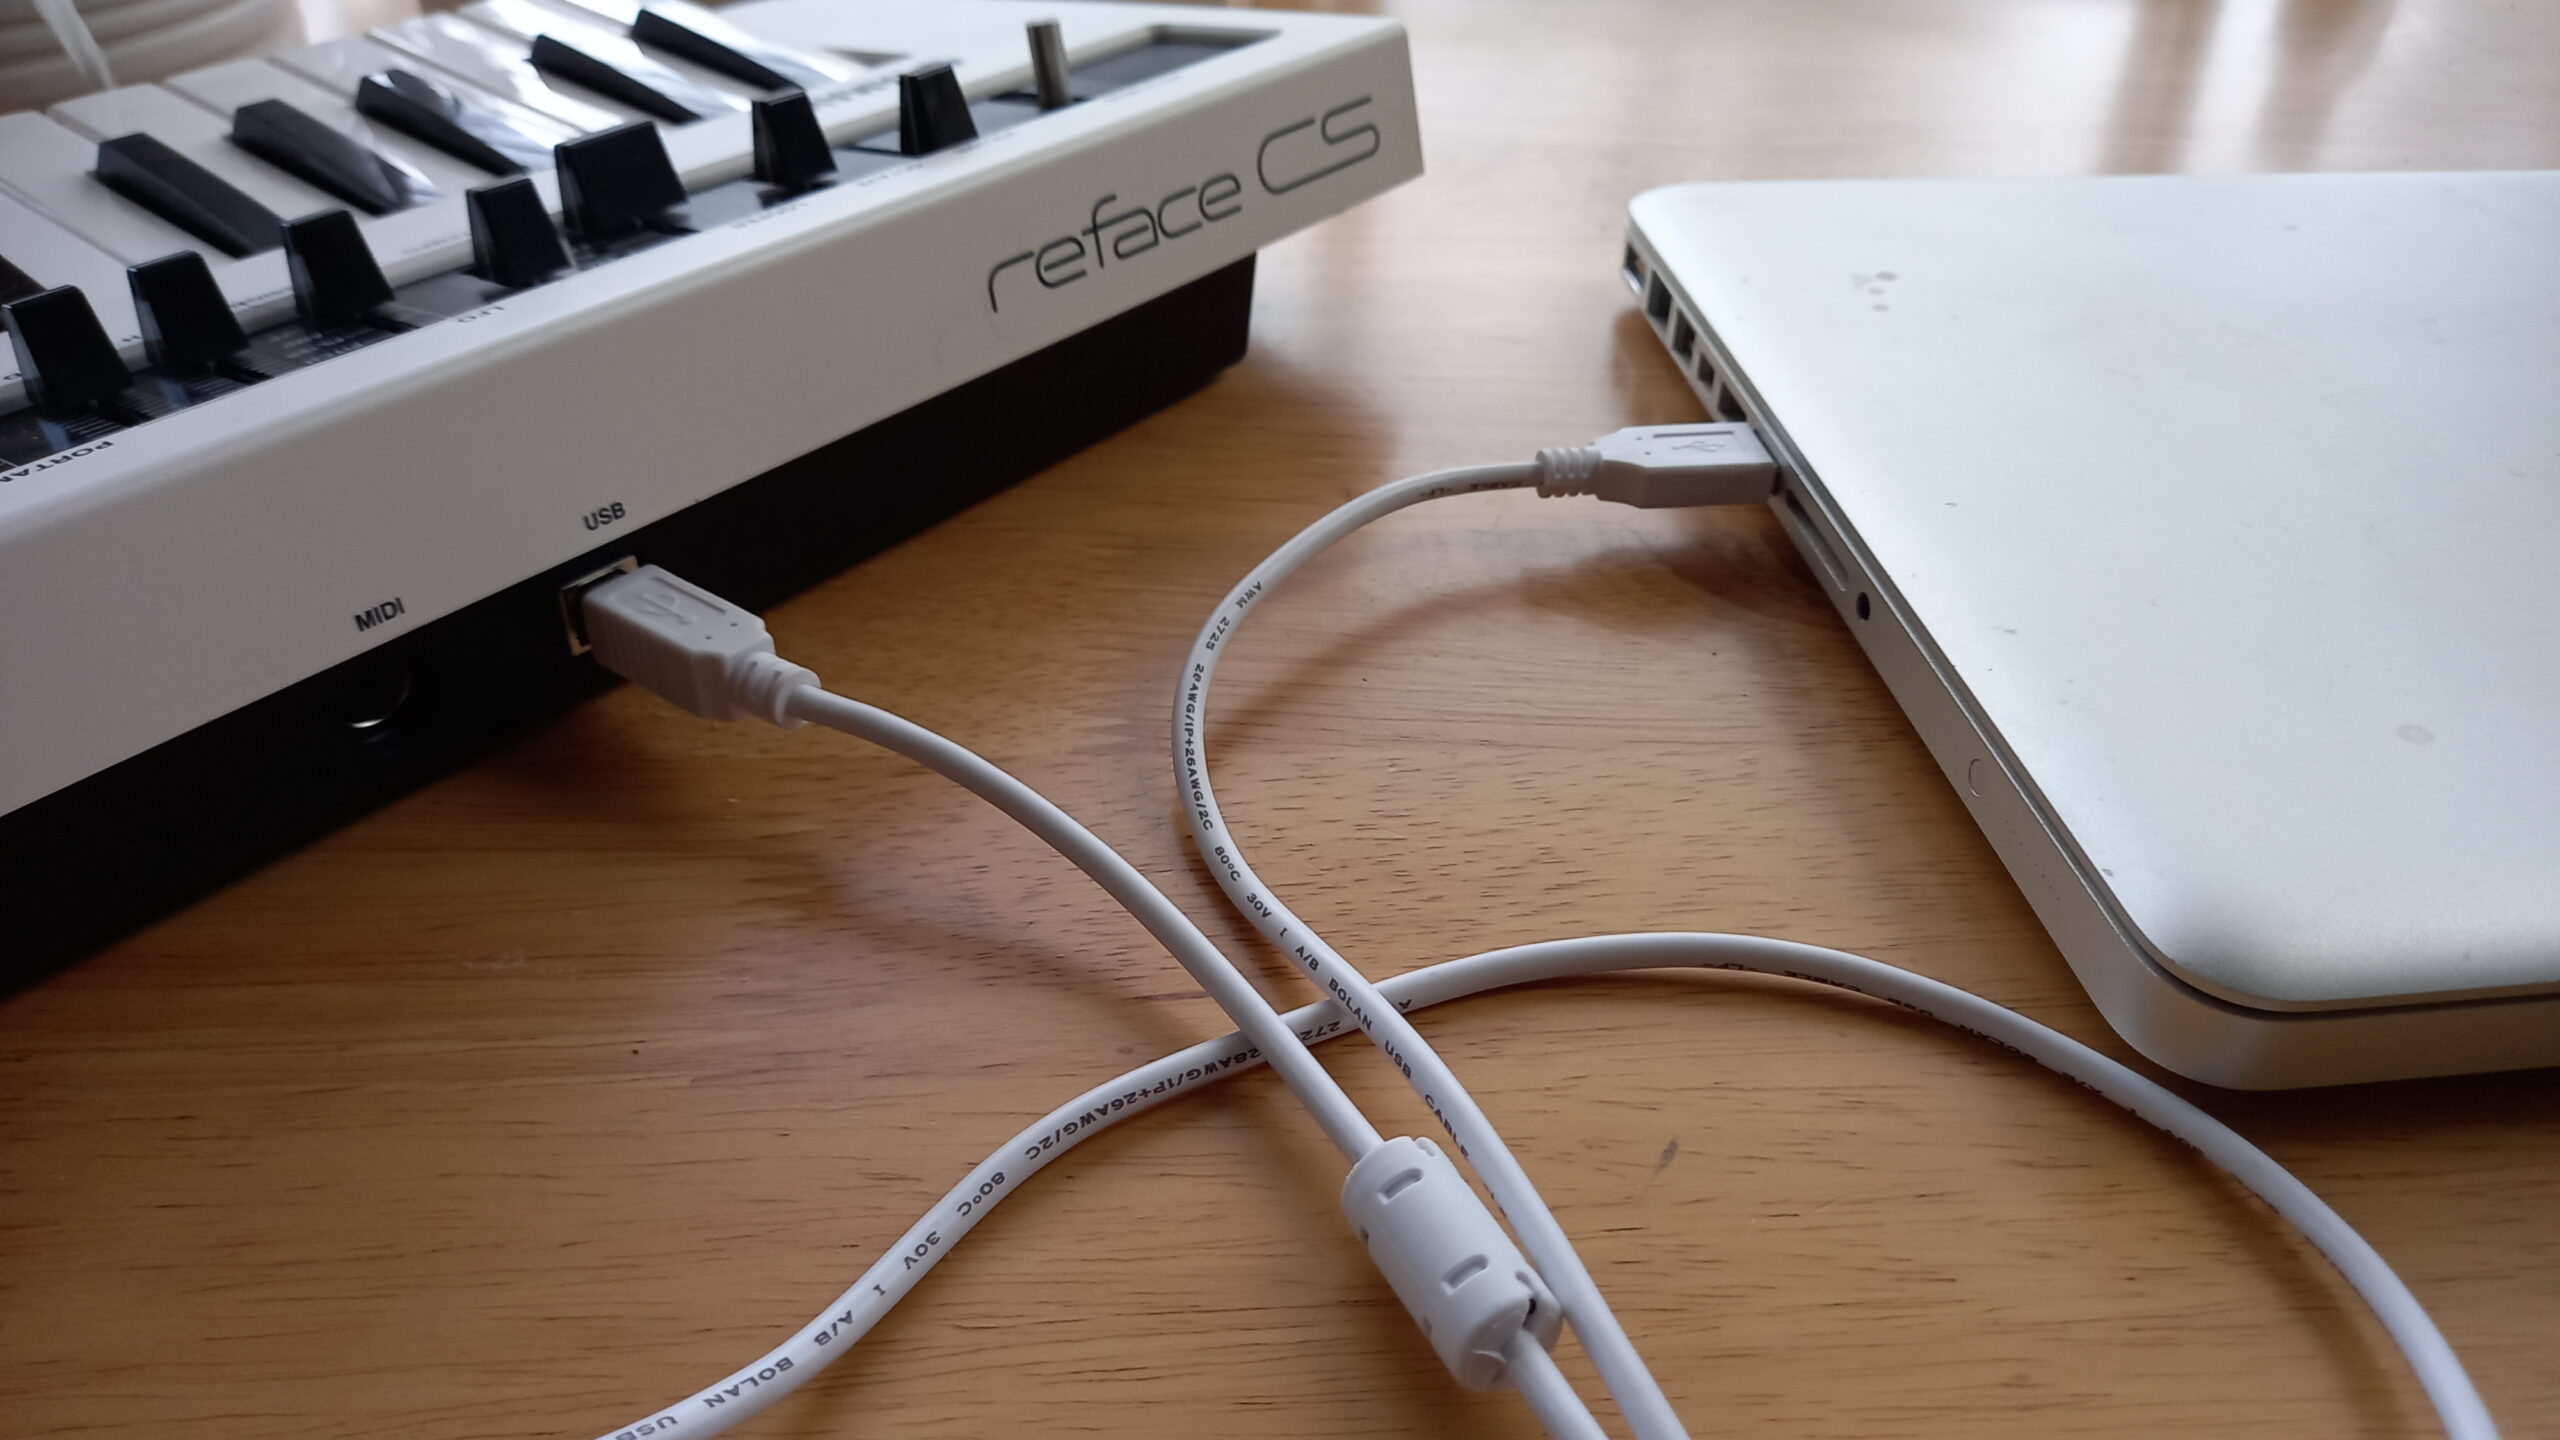
Connect your USB cable to your synth
In most cases, you’ll be connecting your synth via a USB-A to USB-B cable!
You’ll be plugging the USB-B end into your synth.
Connect the other end to your computer or laptop’s USB input
Like the above, you’ll connect the USB-A side of the cable into your computer or laptop. Like the below:

Ensure any required drivers are downloaded and installed
In most cases, plugging your synth into your PC should prompt a notification regarding downloading or installing a piece of software called a “driver”, this is a piece of software that lets your computer and synth talk to and understand each other.
If you’ve not been prompted to install any drivers, have a quick read through your synth’s manual to see if there’s any reference to drivers. If not, double check the manufacturer’s website to see if you can find any drivers manually.
If there’s still nothing, then you may not need them (though this is unlikely). If you’re having any trouble, check out the manufacturers website!
Open your DAW’s preferences and enable the synth
Now that your computer recognises your synth, you just need to go into your DAW’s preferences to enable it. It will be under the “inputs” section.
Arm your track to enable recording
You should be set up and ready to go! All you need to do now is to arm your track and press record!
Top tip: Not only can you record the sound from your synth, but with newer models you can also send and receive MIDI information, giving your instrument even more versatility. I’ve written about that in my “Related Questions” towards the bottom.
Record your synth using a Microphone
To connect your synth to a computer or laptop using a microphone:
- Connect your microphone to your computer
- Place the microphone near your synth
Connect your microphone to your computer
I won’t go into specifics as to how to connect a microphone in this article, however, it’s much the same as the other methods described above for connecting a synth, just with different cables!
Place the microphone near your synth
Depending on the sound you want, place your microphone near your synth or amplifier (if you’re using one).
This is a good method for getting a rough and lo-fi sound, though I wouldn’t recommend it for “standard” practice. It’s a lot easier and simpler to follow one of my previously mentioned methods!
Connecting your synth directly to your computer or laptop using a Y-Cable
To connect your synthesiser directly to your computer or laptop:
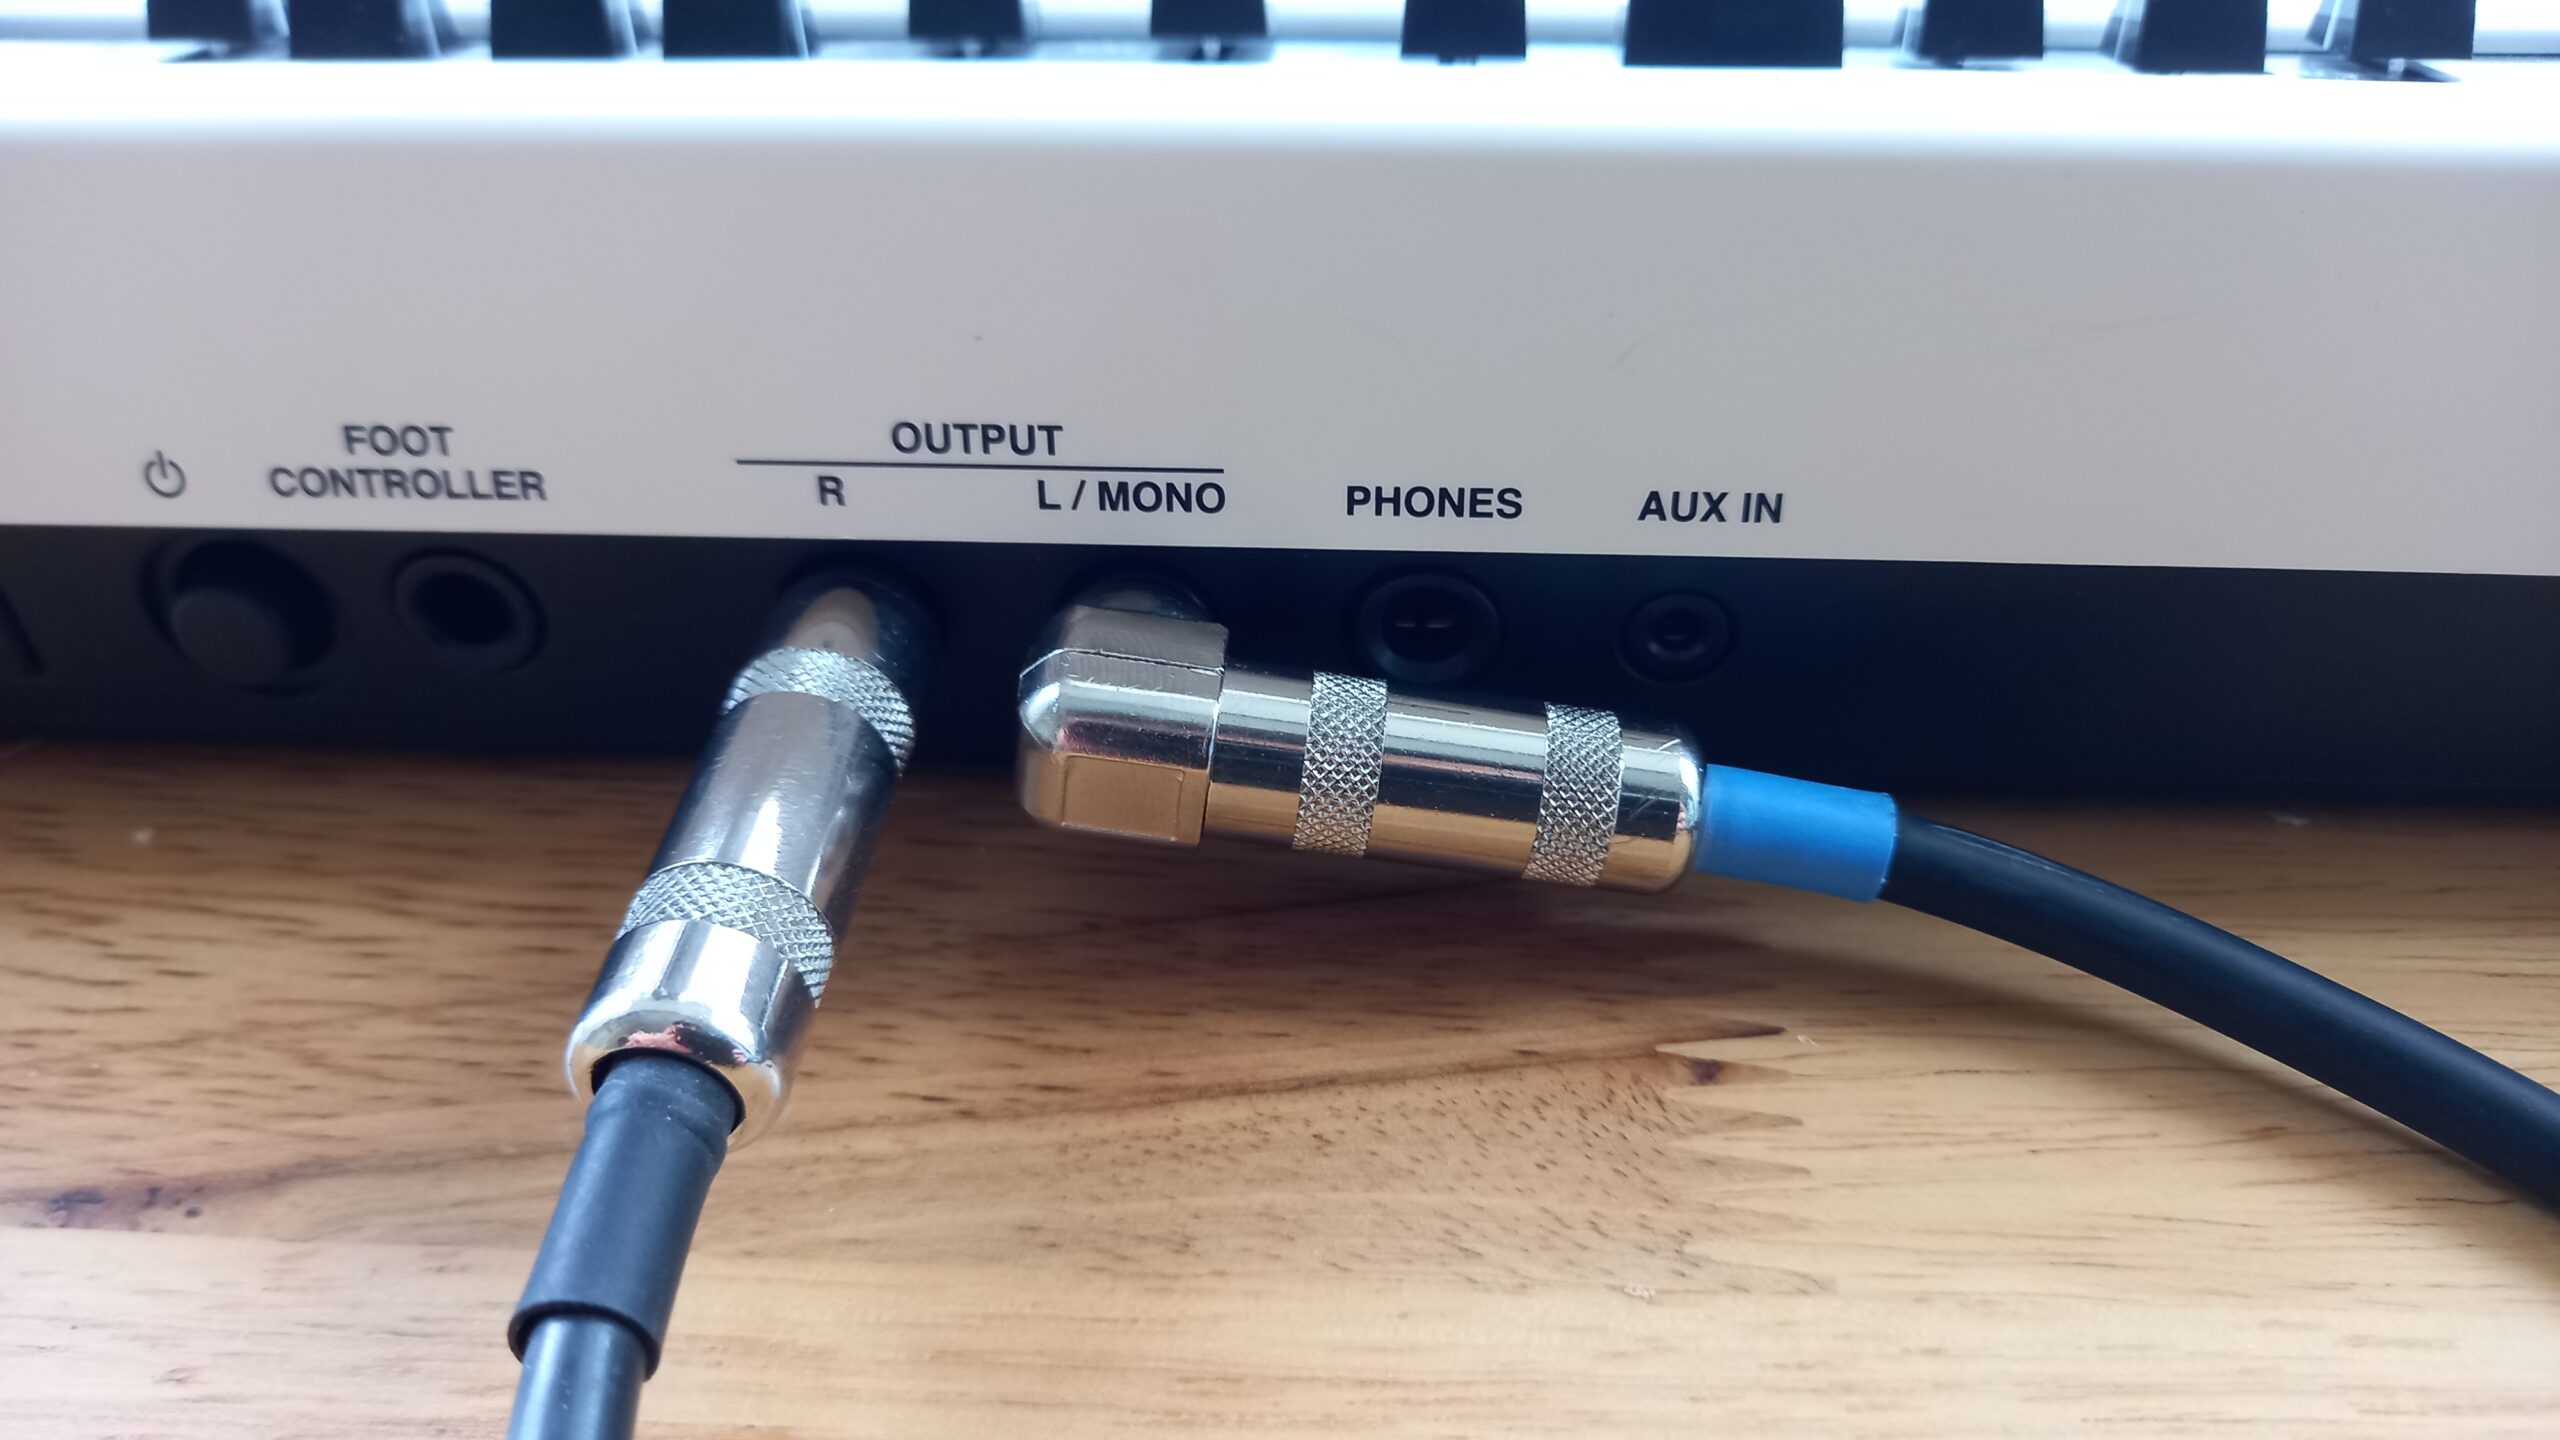
- Connect the ¼ inch (6.35mm) jacks of a Y-Cable to your synthesiser’s audio output
- Connect the ⅛ inch (3.5mm) jack of the Y-Cable to your computer or laptop’s “line in”
Connect the ¼ inch (6.35mm) jacks of a Y-Cable to your synthesiser’s audio output
Most synths have either 1 or 2 outputs at the back which are usually sized at 6.35mm (¼ inch). Plug the 2 6.35mm (¼ inch) jacks into your synth.
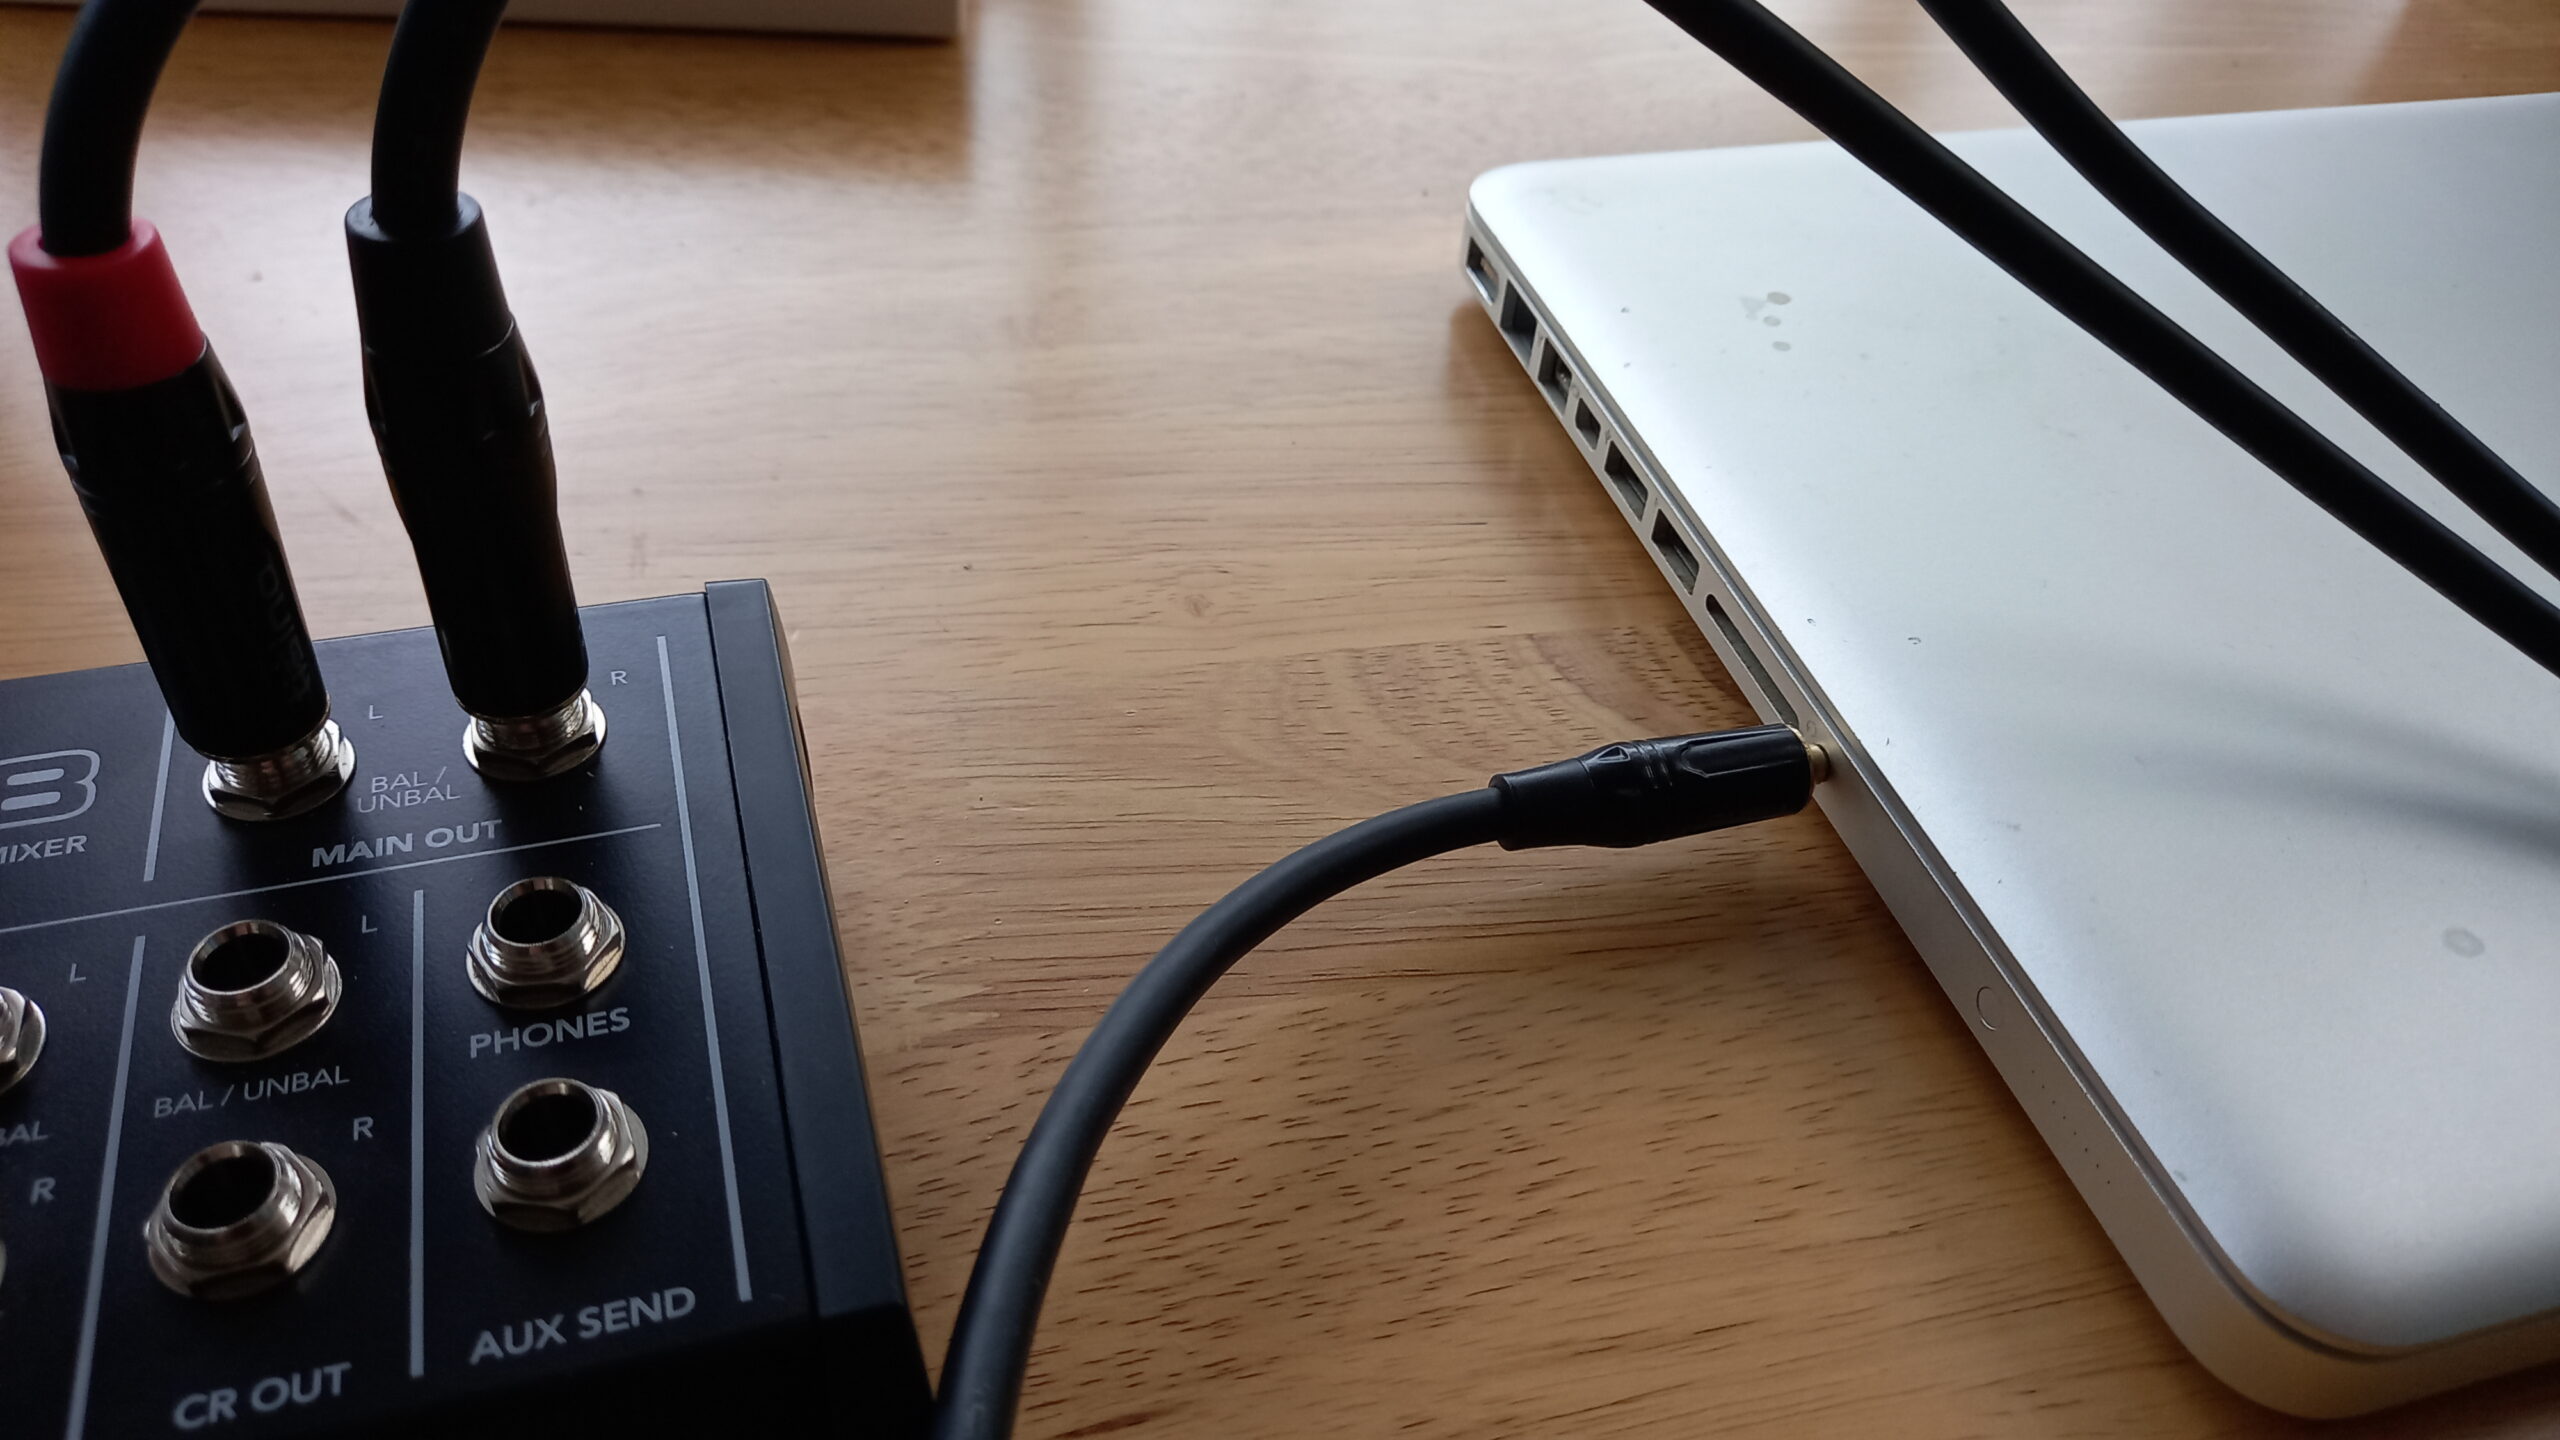
Connect the ⅛ inch (3.5mm) jack of the Y-Cable to your computer or laptop’s “line in”
You will be left with one available jack, the ⅛ inch (3.5mm) mini jack. Connect this into your PC’s Line Input (Line-In). This is shown in the below image:
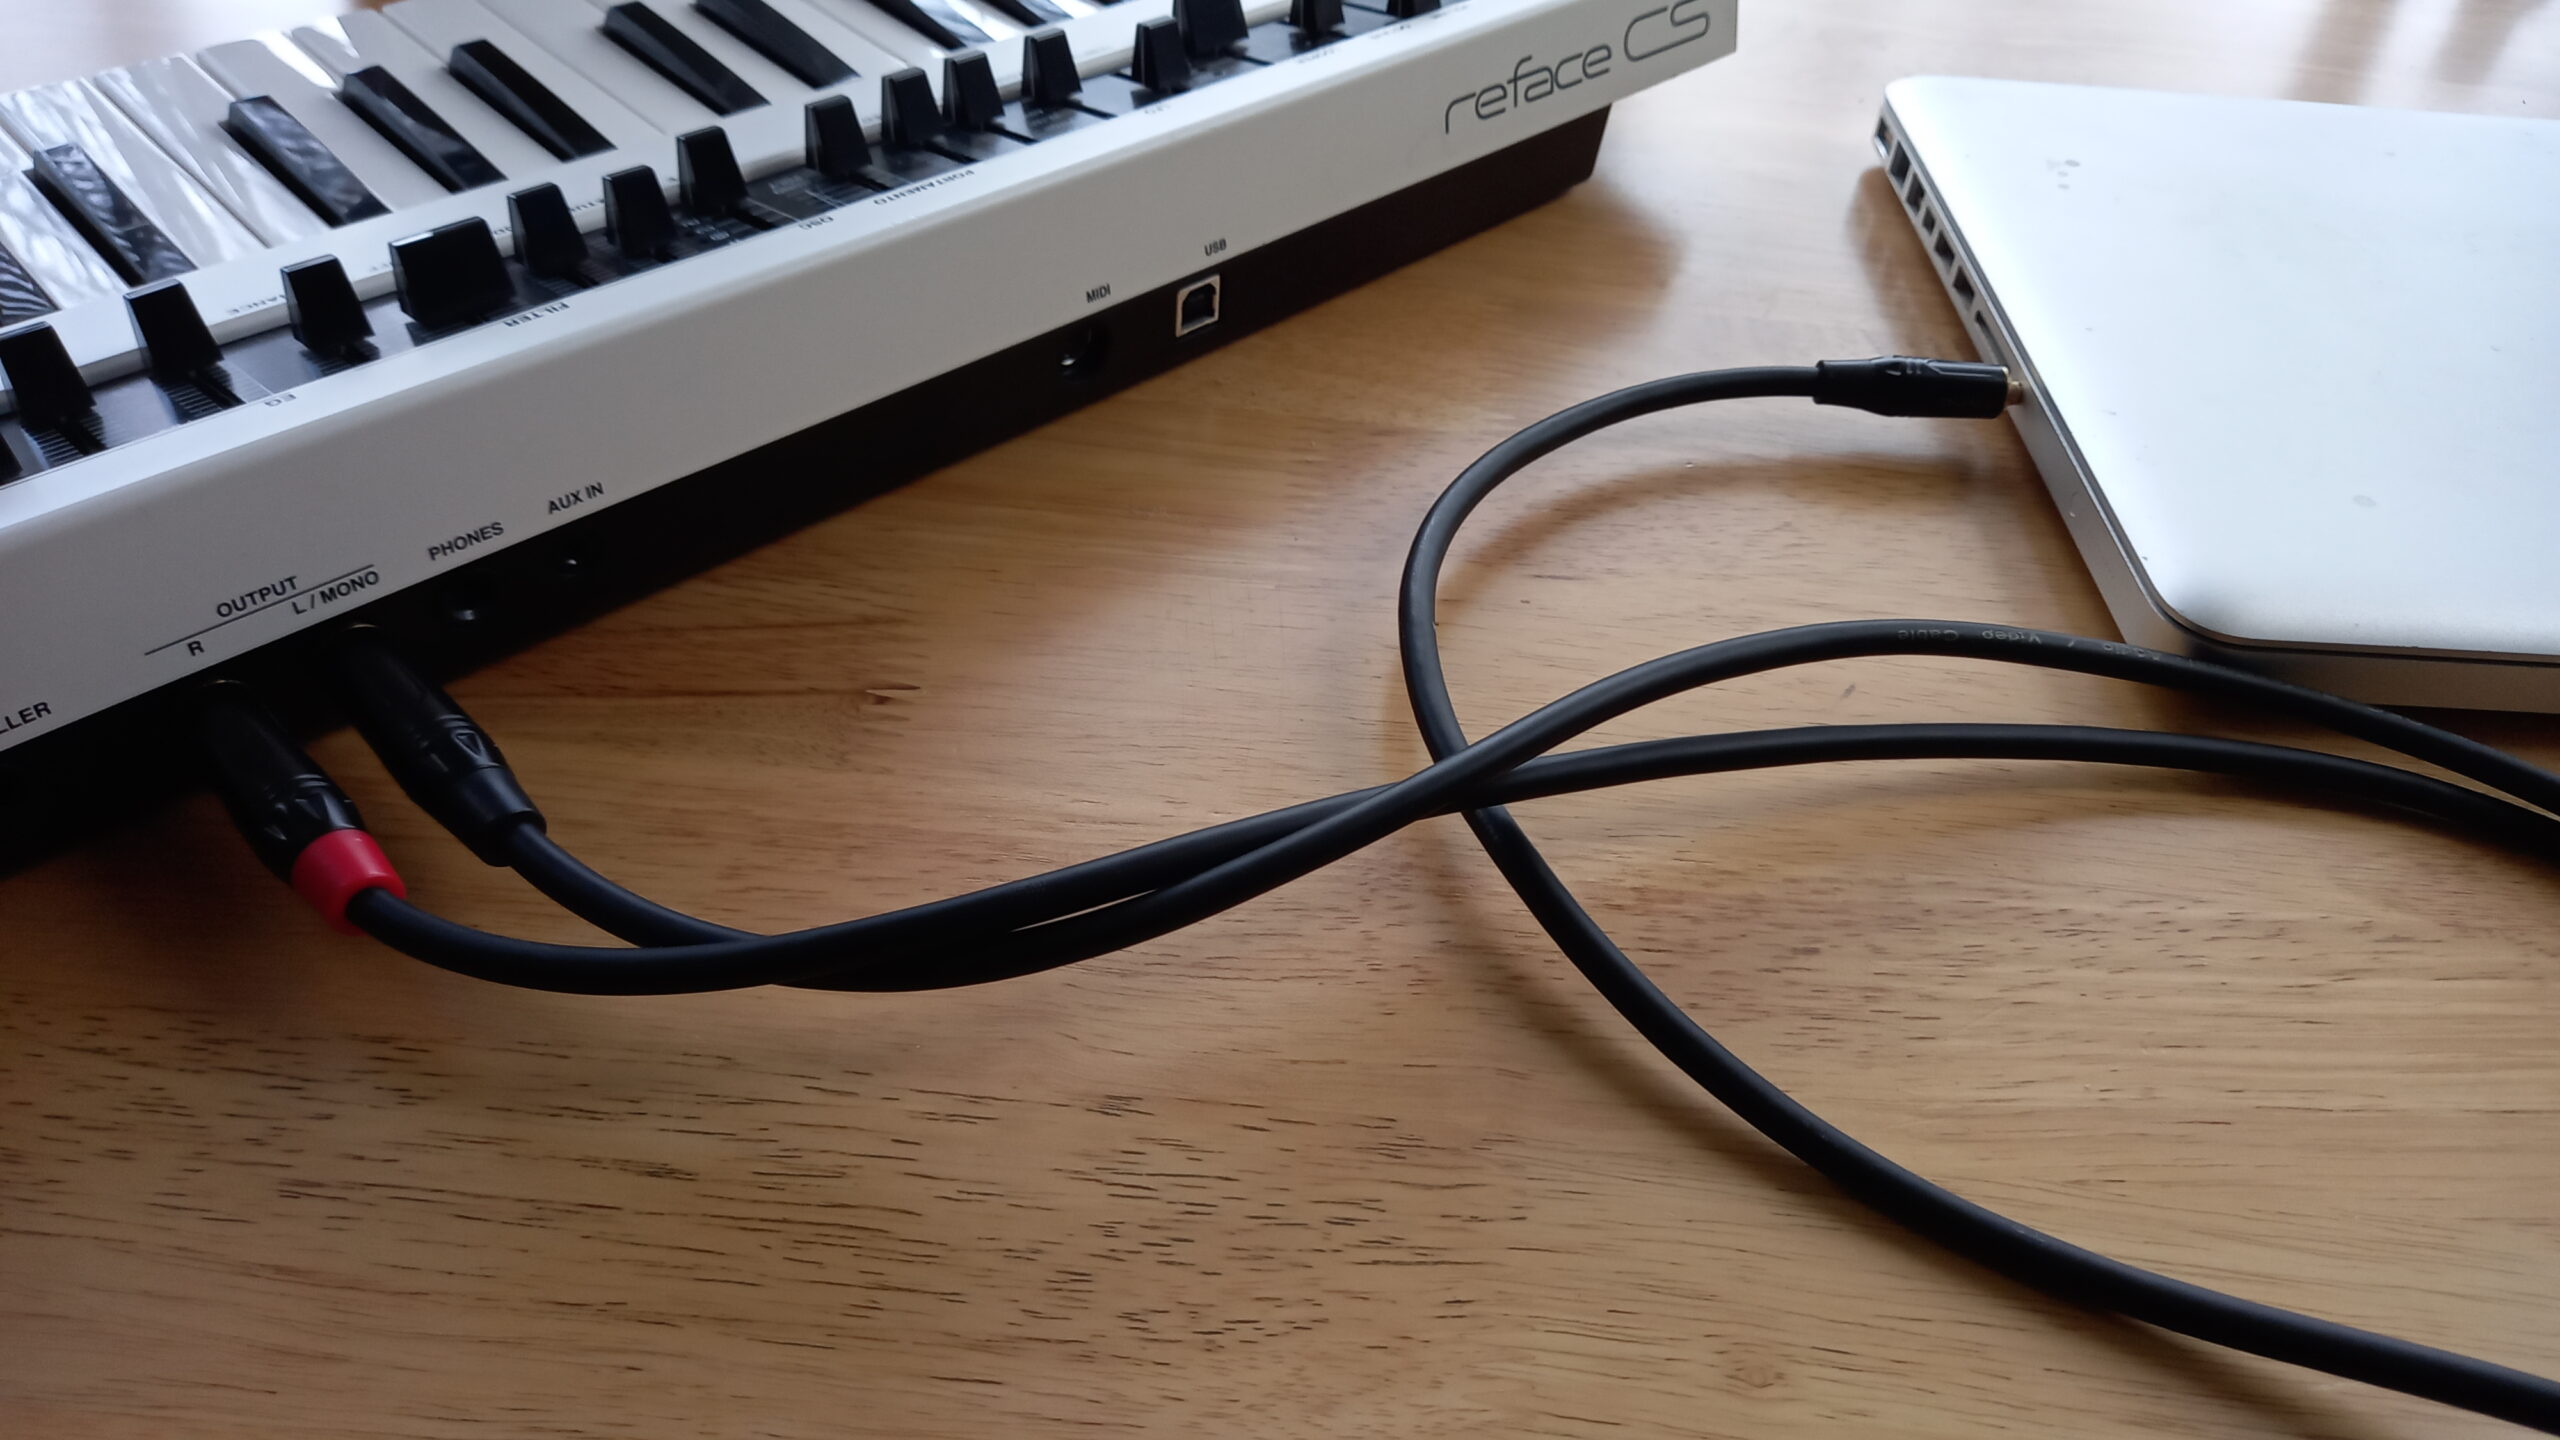
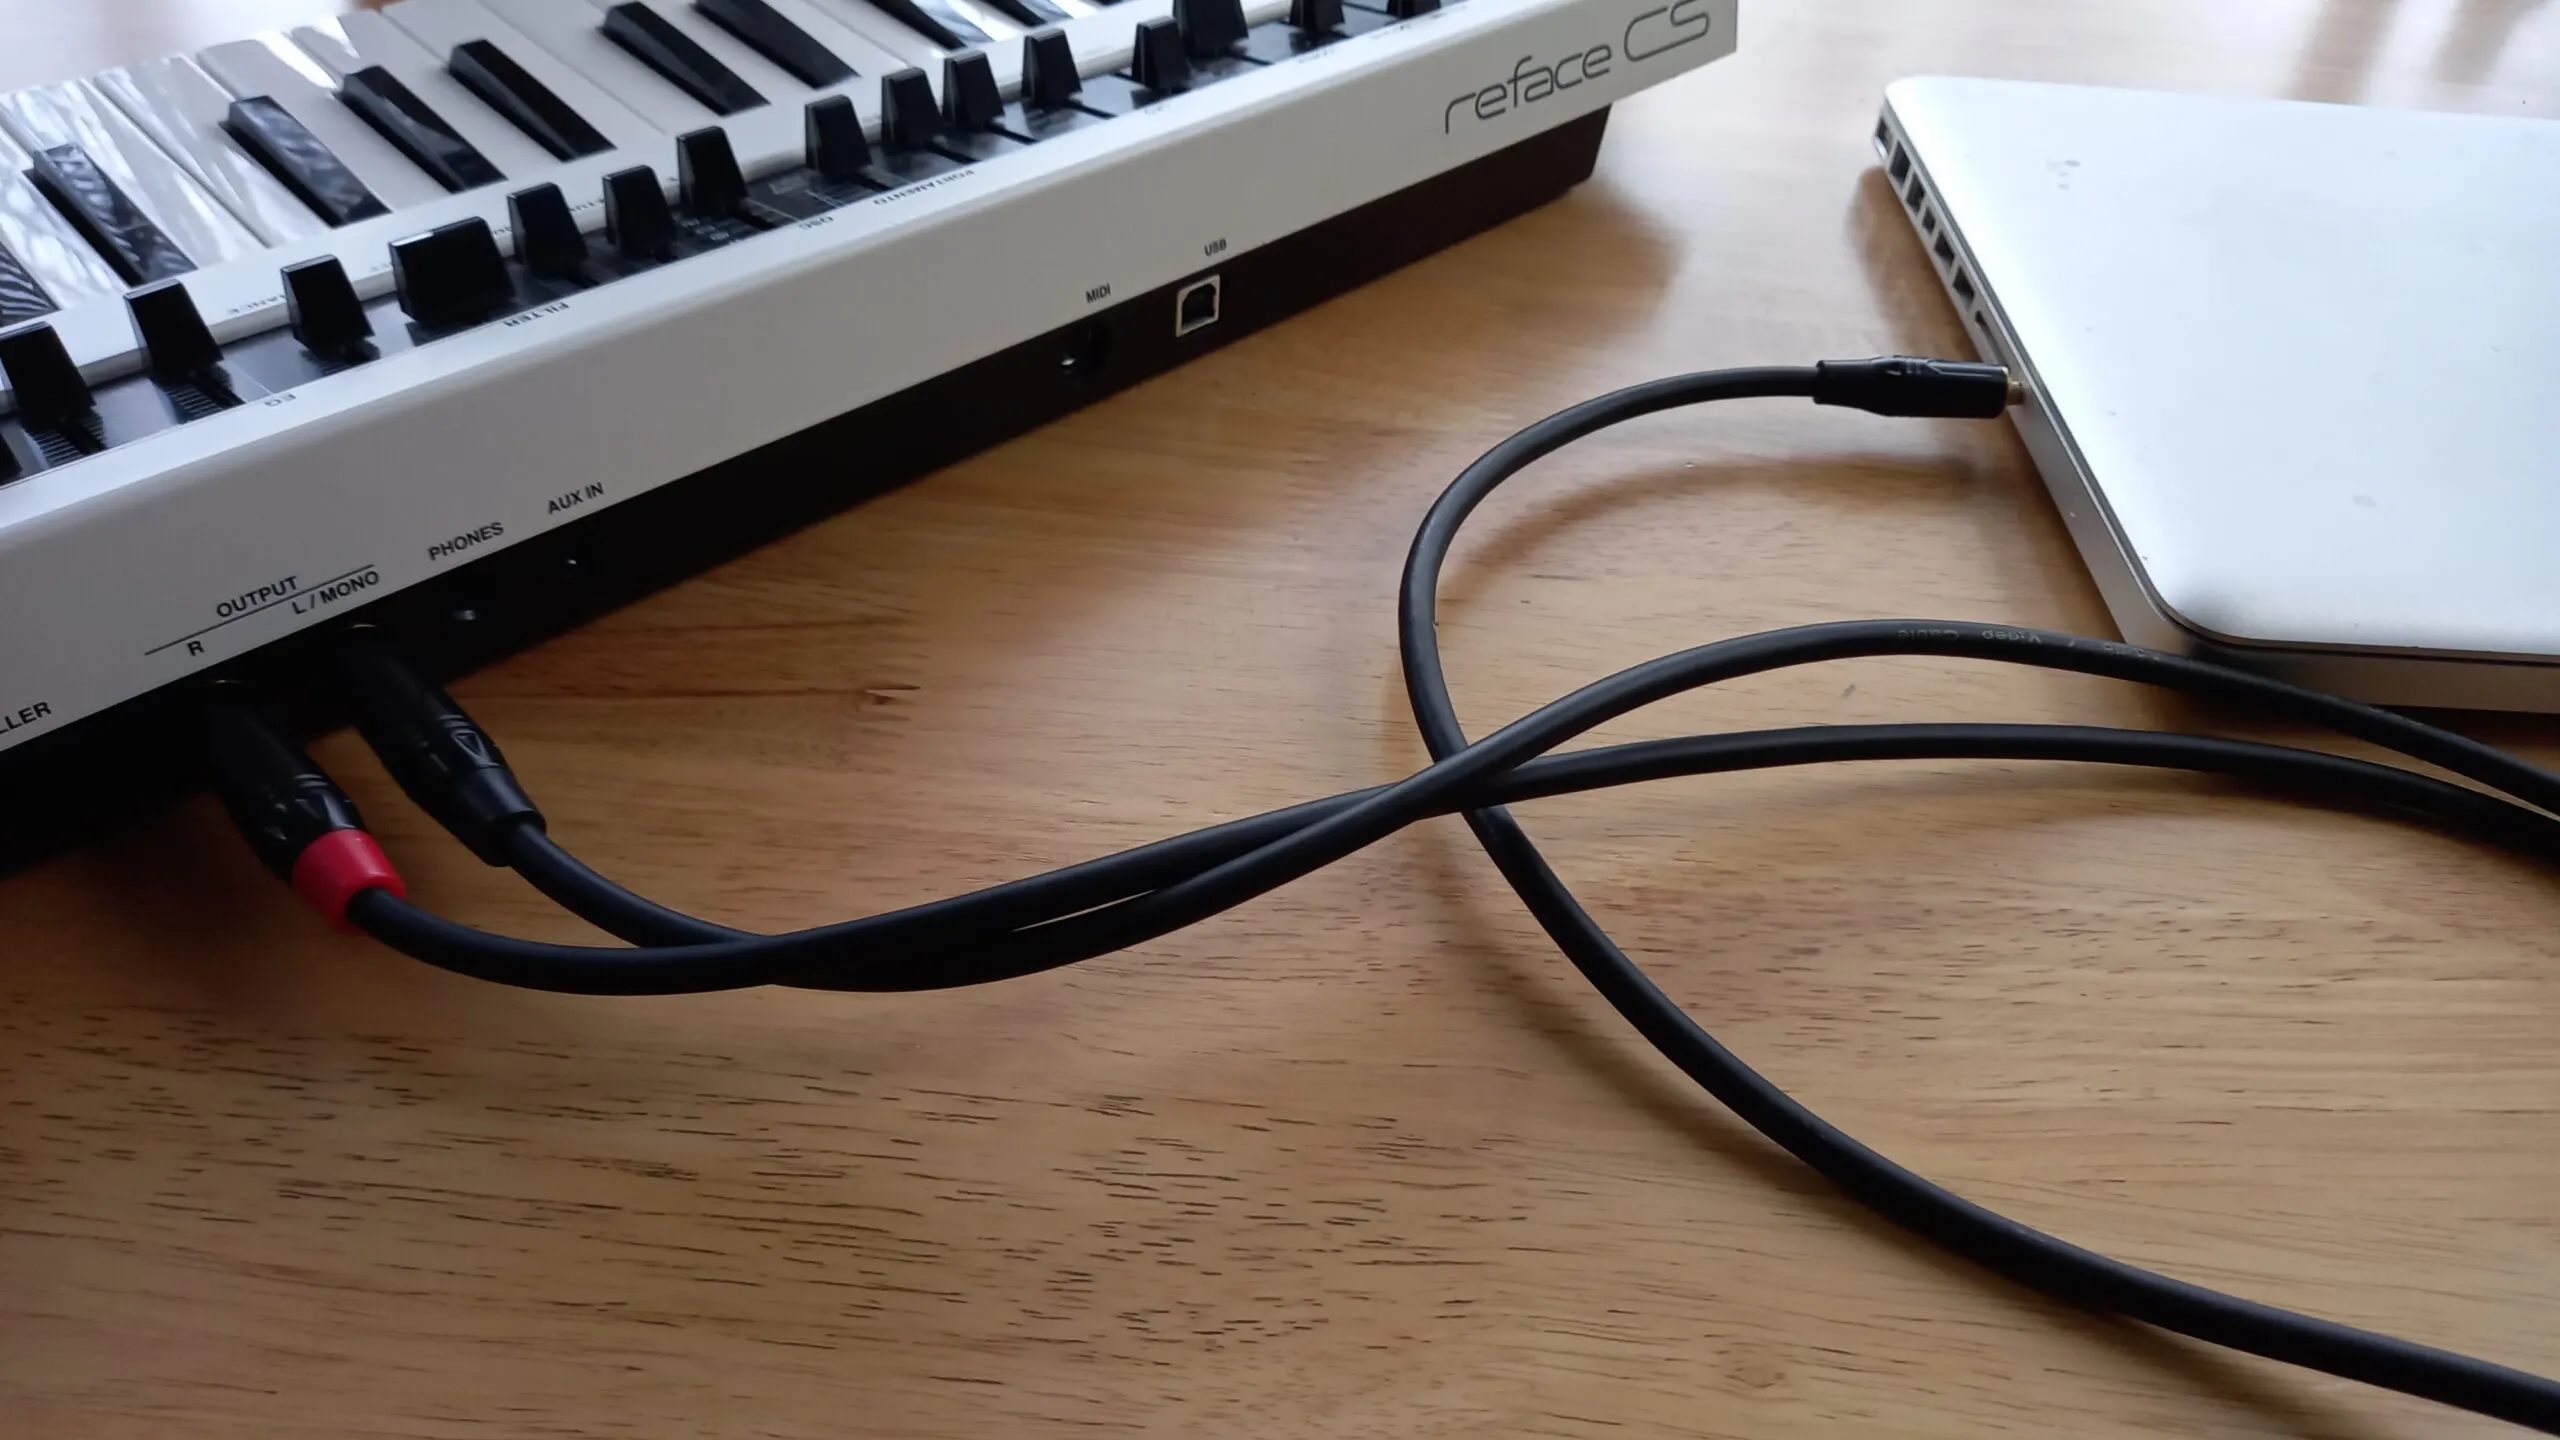
I don’t recommend using this way to record a synth, as there’s less control over the volume and gain which can lead to irregularities in your sound. If you’re on a tight budget, however, it can be a good option to get some recording done.
Summary
As you can see, there’s quite a few ways to connect and record a synth to your PC or laptop!
I always recommend using an audio interface or a mixing console for the most reliable sound quality. Also, you can connect other devices to it which makes it more useful to you in the long run.
Personally, I record using a mixing console as I like the EQ shaping functionality as well as being able to use it for live performances!
I’ve included some related questions below that will help you understand more about connecting and recording your synth.
If you think I’ve missed something, or have any additional questions, get in touch at [email protected]
Related Questions
Can you use a synthesizer as a MIDI keyboard?
In most instances, you can use a synthesizer as a MIDI keyboard. Most synthesizers will have a “MIDI OUT” port which can send MIDI signals.
To use your synthesizer as a MIDI keyboard, simply connect your synthesizer to a MIDI interface, using your synth’s MIDI OUT port. Then connect your MIDI interface to your computer using the cables provided with it. Then, enable the device in your DAW. You should now be able to use your synthesizer as a MIDI keyboard.
Most modern keyboards come with a USB connection that allows them to send MIDI information to your PC without requiring a MIDI interface. If your synth has a USB port, read the devices manual to see if you can do this!
Which Audio Driver Should I use for recording a synthesizer?
The audio driver you should use to record your synthesizer on your computer or laptop depends on whether you are using an audio interface or via a mixing console/directly.
- If you are recording your synthesizer via an audio interface, then you will always be using the driver associated with your audio interface. Ensure that it is always up-to-date by checking the manufacturers website.
- If you are recording via a mixing console or directly into your PC, use the “ASIO4ALL” audio driver. You may need to download and install this as it does not come as standard with most PC’s. This is a free low-latency audio driver that is optimised for audio recording purposes.
Should I record my synth in Mono or Stereo?
In most instances, most people agree that you should be recording your synth in Mono. This is mostly because it makes the signal easier to work with in your mix, whereas stereo can introduce complications when mixing. Recording a synth in stereo is mostly beneficial when there is a stereo effect present, such as using an onboard “chorus” effect.
What is an Audio Interface?
An Audio Interface, sometimes called a “sound card”, is an external device that allows you to connect external instruments and hardware to your computer or laptop.
Almost every computer or laptop will have some kind of built in audio interface, like the ports you use to connect headphones. An Audio Interface provides better functionality than most built-in sound cards as they often have more ports, pre-amps, better monitoring capabilities, and occasionally MIDI input and output.


Conor is a music producer, multi-instrumentalist, and all-round enthusiast from the UK with over 15 years of experience. He’s the founder and sole-content creator for the roundtable audio blog and YouTube channel.