
Every vocalist wants to get a professional quality recording when they’re in the studio. Whether you’re singing, podcasting, or doing voice-over work, it’s important to have a clean and clear recording. I’ve put together 13 vocal recording tips to get you studio quality vocals, every time.
Here are my tips for recording vocals:
- Pre-recording: Reducing ambient noise, isolating yourself, warming up, using a shock mount and pop filter.
- During recording: Use closed-back headphones, a good mix, and get your levels right.
- Production: Using composite tracks and effects that will enhance your voice.
If you find your vocal recordings lacklustre, and you can’t tell what you are doing wrong, then this article is meant for you. I’ll give you all the tips you need to produce the best quality vocal track you can, covering tips for pre-recording, during recording, and production.
Before recording
Many factors can impact recording vocals, not just your voice. Preparing yourself and your environment before a recording session is an essential first step before getting in front of a microphone.
By taking care of the elements that can hinder your recordings, such as ambient noise, inadequate gear, and poor recording techniques, you’ll be setting yourself up for success.
1: Isolate yourself and reduce any ambient noise
There’s nothing worse than background noise in a vocal take. Dogs barking, planes flying overhead, or noisy traffic will ruin just about any vocal track, no matter how well your performed. This is why professional vocalists record in an isolation booth at a studio filled with sound absorbers and diffusers.
Remember, when you are recording vocals and trying to reduce ambient noise, you are trying to achieve 2 things. The first is sound isolation, where you are trying to separate your voice from external elements. The next is sound absorption, which reduces effects like unwanted reverb from the room. You preferably want as much of a “dry” sound as possible to make your track easier to mix and adjust with effects.
If you can’t record in a professional studio, then there are steps you can take to reduce ambient noise in your recording space, along with echoes and reverb.
If you have some available cash, you could opt to invest in some equipment to reduce ambient noise, such as sound diffusers and absorbers. These are great pieces of audio equipment that absorb sound and diffuse specific frequency ranges.
Check out these sound absorbers on Amazon here
Check out these sound diffusers on Amazon here
If you’re really on a budget, you can also get the job done with household materials, such as heavy moving blankets. Essentially, what you would want to do with the absorbers or moving blankets to create a makeshift vocal booth by placing them on the walls or cupboards close to where you are recording.
By following the steps on the below checklist, you’ll ensure that your studio will be set up for quality vocal recording takes.
- Close any windows/doors
- Turn off any noisy equipment (e.g., fans, Air Conditioning, TV)
- Put any pets away
- Get yourself sound diffusers and absorbers
- Record your vocals at times in the day when it is quiet
- Cover your recording space with heavy moving blankets
2: Purchase a shock mount for your microphone
Shock mounts can be a determining factor in getting an excellent vocal recording.
A shock mount allows the microphone to “float” freely in a suspended basket. This means that it won’t pick up any unwanted noise or resonance when you accidentally bump it, or tap the floor with your foot.
Resonance (the sound from movement) creates a low rumble in your vocal takes that is very hard to remove in production, and is often at the expense of degrading the vocals to a large degree.


Ideally, you should be using a condenser microphone to record your vocals as they provide superior sound over dynamic microphones. As these types of mics are very sensitive to sound, it means that they’ll be more susceptible to resonance, so opting for a shock mount is paramount.
Different shock mounts are used for different microphones, so there’s no one-size-fits-all solution. Make sure to do your research and get the right mount for your microphone.
3: Improve your recording with a pop filter
A pop filter is another inexpensive piece of music equipment that is key to any good vocal recording.
Plosives occur when you speak or sing a word by denoting a consonant. It is produced by stopping the airflow followed by releasing the air, and it creates clipping in your recording. Letters such as P, B, K, T are examples of plosives.
A pop filter essentially halts this gust of air and reduces excess low-end frequencies and clipping.
Clipping means that the microphone has registered and recorded a sound beyond what it is capable of, and when you play that section back, the sound will be distorted, louder, and will have a noticeable “pop” to it.
I’ve written a full article on this website explaining pop filters here that I’d recommend checking out.
I recommend the SeElectronics Studio Mic Pop Screen as the best pop filter for beginners. You can pick it up on Amazon here.
4: Use a cardioid-pattern microphone
Most people don’t consider one important factor before they start recording: the polar pattern of their microphone. The polar pattern of a microphone is the direction that the microphone picks up sound from.
The best polar pattern to record vocals with is a cardioid pattern. This pattern only picks up sound from directly in front of the microphone.
Other polar patterns, such as omnidirectional, supercardioid, hypercardiod, will pick up sound in different ways which can impact your sound.
I’ve written an article on this website that covers everything you need to know about microphones, including the different polar patterns and their uses.
Check out this cardioid condenser microphone on Amazon here.
5. Warm up your vocal cords
Warming up your voice before any performance, live or studio, is crucial and will benefit your recording greatly.
Think about this: you don’t see a star athlete who doesn’t warm up. Even though this metaphor is a bit overused, it holds true.
Just like an athlete, your vocal cords are comprised of muscles and tissues that need to be flexed and require oxygen and blood for them to work correctly. The only way to do this is to warm them up. It also reduces the chance injury, which will keep your vocal cords in working order for years to come.


You should warm your vocals up for 10 – 15 minutes before doing a vocal take to ensure that your vocal cords are stretched, your muscles are loose, and your throat is clear.
Try these vocal warm up exercises:
- Humming
- Tongue trills
- Lip rolls
- Practice scales
- Practice arpeggios
- Jaw loosening
Make sure to to practice using a small range of notes in your different vocal registers (chest, middle, and head) instead of doing a scale that spans your full vocal range. This puts less stress on your vocal cords, and is a more efficient way to warm them up.
I recommend doing this alongside a piano, or instrument that you know is in tune, to ensure you’re hitting the right pitch.
Bonus tip: One of the biggest mistakes that a vocalist will make is trying to warm up by singing songs that they know. This won’t work the vocal cords the same way that structured exercises will, as the intervals that you go through in a song that you know are learned time and time again. Structured exercises will allow you to practice through the weak spots in your voice.
6. Practice proper vocal techniques
In addition to warm up exercises, there are other vocal techniques that need to be practiced to ensure you can get the best performance. These techniques are:
- Breathing correctly (i.e., diaphragm breathing)
- Standing the correct distance from the microphone
- Recording off-axis into the mic
Breathing Correctly
Correct breathing is another principle of singing that will take your performance to the next level. The correct breathing technique can open up the voice making it sound smoother and richer. In contrast, not using a proper breathing technique can lead to a strained performance which will be obvious to listeners.
Here’s a great article from the BBC that will help you achieve the right breathing technique.
Standing the correct distance from the microphone
The distance you stand from the microphone has a large impact on the overall sound of the recording. The further away you stand, the softer the recording will be, and conversely, it will be louder the close you stand.
Not only this, but the frequencies picked up from a microphone change at certain distances. This is called the microphone’s proximity effect. This phenomenon leads to more low end being picked up the closer you are to a microphone. While this can lead to thicker vocals, it can also introduce a low-frequency hum and rumble.
To get the best performance, you need to practice standing at different distances from the microphone and hearing how it sounds. This will allow you to learn how close or far you need to be during your performance.
Next time you watch a professional singer, watch how they move the microphone during loud and quiet parts of a song.
Recording off-axis into the mic
The last factor to consider is that you don’t always have to stand in front of the microphone. By turning your body slightly to the left or right of the mic, you are singing into it from an off-axis position, which is a technique used to reduce sibilance.
Sibilance is the “hissing” sound that you make when you pronounce words with the letter “s.”. Whilst there are ways to remove it by using plugins (which I’ll discuss further down), prevention is better than cure. Using a plugin such as a de-esser could degrade the quality of the track if not used correctly.
Practice singing into your microphone from different angles to find the perfect spot to reduce sibilance.
7. Test your recording levels
Having the correct levels is essential for getting a quality vocal recording. It’s important to ensure that the vocals are loud enough to be heard without distorting or taking up too much headroom.
Headroom is the gap between the loudest part of a recording and the maximum possible recorded value (0dBFS for digital recording). This gap gives you, as a vocalist, a safe margin to avoid clipping, as well as giving plenty of space for any production required.
If you are recording vocals yourself, you’ll need to make sure that the vocals are averaging -18dBFS, and are not peaking above -10dBFS. This will give plenty of headroom for any mixing and mastering. If you’re recording in a studio, then the producer or sound engineer will monitor this for you.
Bonus tip: When testing your levels, you can use this as an opportunity to practice your vocal take!
During recording
Now that you’re all set up, it’s time to record! Like the previous section, there are a number of essential factors to consider here to help you get the best performance.
8. Monitor your vocals using closed-back headphones
Closed-back headphones are essential for vocal recordings. Not only do they block out external sounds, so you’re able to hear yourself more clearly, but they also stop the monitor signal that you are listening to from getting picked up by the microphone.


This would otherwise introduce an unwanted sound into your recording, and can even cause feedback in some instances. Remember that when you add effects to a track, it amplifies or enhances everything that is recorded, so having a layered copy of your voice and any other instruments in the mix is far from ideal.
I’ve written about closed back headphones on this website in the this article if you’d like to learn more.
9. Create a headphone mix
A headphone mix is what the you will be listening to when recording your vocals. It’s an essential tool for ensuring a professional level performance as it will keep you in time, and allow you to hear yourself and adjust your technique if needed.
As a singer, you’ll need a headphone mix to know where to come in, where to stop, and how the song goes. Try to aim for a headphone mix where your vocals are clear with the backing track sitting quieter, as a reference and not as support.
In addition, having the right headphone mix can make you feel relaxed, and give you a boost of confidence when recording. When you hear yourself in a way that sounds good to you, you will automatically adjust your technique (both personal and surroundings) to get the best sound out of your voice. A lot of producers use a little bit of reverb in the headphone mix to give a stronger performance.
I’ve laid out some tips for you to consider below. Try them out and see what works for your headphone mix:
- Make sure the volume of your voice is loud enough
- Make sure you can hear yourself clearly
- If you are a singer, then use a backing track if necessary
- Use some effects if necessary (reverb and delay) but not too much
- If you are a podcaster, then adjust each volume (for guests) individually
- If you are a voice-over artist, then use the appropriate music score or backing track
10. Record your vocals as a dry signal
Even though you may use some effects when monitoring, you must always try and record your vocals as dry as possible.
This is because having a dry recorded signal means you will have more headroom in production. You will be able to adjust, EQ, compress, and add effects without worrying about having some other effect or noise amplified or enhanced.
I touched on how to get a dry vocal recording by attempting to eliminate ambient noise and reflections, and reverberations in the room with a few elements, which are essential for a clear dry signal.
Here’s some tips on how to record a dry signal:
- Record the vocal track without using any effects
- Use the elements of a vocal booth if you can (absorbers, diffusers, heavy moving blankets)
- Block out external ambient noise
11. Record multiple takes of your vocals
Think of your favourite song. The chances are high that it’s not the first take that the artist did in the studio!
Some artists spend days, weeks, and even months redoing their vocals if they feel that they’re right. It’s important not to put pressure on yourself to get a vocal line down in the first take.
Recording many vocal takes will also give you the benefit of choice. For example, you can take different pieces from different recordings and join them together. These are called “composite tracks” or “comps“. If you have a good sound engineer or producer and you have practiced the above equipment strategies, then it will sound like it was all done in one take!
Here’s some tips for recording multiple takes
- Sing the same distance away from the mic
- Sing in the same position away from the mic (off-axis and so on)
- Try and record as many takes on the same day
- Take a break if you’re becoming frustrated
After recording (production)
Finally: your vocals are recorded, but the job isn’t over yet! There’s still post-production work that’s needed to bring your performance to life, and this can make or break your recording.
In fact, producers get paid a higher percentage of an album sale than the artist for this exact reason. Production is a crucial part of a recording that can turn a track into a number 1 hit or a flop.
If you don’t have a qualified producer or sound engineer on hand, you can still achieve professional quality vocals by following the below steps.
12. Form a composite track of your vocals
You’ll remember composite tracks from step 11. Now’s the time to listen through your different recordings and find the best bits to make 1 super track.
To do this, you will need to blend the vocal sections together, and the best way to achieve this is by fade ins/outs for each take. Applying this type of effect is pretty straightforward no matter what DAW you are using.

This is done because the beginning or end of takes may have some unwanted noise, and a quick fade in or out will help remove it.
Another thing you will need to consider is that you might have to compress the entire vocal take. This just means you will bring the loudest and quietest sounds closer together, to create a more consistent volume. If you’ve followed the recording advice above, then you shouldn’t need too much compression at this stage.
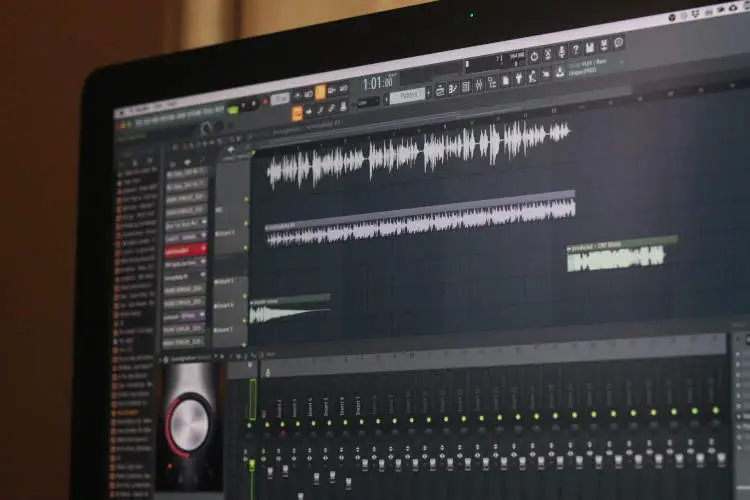
13. Use post-production effects
You should now have a vocal track that is clean, dry, has no ambient noise, and is joined together cleanly with no hisses or pops in it. Now’s the time to add effects.
Post-production effects take your composition to the next level, and with the way that technology and plugins work in today’s digital world, they are nothing short of incredible.
If you have a producer, this is their job, but if you are new to music production, you can get a great result by following using the below effects (in the order they’re listed!).
I’ve also written a guide on this website here about the mechanics of adding effects in your DAW, and how best to set them up.
Here’s a list of effects that work great with vocals:
- High pass filter (used to remove the low frequencies that are not being used in a vocal track)
- De-esser (used to remove sibilance)
- Auto-tune (used to help with pitching)
- Equalizer (used to attenuate or push frequency ranges)
- Compression (used to flatten out the volume)
- Delay (used to create depth)
- Reverb (used to create space)
High Pass Filter
A high pass filter (HPF) removes low frequencies under a set range. As a rule, you will always want to remove frequencies under 20Hz as they are imperceptible to the human ear.
For vocals, I recommend starting the HPF at around 100Hz and working up from there. Listen to what you’re removing and make sure that you’re not losing too much low end, as this will leave your performance sounding weak.
De-Esser
Sibilance is the “hissing” sound made by the letter “s”. If you followed the above tips, then this will be reduced by singing off-axis, but you may find a few have made their way into your recording.
De-Esser plugins are designed to reduce and remove the presence of sibilance. I recommend the RX8 plugin by iZotope. It’s the one I use and have had the most success with.
Auto-Tune
The words “auto-tune” may get you thinking about artificial sounding, digitised, vocals but it’s a really useful tool for cleaning up a performance, when used in moderation. Putting a little bit of auto-tune on your vocal track can help smooth any edges that may be caused by slipping out of key.
Equalisation
It’s likely that you’ve come across equalisation before, sometimes called “EQ”. It allows you to cut or amplify specific frequency ranges to allow your vocals to be heard clearly.
It’s always preferable to cut frequencies rather than boosting them, as this can affect the gain of your overall track.
Listen for areas where frequencies are competing, for example between an acoustic guitar and a vocal, and make cuts accordingly. The aim is to allow everything to have its own “space” without sounding artificial.
Compression
A compressor is a type of device that allows you to flatten out the volume of your recording.
A compressor is just about used on everything to level out the sound, so nothing is louder or softer than anything else. For example, if you think about a TV show, you will be able to tell that a whisper is just as loud as a yell.
If a compressor is used correctly, you won’t be able to tell that it is there, but it will bring life to your vocal track.
Some compressors come with saturation which is a type of soft distortion that can add presence to your vocals. Used correctly, saturation can add a warm drive to your vocals, just be sure not to overdo it (as with any other effect!).
Delay
Delay creates a copy of your recording and plays it back over a period of time, like echoes. It’s used to give depth and body to a vocal recording, though it does need to be used in small amounts.
Reverb
Reverb is similar to delay in the sense that it creates room and depth in your recording. It’s subtler than delay, however, and gives your recording a “shimmer”. Imagine the sound of singing in a large empty building: that’s reverb.
Conclusion
You should now be confident and ready to record and produce a great vocal recording using the above tips! These are tips for pre-recording, during recording, and after recording that you can utilize to make your vocal tracks sound like they came from a professional studio.
The next time you’re thinking about recording some vocals, keep these tips close by and you’ll have a finished product that you can be proud of releasing into the world.
Check out my latest articles


Take a look at the top of your guitar and you’ll see a thin strip…


Can You Reuse Guitar Strings (and Should You?)
Have you snapped a string on your favorite guitar? Perhaps you’ve accidentally mixed up the…


Light vs Medium vs Heavy Guitar Strings Compared
Light, medium, and heavy are all terms that guitarists use to describe the relative thickness…


Conor is a music producer, multi-instrumentalist, and all-round enthusiast from the UK with over 15 years of experience. He’s the founder and sole-content creator for the roundtable audio blog and YouTube channel.