
I use Fender Stratocasters more than any other type of guitar. I’ve always had one around. My first guitar was a Squier Stratocaster, and I own two Fender Strats now, so I know just how tricky they can be to restring!
I’ve put this guide together to show you how to restring a Stratocaster, based on my 20 years of experience. I’ve also included some handy tips throughout, that will help keep your guitar in tip-top condition!
Affiliate disclaimer: This page contains affiliate links for products that I’ve tried and tested. As an Amazon Associate I earn from qualifying purchases at no additional cost to you. Learn more here.
- Required materials
- 1. Loosen the old strings
- 2. Cut the old strings in half
- 3. Remove the old strings
- 4. Clean your guitar’s fretboard
- 5. Insert the new strings into the bridge
- 6. Feed the strings through the tuning pegs
- 7. Lubricate the nut and saddles
- 8. Begin winding the strings
- 9. Tune the new strings up to pitch
- 10. Cut off any string excess
Required materials
To restring your Stratocaster, you’re going to need:
- A pack of new guitar strings
- Wire cutters
- A guitar tuner
- A pencil
- A string winder (Optional)
I’ve put the string winder as optional as you don’t technically need one, but it will make this job easier. I’d never used one until I got one included in my GrooveTech guitar kit. Since then, I use it for every string change – it just makes winding the strings so much easier.
I recommend checking out the full guitar kit, as it contains all the tools you need for jobs like these, and other guitar maintenance tasks. You can find it here on Amazon.
1. Loosen the old strings
Loosen your guitar strings by tuning them down. You’ll want to remove all the tension so that they don’t “ping” when you cut them.


2. Cut the old strings in half
Take your wire cutters and cut the strings in half. This makes them much easier to remove. I recommend cutting them one at a time, as cutting them all together can be tricky.

3. Remove the old strings
Push the bottom half of the cut strings through the bridge and out the back of the guitar. Remove the top half of the strings by unwinding them from the tuning posts. Be careful, as the strings can be a bit pointy!


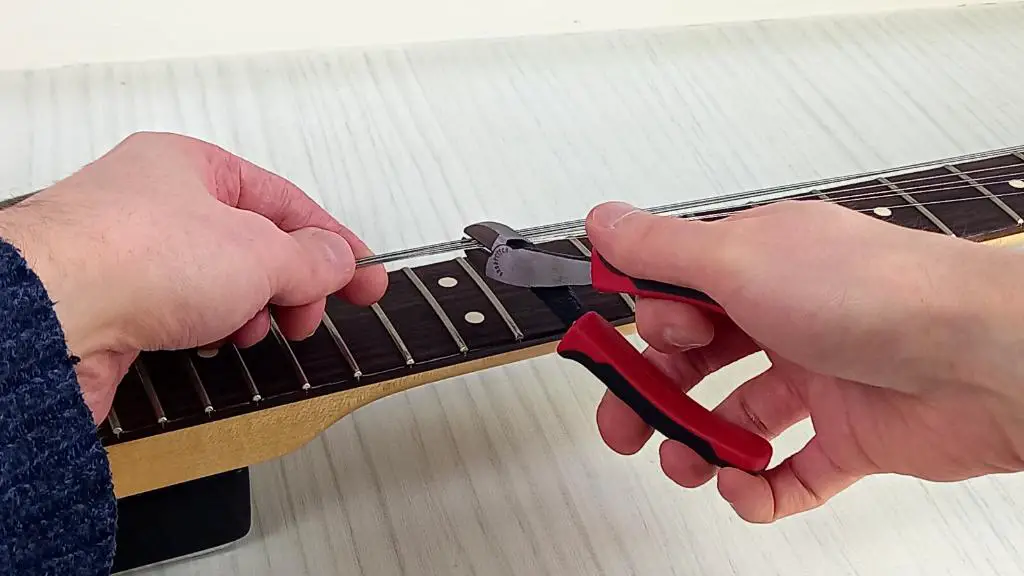
4. Clean your guitar’s fretboard
Now that your strings are off, it’s the perfect time to clean your guitar’s fretboard. I’ve written a full guide on how to clean a rosewood fretboard (as all of my guitars have rosewood fretboards!). If your guitar has a maple fretboard, simply wipe it down with some guitar polish and a lint-free microfiber cloth to remove any dirt.
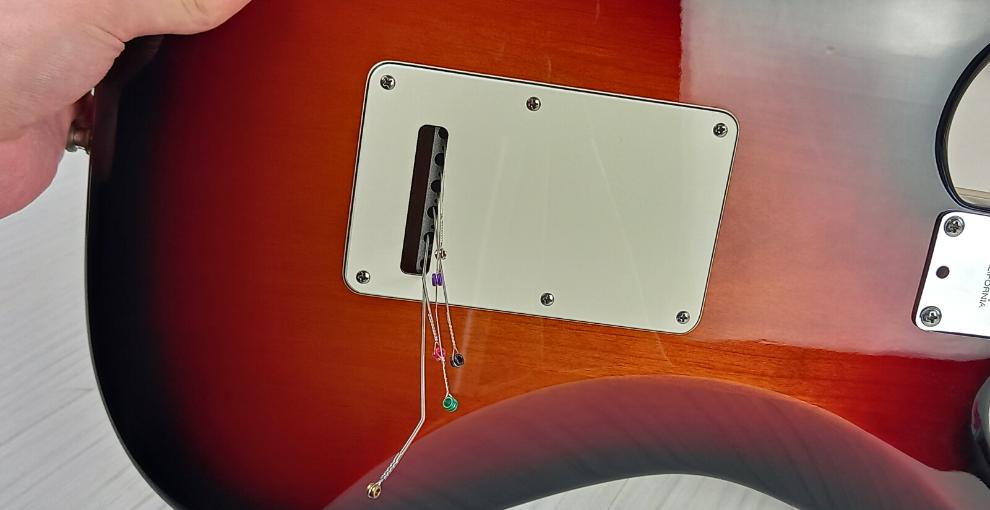
5. Insert the new strings into the bridge
Open up your new strings and feed each one through the back of the guitar. They should be installed in order of thickness, with the thickest string in the 6th position (low E) and the thinnest in the 1st position (high e).
To me, this is the trickiest part when I’m restringing my Stratocaster, so take your time.
Make sure that the string comes through the tremolo block, exiting through the center of the saddle. It’s also important to make sure that the ball-end is pulled all the way through and is in full contact with the bridge.

The string might slip under the bridge, or come out behind it. If it does, pull the string back out and try again.
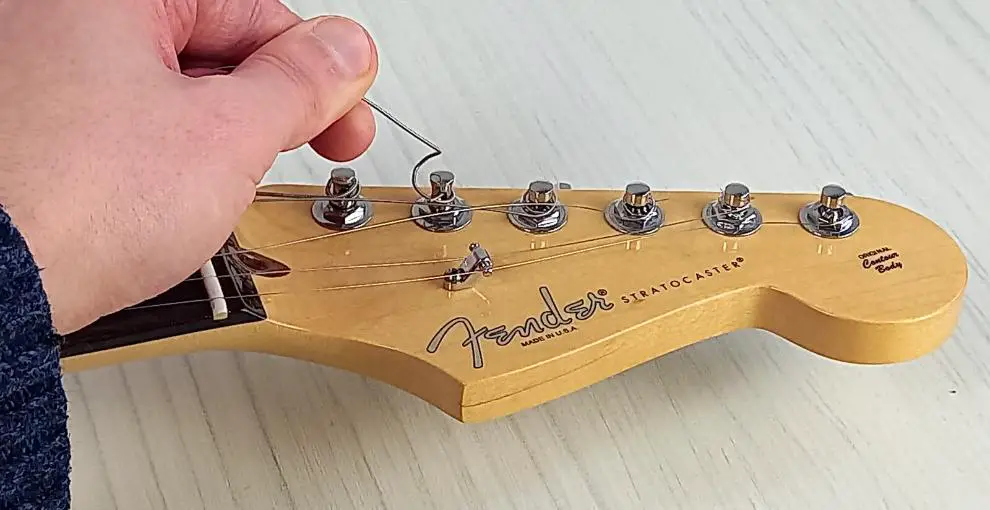
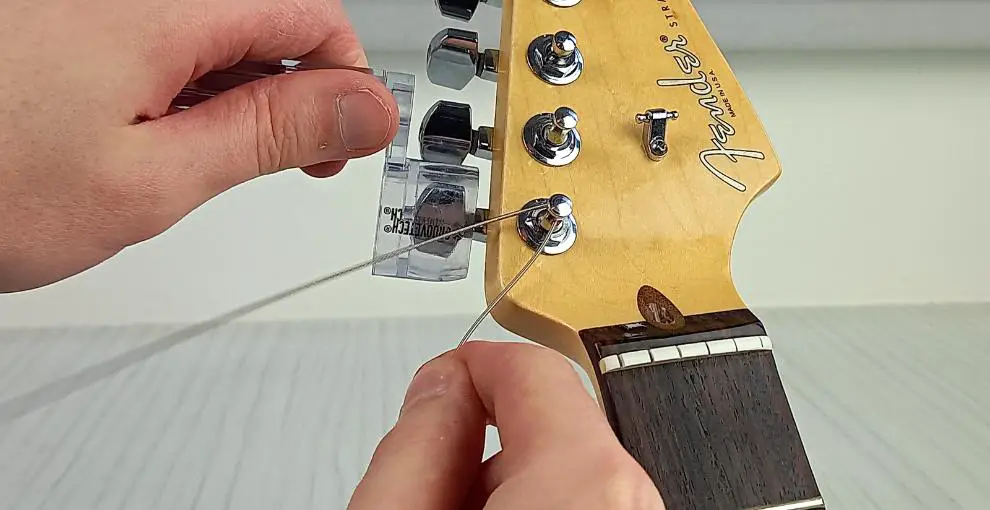
6. Feed the strings through the tuning pegs
This next step depends on whether you have standard or vintage style tuners.
Standard tuners
Turn the machine head so that the hole in the tuning post is facing the neck. Then, take the string and pass it all the way through and hold it so that it’s taught.
Next, pinch the string at the 2nd fret, pull it back to the 3rd fret and hold it there. Then, create a sharp bend where it leaves the tuning post. This will give you enough slack to wind around the post, without giving you too much, which can affect the tuning stability.


Vintage tuners
Vintage style tuners are pretty common on Stratocaster. Having said that, all my Strats have standard tuners, but my Fender Marauder has vintage style tuners. It threw me for a loop the first time I had to restring it, but it’s actually really easy.
Pull the string so that it’s running alongside the desired tuning post and hold it taught. Then pinch the string at the 2nd fret and pull it pack to the 3rd and hold it there. Clip the excess string past the tuning post. Finally, insert the string into the top of the tuning post and bend it into one side of the slots.


7. Lubricate the nut and saddles
Rub the tip of the pencil onto the saddles and nut slots of your Strat. The graphite helps to lubricate the string, which provides better tuning stability and helps to prevent snapping!
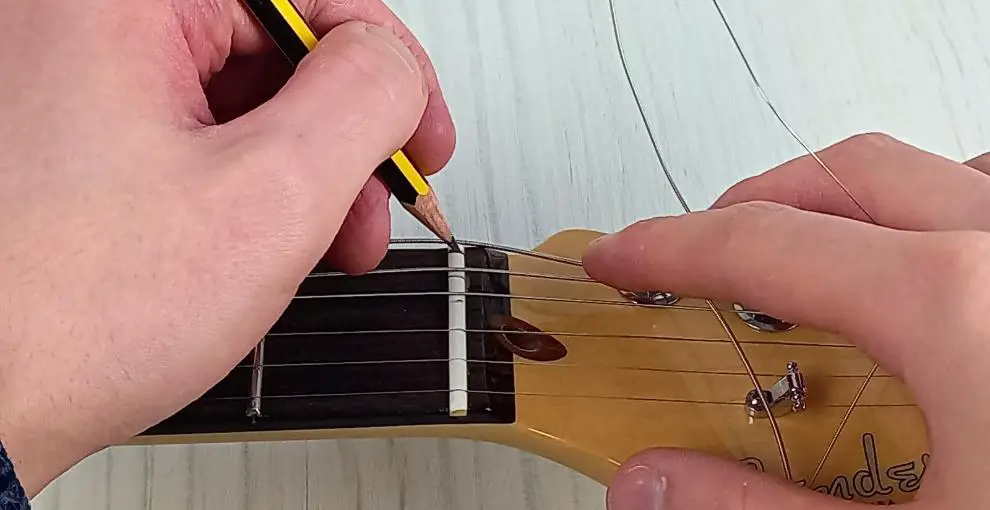

If you get some graphite on the face of your nut, you can remove it by using a pencil eraser.
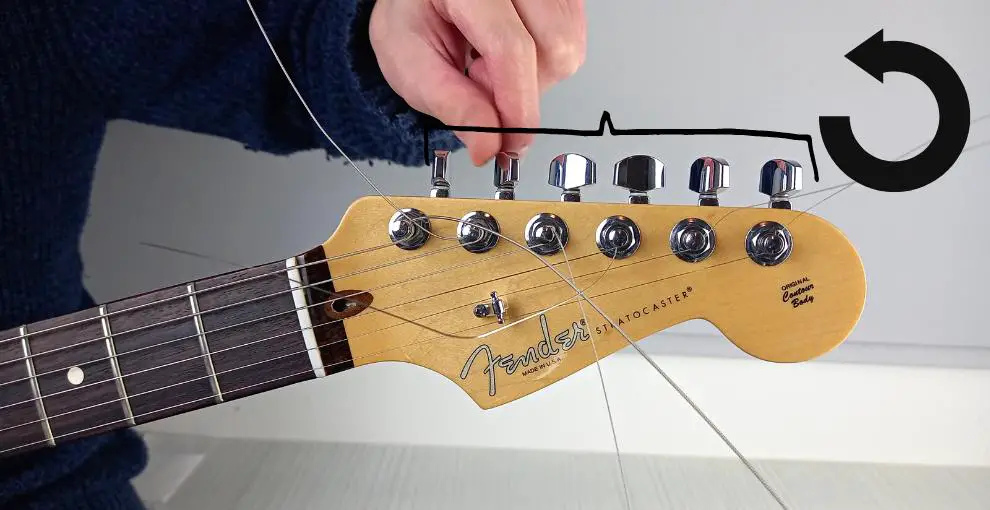
8. Begin winding the strings
Pull the string towards the bridge, so that the crook of the bend is resting against the tuning head (if it’s a standard style tuner). Hold the string in place and begin tightening it by turning the machine head anti-clockwise, so the string is sat on the inside of the tuning post.
I recommend pulling the string slightly towards the machine heads so that there’s a bit of extra tension. I find that this helps me to get a more even wind, which means better tuning stability.

If it slips, which happens sometimes, simply unwind it and start again.
For standard style tuners, make sure the excess of the string passes under the first wind, then over the rest of the winds. This squishes the string in place, which makes the tuning more stable. Make sure that the string forms an even coil that moves downwards on the tuning post.
It’s important to make sure that the string ends up in the correct nut slot and is resting in the saddle. Repeat this for all strings until each of them has just enough tension to be plucked and ring out.
Pro tip: Take a pencil and rub the tip on where the string comes into contact with the saddle and nut. This help lubricate the string and provides better tuning stability, and prevents snapping.
9. Tune the new strings up to pitch
Get your guitar tuner and begin tuning each string to pitch. This will take some time, as your strings will need to stretch out, and your bridge and neck will need to adjust.
You can help speed up the string stretching by pulling the string at the 12th fret and giving it a few light tugs (but be gentle with the thinner strings!).

I find it takes about 4 or 5 rounds of tuning for them to become stable.
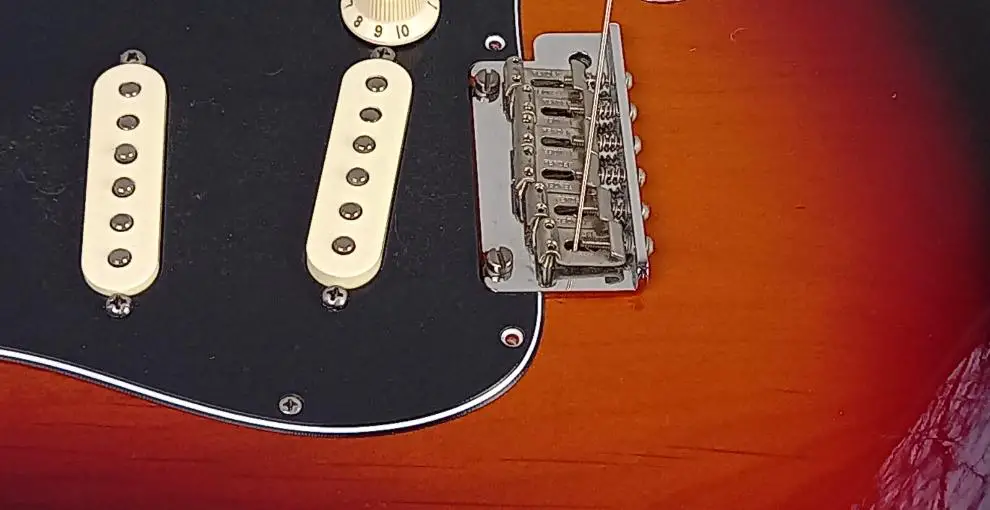
You might notice your bridge lifting at the base – don’t worry! This is just a “floating bridge”, which is common on Stratocaster (the first time I saw this, I thought my guitar was broken!). It means you can use the vibrato-system to bend the strings both up and down. If you want to, you can change this with a fairly straightforward DIY task.
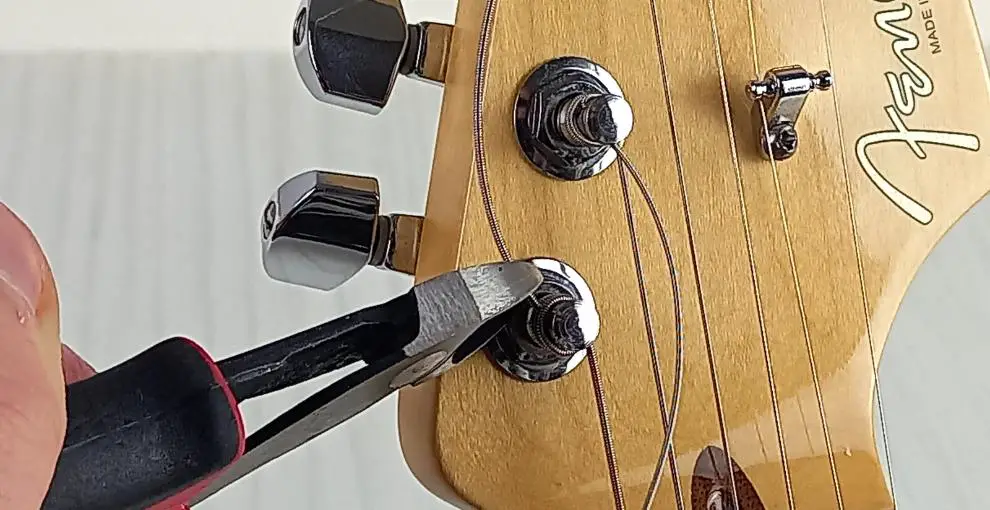
10. Cut off any string excess
Finally, cut off the excess string past the tuning post – you don’t need it anymore (unless you like the punk-rock aesthetic!).
Pay attention to not accidentally cut your new strings below the tuning post – otherwise you’ll have to replace the string (it happens – I’ve done it before!).

And that’s it! You’ve restrung your guitar and you’re now ready to rock. Just remember, restringing your guitar isn’t a race – taking it slowly and doing it properly will ensure that you have superior tuning stability!


Conor is a music producer, multi-instrumentalist, and all-round enthusiast from the UK with over 15 years of experience. He’s the founder and sole-content creator for the roundtable audio blog and YouTube channel.