
To a beginner, restringing an electric guitar can seem like a daunting task. It did when I was just getting started.
I actually used to pay my sister to change my guitar strings for me when I was younger. I was terrified that they were going to snap, or that I was going to do something wrong! But, I eventually learned how to do it myself.
Now, 20 years later, I’ve refined my process to a point where my strings will hold their tuning for weeks at a time, even after a heavy playing session!
In this guide, I’ll teach you my tried and tested method to restring an electric guitar – with some extra tips and tricks to help you get even more life out of your guitar strings.
Affiliate disclaimer: This page contains affiliate links for products that I’ve tried and tested. As an Amazon Associate I earn from qualifying purchases at no additional cost to you. Learn more here.
- Required materials
- 1. Remove the old guitar strings
- 2. Clean the guitar’s fretboard
- 3. Insert the new strings into the bridge
- 4. Feed the string through the tuning pegs
- 5. Lubricate the nut slots and saddles
- 6. Wind the string
- 7. Tune your new strings up to pitch
- 8. Cut off any string excess
- Making your guitar strings last longer
- Frequently asked questions
Required materials
To change your guitar strings, you’re going to need the following items:
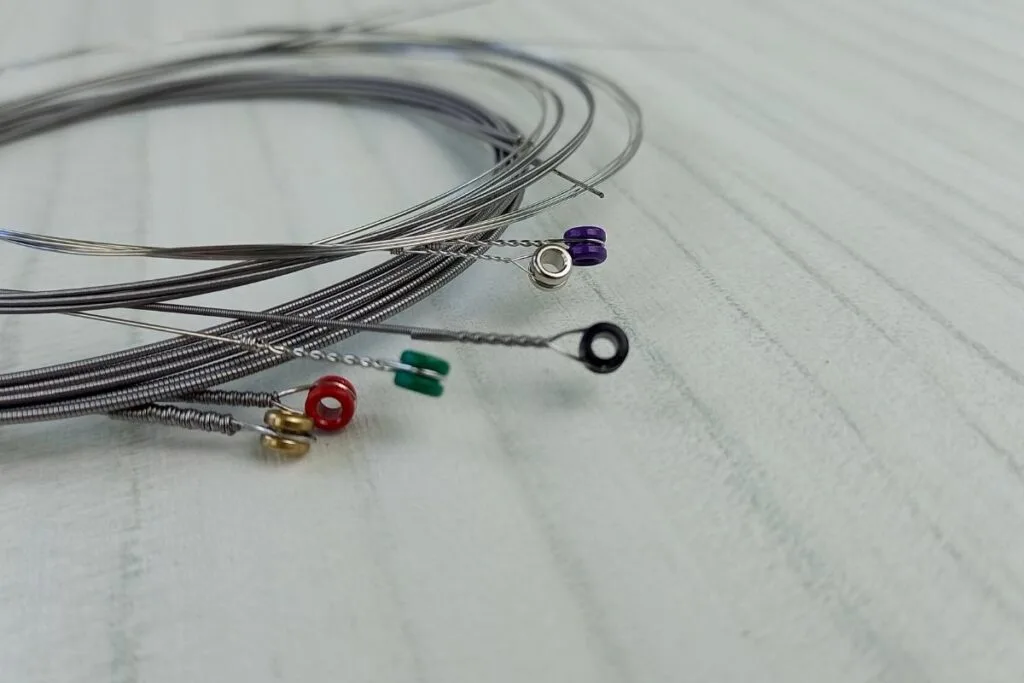
- A pack of new guitar strings
- Wire cutters
- A guitar tuner
- A pencil
- A string winder (Optional)
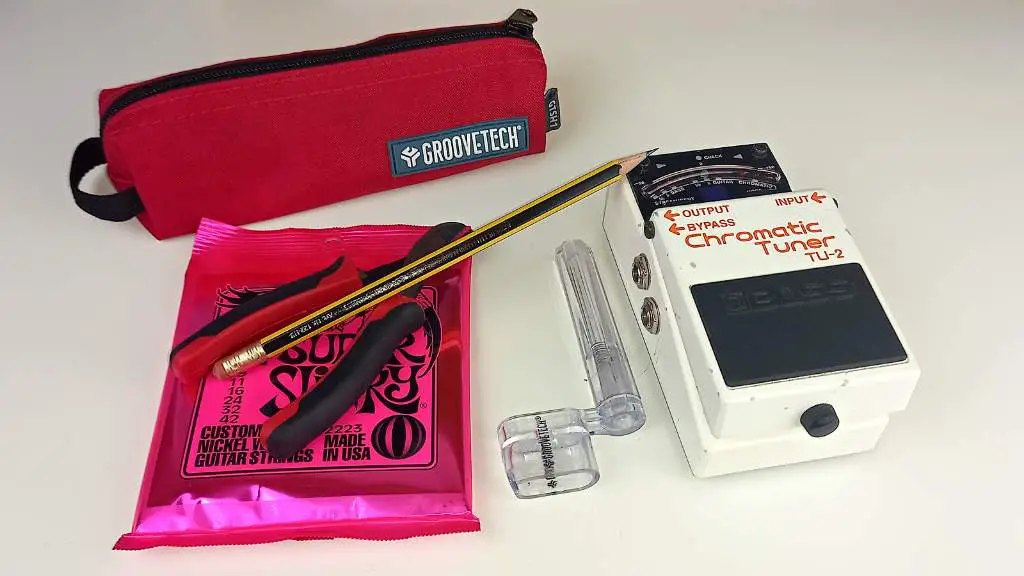

I’ve put a string winder as optional as you don’t technically need one, but I really recommend using one. I was skeptical at first, but I used the one that came included in my GrooveTech guitar kit, and it really is a time saver when I restring my guitars. It also helps me to get a more even wind, which is important for the strings tuning stability.
I’d recommend picking up the full GrooveTech guitar kit as it includes everything you’ll need for this job and for most other DIY guitar maintenance jobs. You can find it here on Amazon.
But, if you want to pick these tools up separately, it should only cost you around $20 including the strings.
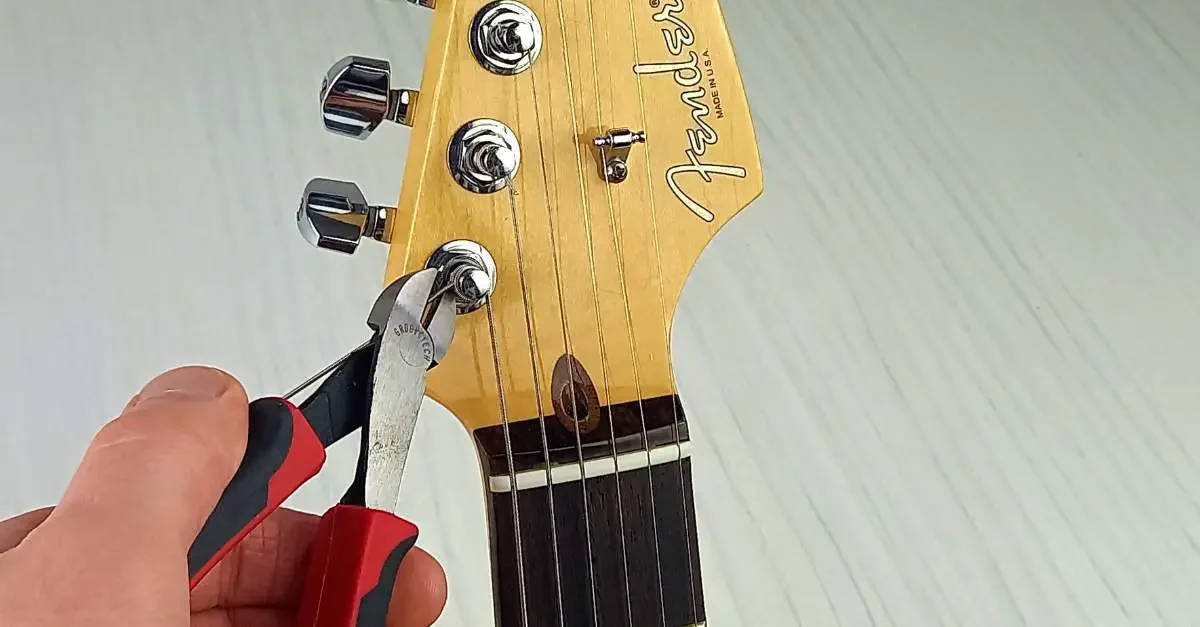
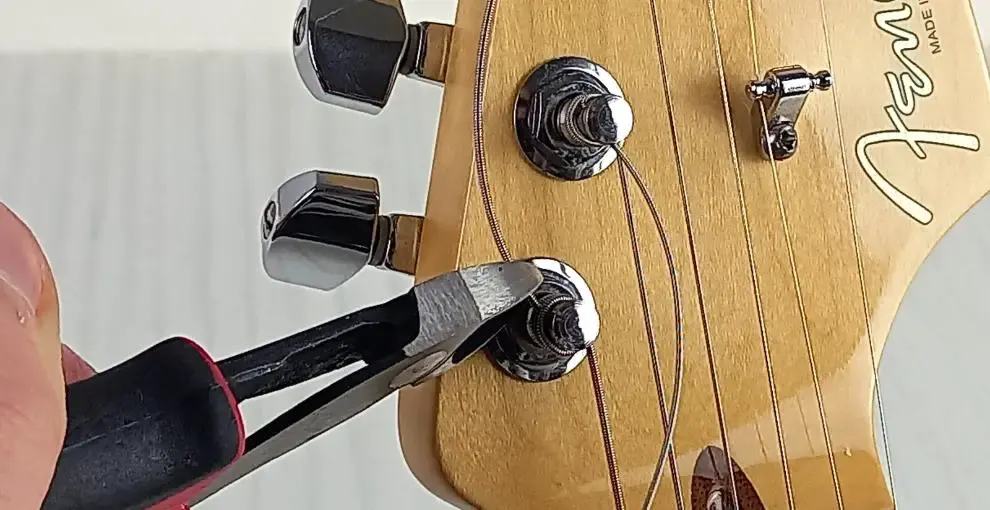
1. Remove the old guitar strings
Firstly, you’re going to want to take the old strings off your guitar.
There’s a bit of a debate as to whether you should remove them one at a time or all at once. The recommended approach is to do them one at a time, to reduce the impact on the guitar’s neck. But, I’ve always changed my strings all at once, and in my experience, I’ve never had any problems with doing it this way!
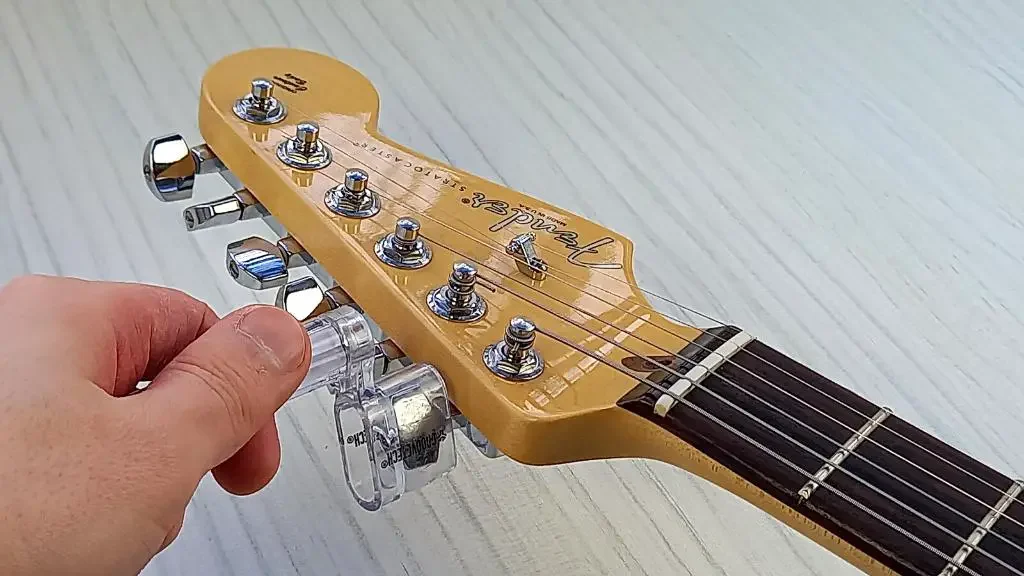
To remove your guitar strings, use the string winder to loosen each string by turning the machine head as if you’re tuning the string down. Keep turning it until the string is loose with plenty of slack. The idea here is that when you cut the strings, there shouldn’t be any tension that causes them to “ping”.

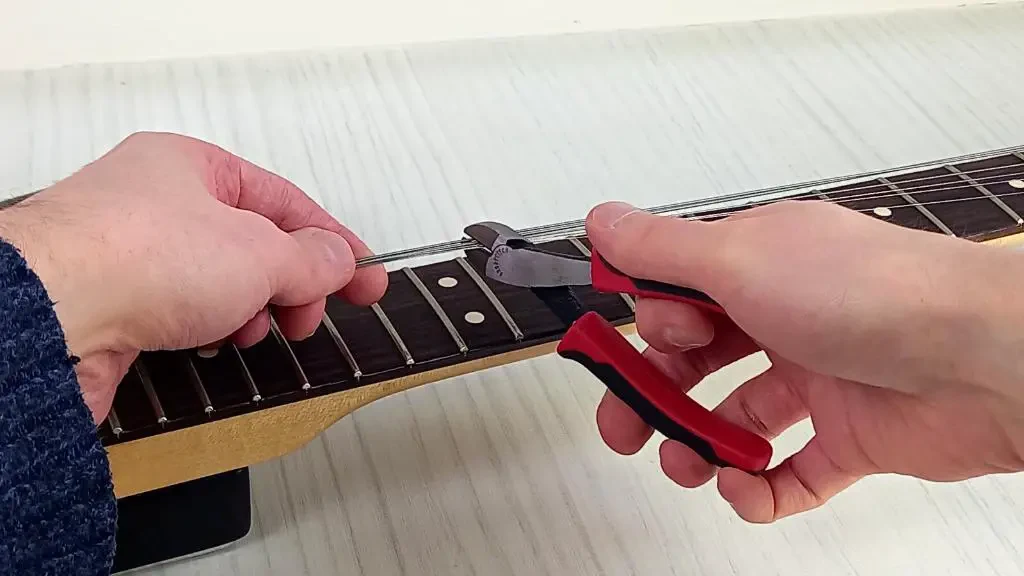
Take your wire cutters and clip the strings in the middle. Cutting the string makes it much easier to remove as the part of the string that’s been wrapped around the tuning peg holds its shape, which makes it awkward to pull through the bridge.

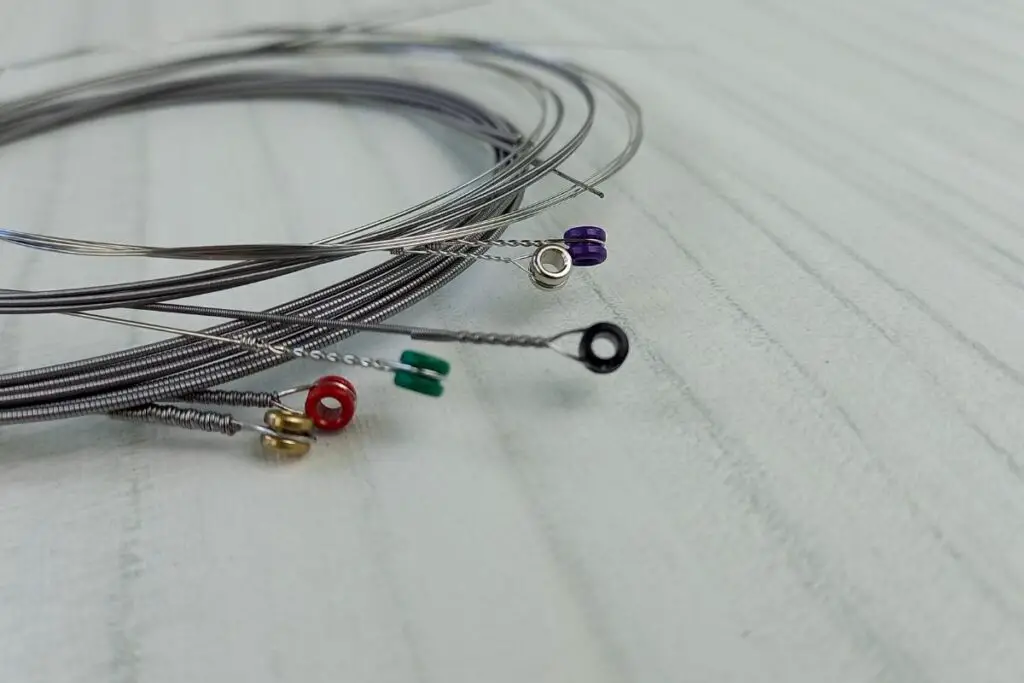
Remove the strings by pulling them out through the bridge. Then, unwind the rest of the string that’s on the tuning peg. Gather the old strings together and put them in the bin.
Pro tip: Be careful when working with the strings as the ends can be a bit sharp. I’ve pricked my skin before when not being careful!
2. Clean the guitar’s fretboard
Now that the strings are off, it’s the perfect time to clean your guitar’s fretboard.
Grime, sweat, and dust builds up on your fretboard over time which affects how your guitar feels to play and even how it sounds.
So, give your guitar the 15 minutes needed to get it looking and feeling brand new by following my complete guide to cleaning a rosewood fretboard. If your guitar has a maple neck, check out this guide from Sweetwater.
3. Insert the new strings into the bridge
Open up your pack of new strings, unwind them, and feed each string through the correct hole in your guitar’s bridge.
Every guitar string pack has a system to help you identify which string is for which hole. Here’s the most common systems used:
- Colored ball ends: Some manufacturers use colored ball ends at the base of the string. On the packet, it tells you which color goes in which position
- Numbered packets: Another common method is for manufacturers to package their strings in individually numbered packets. The numbers on the packets refer to the string’s gauge (or thickness). The higher the number, the thicker the string.


Carefully feed the string through the bridge hole, making sure that the full length of the string has been pulled through and the ball end is in full contact with the bridge.
Depending on your guitar’s bridge type, this can be a bit tricky. Les Paul style guitars have an easy to access bridge, whereas Strat style guitars need the strings to be fed through the back of the guitar. You can check out my guide on restringing a Stratocaster for more info.
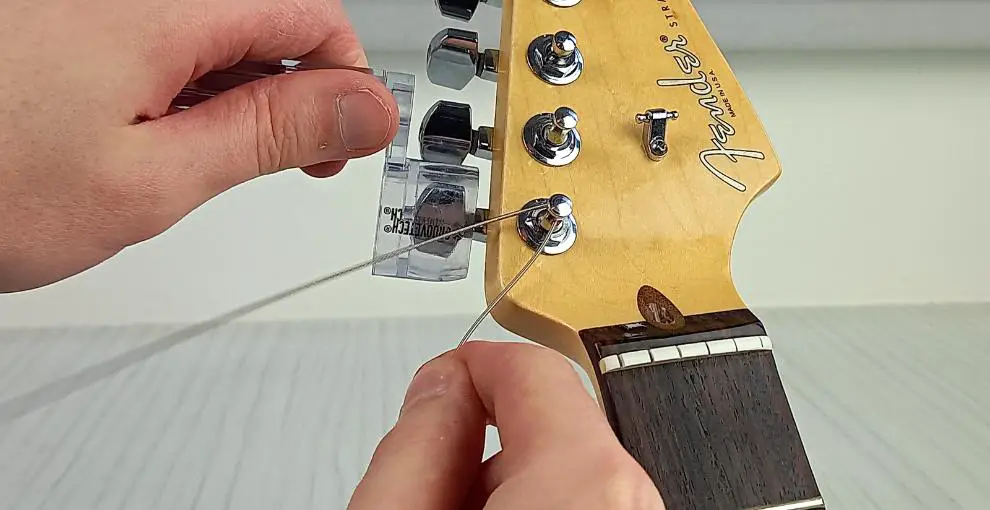
4. Feed the string through the tuning pegs
Now you’ll need to pass the strings through the tuning pegs. There’s two types of tuning pegs: standard and vintage. Standard is the most common, but there’s still a few guitars with vintage tuners.


Standard tuners
If your guitar has standard tuning pegs (that is, a post with a hole through it) then start by aligning the hole so that it’s directly facing the neck. Then insert the string through the post.
You’re going to want a little bit of slack on the string to get some windings around the post, but not too much.
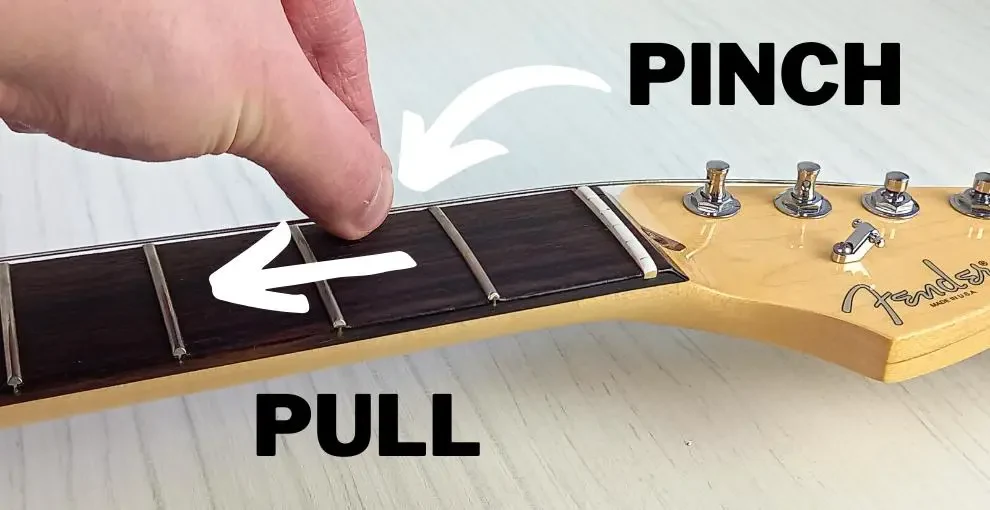
To get the right amount of slack, start by pulling the string all the way through the tuning post and hold it taught. Then, you can either:
- Pinch the string at the 2nd fret and pull it back the 3rd fret, then bend the excess after the tuning peg at a right angle. This is the method I use.
- Pinch the string where it meets the next, next tuning peg. Then, move your pinched fingers down to the current tuning post and create a sharp bend in the string, towards the machine heads.

Some people recommend cutting the excess string at this point, but I like to leave it on. I find that it’s a
Vintage tuners
If your guitar has vintage tuners (a post with a slot on top) then you’ll need to clip the string before inserting it into the post.
My Fender Marauder has vintage style tuners which really confused me the first time I had to restring it. But, it’s actually really easy to do!
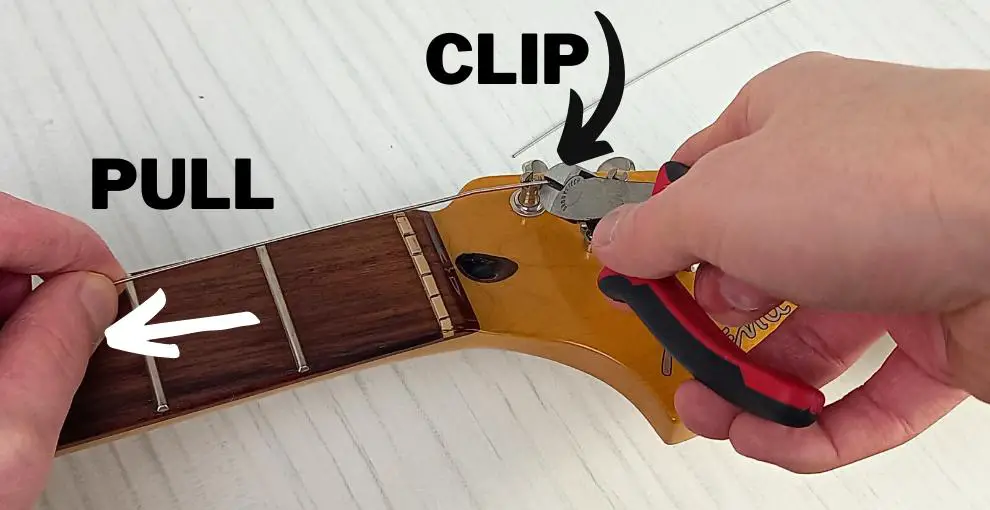

To restring vintage style tuners, just run the string to the desired tuning post (without inserting it) then cut the string where it meets the next, next post. Once you get to the last two tuning posts, you’ll have to give it your best guess. Alternatively, you can pinch the string at the second fret and pull it back to the 3rd fret, then clip the string at the tuning peg.
Finally, put the string in the hole, and bend it into one side of the slots.
5. Lubricate the nut slots and saddles
Before tightening the strings, take a pencil and rub the tip onto the nut slots and saddles. The graphite from the pencil acts as a lubricant for the string, which provides better tuning stability, and helps to prevent snapping!

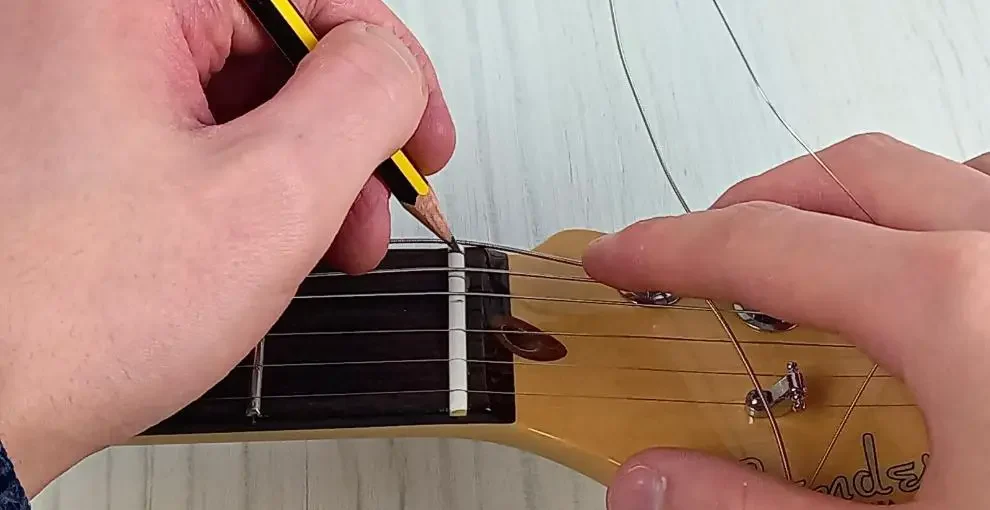
The graphite can stain your nut, especially if it’s a lighter color, so make sure to only get it into the slot. If you do get some on the face of the nut, use an eraser to quickly remove it!
6. Wind the string
Start by pulling the string back so that the crook of the bend sits against the tuning post. There should be a little bit of slack in the string.
Personally, I recommend pulling and holding the string slightly towards the machine heads to create some extra tension. I find that this helps me to get a more even wind.

Now, start winding the string. For standard style tuners, you’ll want to make sure that the excess string passes once under the string, then for all other winds, make sure it’s above the string. This helps to “sandwich” it and secure it in place. In my experience, this leads to more stable tuning!
When you’re winding the string, make sure to work your way down the tuning post to form a neat coil. Again, this helps with tuning stability as the string is held securely in place.
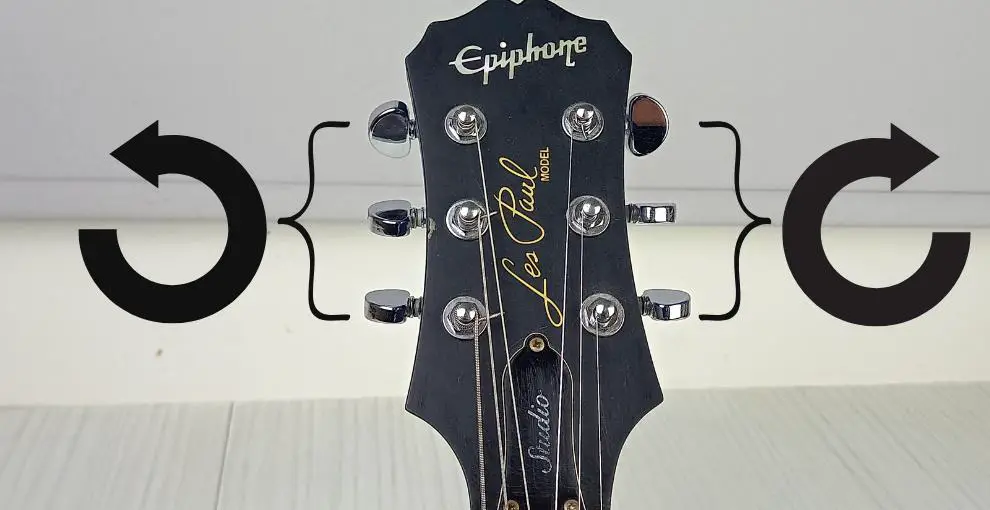
On a guitar with the machine heads on one side (like a Stratocaster) you’ll want to turn the tuning machine heads anti-clockwise. On a split headstock (like a Les Paul) turn the machine heads for the lower pitched strings (E, A, and D) anti-clockwise, and the higher pitched strings (G, B, and e) clockwise, so that the string always sits to the center of the headstock.
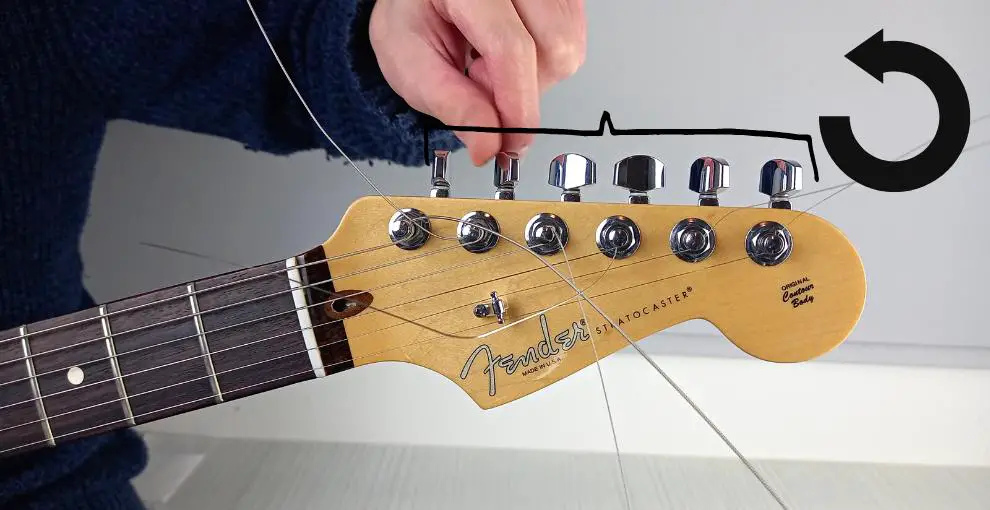


Make sure that the string is sat securely in the saddle and nut slots. Wind the strings so that they’re just tight enough to ring out when plucked.
7. Tune your new strings up to pitch
Now you’ll want to tune your strings. This isn’t going to be as easy as it normally is. Your new strings and your guitar neck and guitar bridge (if you have a floating bridge) will need a little bit of time to settle, which means you’ll need to tune your strings a few times.
Take your guitar tuner and start with your lowest pitch string. Once it’s tuned to pitch, stretch the string by pulling it at the 12th fret and giving it a few light tugs – but be gentle with the lighter strings, as you don’t want to snap them! This speeds up the stretching process and helps it become stable.
Repeat this across the different strings. As I said, you’ll probably find that you’ll have to repeat this whole process a few times before your tuning becomes stable. It usually takes me about 4 or 5 rounds of tuning for it to become stable, and then a final round after a few hours once the neck has fully settled.
If you’ve changed to a heavier or lighter gauge string, then you may have to adjust your guitar’s neck afterwards to compensate for the change in string tension.
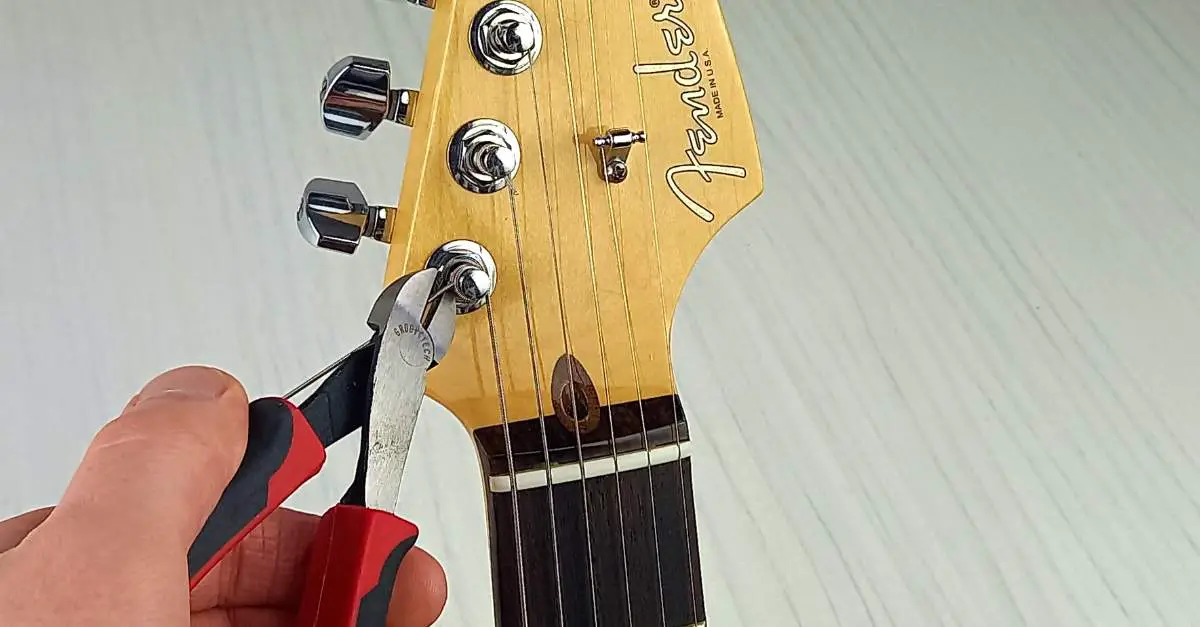
8. Cut off any string excess
Unless you’re Tom Morello, you probably don’t loads of excess string flapping around on your headstock. To cut them, take a pair of wire cutters and trim, removing as much excess as you can.
It’s important to make sure that you only cut the excess – you don’t want to accidentally catch the new string (which I’ve done before!).

Now, your guitar’s restrung and ready to rock!
Making your guitar strings last longer
By taking a little bit of extra care, you can make your strings last even longer! This will save you time and money, and keep your strings sounding great.
Firstly, wipe them down with a clean, lint-free cloth before and after practice – and use a cleaning product like Fast Frets (which I use). This helps to remove any sweat or dirt and prevent the string from rusting, which is the main cause of string aging.
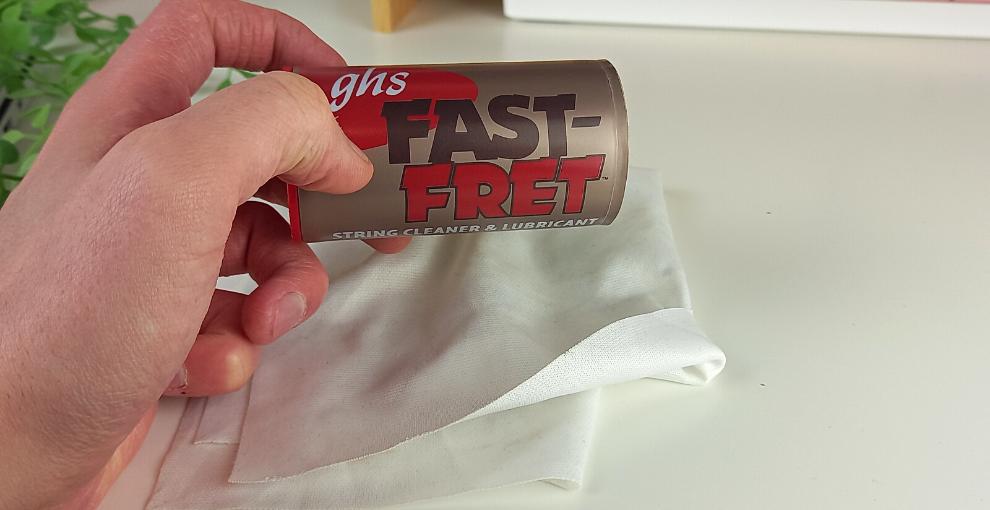

You can check out Fast Frets here on Amazon.
Another key is to store your guitar correctly by keeping it in its case between playing. This keeps dust off, and also helps to reduce some of the environmental effects like humidity.
I’ve written actually written a full guide on how to clean guitar strings!
Frequently asked questions


Conor is a music producer, multi-instrumentalist, and all-round enthusiast from the UK with over 15 years of experience. He’s the founder and sole-content creator for the roundtable audio blog and YouTube channel.