
MIDI keyboards are an essential tool for modern music producers, and learning how to properly use them can save you hours by making your workflow simpler and easier. In this guide, I’ll teach you how to use a MIDI keyboard for the 3 most common applications:
- Control a virtual instrument (VST)
- Control a hardware instrument
- Controlling settings in a DAW
Affiliate disclaimer: This page contains affiliate links for products that I’ve tried and tested. As an Amazon Associate I earn from qualifying purchases at no additional cost to you. Learn more here.
What is a MIDI keyboard?
First of all, it’s important to understand what a MIDI keyboard is – and what it isn’t.
A MIDI keyboard is a type of “MIDI controller” that’s shaped like a musical keyboard. I’ve actually written a detailed guide about MIDI controllers that I recommend checking out.
In short, its only function is to send and receive instructions called MIDI messages. These MIDI messages tell a connected device how to act. For example, pushing the keys on a MIDI keyboard that’s connected to a synthesizer will make the synthesizer play those notes.
But it’s not just about the keys. Most modern MIDI keyboards come with a variety of controls such as pads, knobs, and sliders, all of which have their own uses.


One of the most important things to know is that MIDI keyboards don’t make any noises by themselves. It’s a very common (and understandable) mistake that beginners make. While it may look like an instrument, all a MIDI keyboard does is send instructions to control a connected device.
So, why do we use them? Well, MIDI keyboards make your workflow easier by letting you interface directly with a DAW or a remote instrument. They provide an intuitive and convenient way to make music digitally.
People most commonly use them for:
- Playing a plugin instrument within a Digital Audio Workstation (DAW)
- Playing a hardware instrument(s) (e.g. a synthesizer)
- Controlling settings within a DAW
Let’s take a look at how to do each of these different things.
How to use a MIDI keyboard to control a virtual instrument (VST)
One benefit of using a MIDI keyboard is that you can effectively “play” virtual instruments (technically called a “VSTi”, but usually just called a “VST” or “plugin”) on your computer.
This is very common across most genres in modern day music production: pop, hip-hop, rock, EDM, synthwave… you name it.

Using VSTs is especially useful for beginner music producers as it’s much more cost effective than buying individual pieces of hardware. In fact, nowadays most DAWs come with a lot of VSTs included. You can even get some pretty powerful VSTs for free online.
I also find it much more useful to have everything on my PC than managing lots of individual pieces of equipment!
All you need to get started is a PC, a DAW of your choice, a VST, and your MIDI keyboard. Here’s how you do it:
- Connect your MIDI keyboard to your PC
- Configure your MIDI keyboard with your DAW
- Add the desired VST to a MIDI track
1) Connect your MIDI keyboard to your PC
I won’t go too in-depth here, as I’ve written a detailed guide on how to connect a MIDI controller to a PC.
For most people, your MIDI keyboard will have a USB-B port on the back that connects to your PC using a USB-B to USB-A cable (usually called a “printer cable”). 9 times out of 10, it’ll also receive power from the PC connection.
If your MIDI keyboard is a bit different, then check out my guide for other connection types.
2) Configure your MIDI keyboard with your DAW
Open your DAW and go into your MIDI settings (usually under “preferences”, “settings”, or “options”).
You’ll want to make sure that your MIDI device is showing in there, and that it is set as an active device.
3) Add the desired VST to a track
Open up the section where your VST instruments are, then drag and drop the one you want onto a track. Then, arm the track so that it’s ready for recording.
If you want to hear your instrument as you play it, make sure your monitor is set to “in”.
And that’s it, you’ll now be able to play your virtual instrument!
Note: Some DAWs have specific types of track for either MIDI or audio; in this case make sure you add it to a MIDI track.
How to use a MIDI keyboard to control a hardware instrument
MIDI keyboards are really useful when it comes to controlling hardware instruments like synthesizers or electric keyboards. I think their biggest benefit is that they can simplify complex setups, allowing you to easily switch between controlling multiple pieces of connected gear.
This is great when it comes to live performance, but it’s even more useful in the studio. I can connect all my synths up to my MIDI keyboard, and I can control everything from just one place rather than having to move between different instruments.
As I said earlier, it’s all about making your workflow simpler and more intuitive.
There’s two that you can use a synth to control hardware, it just depends on whether your MIDI keyboard has a five-pin MIDI out port or not.
If your MIDI keyboard does have a 5-pin MIDI port, then you can simply connect it directly to your hardware instrument using a 5-pin MIDI cable. Both devices will need to be sending and receiving MIDI on the same channel to work (your device’s manuals will tell you how to change the channels).
You can make this setup even more advanced by getting a “MIDI through box” and use different MIDI channels to control different devices!
If your MIDI keyboard doesn’t have a 5-pin MIDI port, then it’s slightly more complicated but still possible. You’ll need a PC, DAW, and a MIDI interface.
Here’s how you do it:
- Connect your MIDI keyboard to your PC
- Set up your MIDI keyboard with your DAW
- Connect your hardware instrument to your PC using a MIDI interface
- Set up your MIDI interface with your DAW
- Create a MIDI track and select the output as the MIDI interface
1) Connect your MIDI keyboard to your PC
Again, I’ve covered this in a lot more detail in my article here. If it has a USB-B port, then simply connect it to your PC using a USB-B to USB-A cable.
2) Set up your MIDI keyboard with your DAW
Go into the settings section on your DAW and make sure that your MIDI keyboard is showing as an active device.
3) Connect your hardware instrument to your PC using a MIDI interface
Now, your hardware instrument should have a 5-pin MIDI port or a USB port. If it’s USB, then simply connect it to your PC using a USB cable.
If it’s a 5-pin port, then you’ll need a MIDI interface. You can pick up a MIDI-to-USB for around $30 online. I’d always recommend investing more money into a better product like an audio interface with MIDI capability.
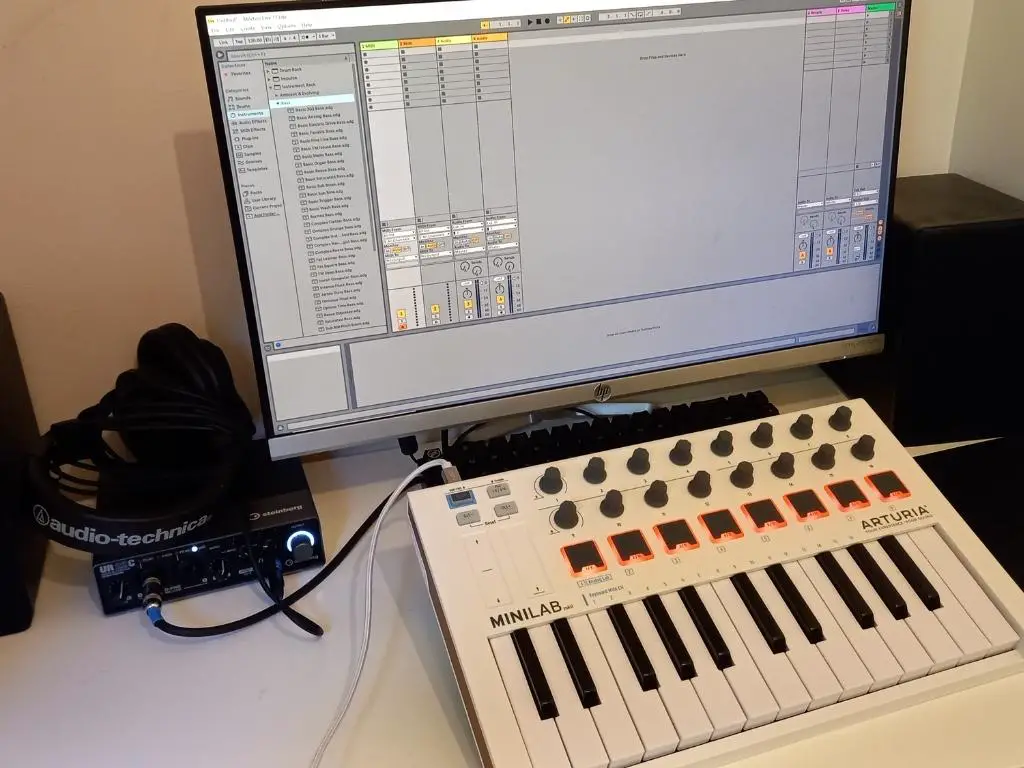
If you’re looking for a recommendation, I use the Steinberg UR22C. It’s one of the best audio interfaces I’ve found for balancing price, functionality, and quality. You can check it out here on Amazon.
Whatever you buy: just make sure that it can handle MIDI in and out.
4) Set up your MIDI interface with your DAW
You’ll now need to set up your MIDI interface with your DAW. Like in step 2, you’ll need to go to the settings and make sure that your hardware instrument is showing as an active device.
5) Create a MIDI track and select the output as the MIDI interface
Finally, create a track and set the input as your MIDI keyboard and the output as your MIDI interface. Arm the track, and you should now be able to control your hardware instrument remotely.
By having your instruments connected to a DAW, you can also send MIDI sequences. So, you can programme some complex patterns, or use your DAWs arpeggiator, and send it to your live instrument. Pretty neat!
How to use a MIDI keyboard to control settings in a DAW
Lastly, let’s look at using a MIDI keyboard to change settings within your DAW. By mapping your keyboard to different settings, you can set your DAW to do things like record and play at the click of a button. It can even handle more detailed tasks like adjusting settings like for your virtual instruments.
What’s better is that it’s really easy to do this. Simply follow these steps:
- Connect your MIDI keyboard to your PC
- Set up your MIDI keyboard with your DAW
- Click the MIDI mapping option in your DAW
- Select the function you want to carry out, then press a button to map it to
1) Connect your MIDI keyboard to your PC
I’ve covered this step in a lot of detail in my complete guide here. In 99% of cases, your MIDI keyboard should have a USB-B port on the back. Connect it to your PC using a USB-B to USB-A cable.
2) Set up your MIDI keyboard with your DAW
Next, go into your DAW’s MIDI settings and make sure that your MIDI keyboard is set as an active device.
3) Click the MIDI mapping option in your DAW
Now, find the MIDI mapping option in your DAW. The specific name varies from DAW to DAW. Some call it “MIDI mapping” some call it “MIDI learning”. It’s usually somewhere in the options menu.
4) Select the function you want to carry out, then press a button to map it to
Once you’ve clicked the MIDI mapping button, you’ll want to click the function that you want to carry out. For example, you might press the “record” button. Next, press the button on your MIDI keyboard that you want to assign that function to. I use the pads on my MIDI keyboard to carry out playback and recording functions.
That’s it! You’re now controlling your DAW remotely. This may seem like a simple trick, but it can drastically speed up your workflow. Once you’ve got the DAW mapped to your liking, working and recording becomes much more intuitive!
Final thoughts
If there’s one thing to take away from this article it’s that there’s a lot of different ways that a MIDI keyboard can make your life easier.
From controlling instruments, both physical and virtual, to making your DAW directly accessible, MIDI keyboards have become an essential tool for modern music producers.
If you’ve not yet picked up a MIDI keyboard, I’d recommend checking out my review of the Arturia MiniLab MK2. It’s the one that I use, and I find that it has plenty of control, buttons, and knobs to give me full contorl of whatever I’m plugged in to.


Conor is a music producer, multi-instrumentalist, and all-round enthusiast from the UK with over 15 years of experience. He’s the founder and sole-content creator for the roundtable audio blog and YouTube channel.